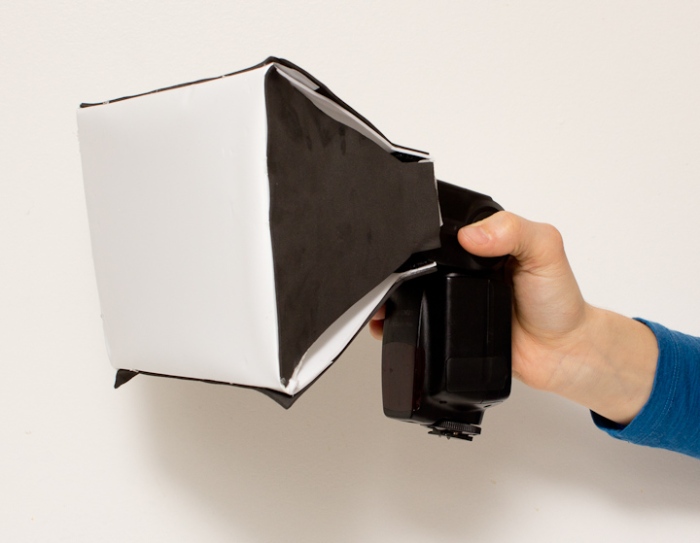
Cheapskate Flash Diffuser MkII working well…
Cheapskate Flash Diffuser MkII working well…
*NOTE! The instructions here are great for cutting out a pattern to fit your flash, but check out the Cheapskate Diffuser MKIII instructions for a better method of general construction
Adrian Thysse has just announced a macro tools workshop for you Albertans, and Alex Wild has just put up a post about diffusing an MT-24 EX, so the time is ripe for macro flash diffusion discussion. This week’s Cheapskate Tuesday is an overhaul of the Cheapskate Flash Diffuser, essentially transforming it into a small softbox. This update uses the same plastic diffuser material as well as craft “foamie” material. A glue gun or other adhesive option is also required.
The two chief advantages to this updated device are: 1. the diffusion material stands off several more centimeters from the flash head, so the illumination of the diffuser is more even. 2. The new device is stiff and solid when mounted to your speedlight, so it won’t flop around. The disadvantages are the more complex build, larger folded size, and increased weight (48 vs. 12 g). Another disadvantage is that this is no longer universal, but must be made to fit the dimensions of a particular speedlight. Here I have illustrated a build that would work for a YongNuo 560, 565 or a Canon 580. The generalized schematics to adapt the design to any speedlight are found below. If possible, I will have some shots from the field taken with this soon.
Please follow along below for the essentials on how to construct the Cheapskate Diffuser Mark II. Just like an update to a Canon lens, this Mark II will run you three times the price. So budget around 3 dollars. Because being a PhD student wrecks my brain and hands, I had to rely on my local Master’s Student Catherine Scott to help me out with all the tough geometry, hand modelling and cutting! Pythagoras also helped immensely.

This “foamie” craft material is the basis for the modification. You will need two black sheets and two white sheets.

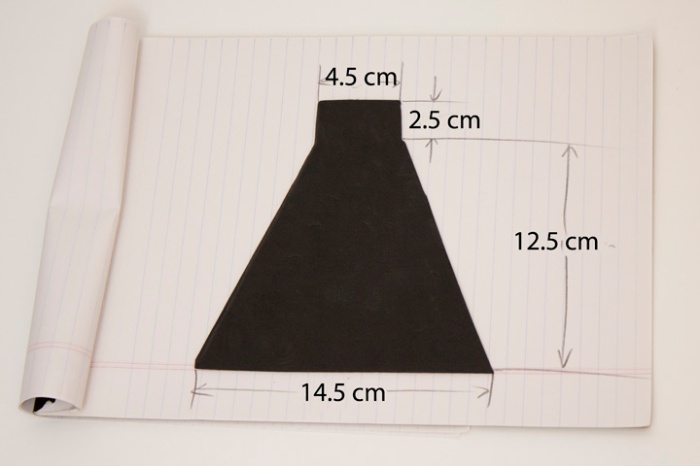
Using the same plastic diffusion material as in the Mk I, mark off 4 cm from each side.

For the wide sides, cut out the pictured shapes in both the white and black foamie material.
Same with the narrow sides. Make two in black and two in white.
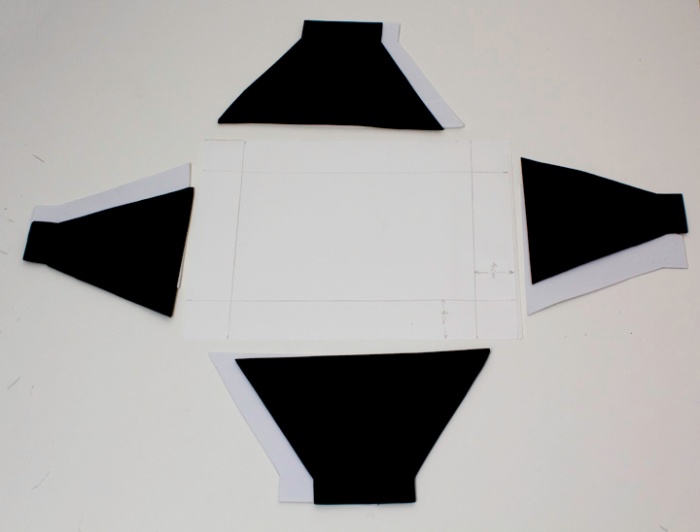
8 foamie pieces of four kinds and a marked plastic sheet.
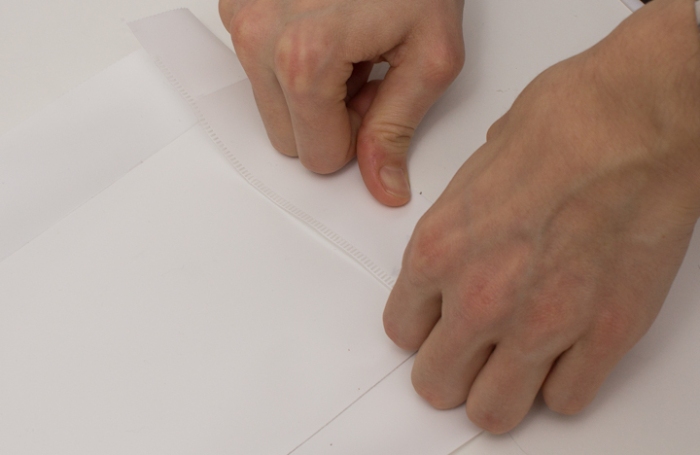
make creases along the lines previously drawn
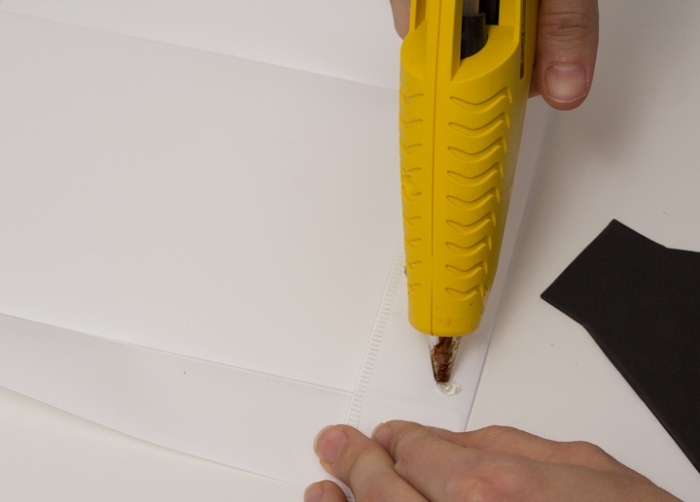
lay down a bead of hot glue along the creased 4 cm
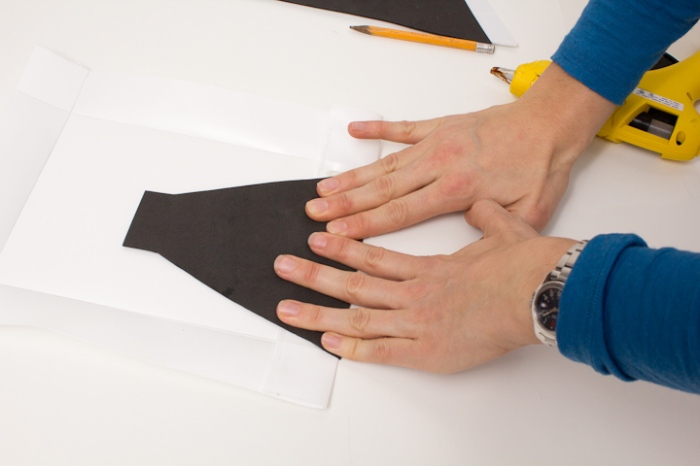
glue down the black pieces on the corresponding sides. Black goes on the “outside”. Then glue the white pieces on the inside, sandwiching the plastic in between.
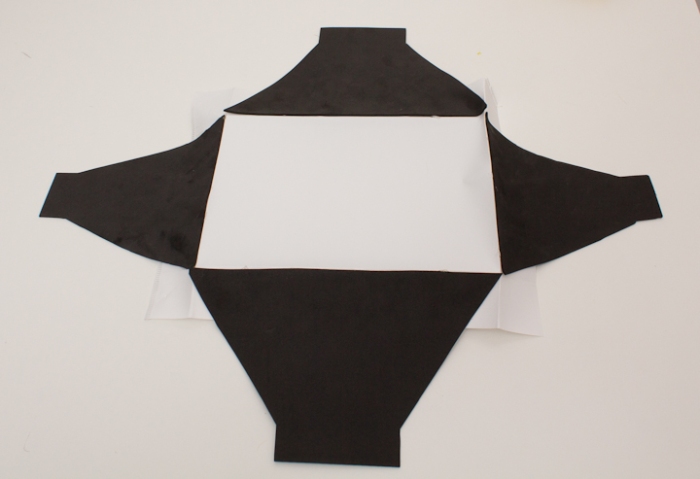
ready for cutting out
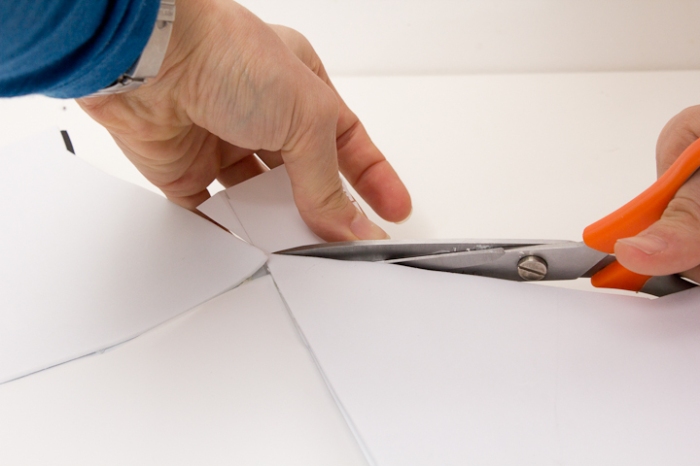
cut out the corners

cut out velcro to size

ready to rock
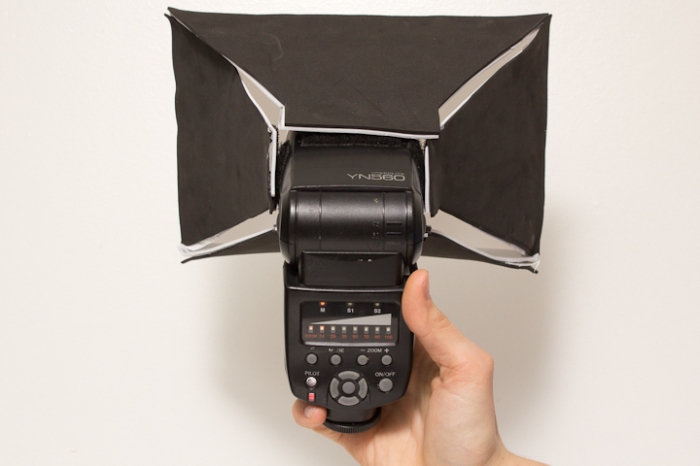
mounted to the YN 560.
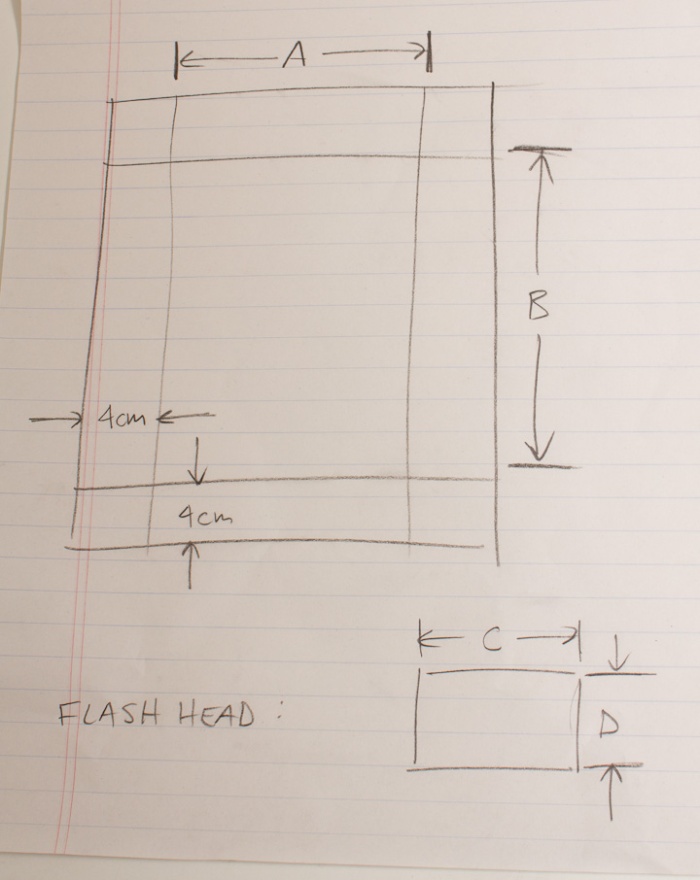
these schematics are for designing custom diffusers for differently sized diffusion material or a different speedlight. Here is how to measure a flash head and mark off the diffuser material.
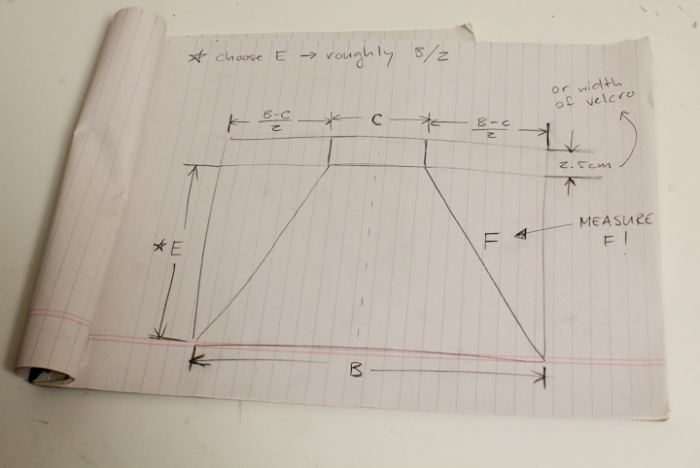
schematic for the larger pieces. Note that B and C are the dimensions from the previous diagram, and that F must be measured.
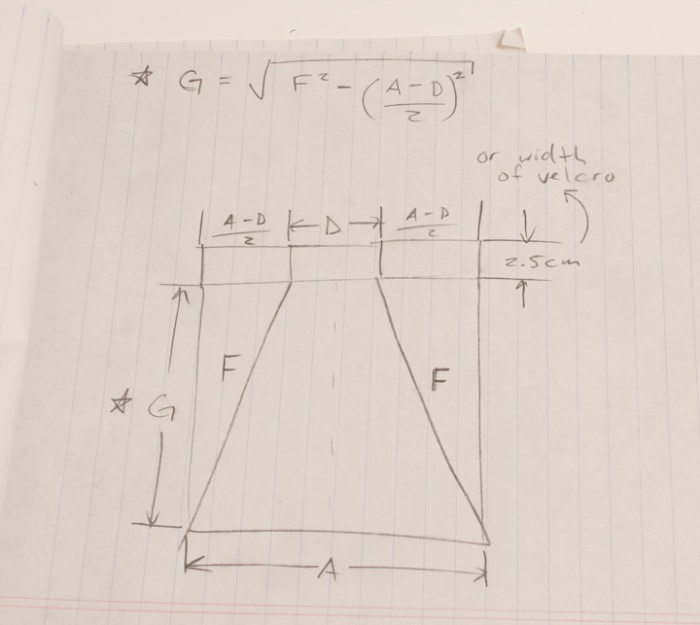
schematic for the smaller pieces. First calculate G, and make sure F is the same as measured in the previous diagram.
UPDATE!!!!!!!!!!!!!!!!!!!!!!!!!!
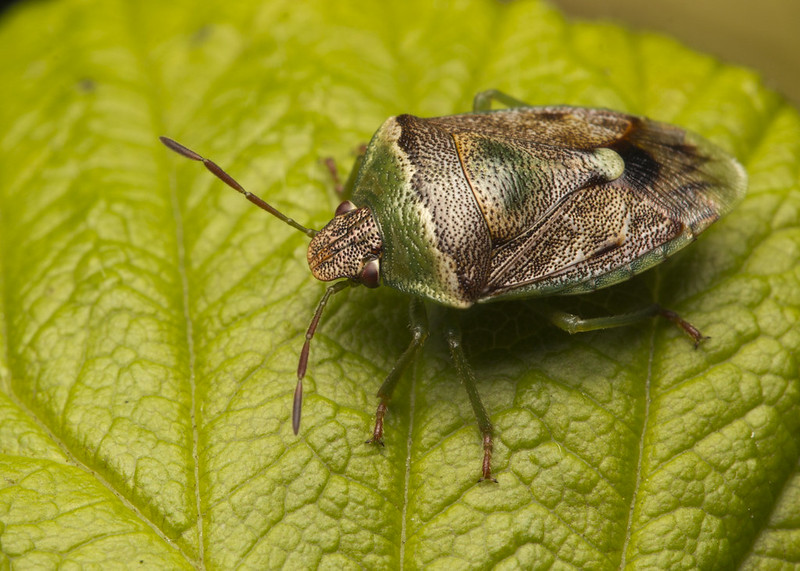
found a Camponotus alate in the hallway at school today, so I had an opportunity to test out the CFDMkII


This male Wood Duck seemed agitated, I presume because I was between him and several females.
This week’s Weekend Expedition was a bit of a hurried affair: I wanted to get done and get on the road to return my malfunctioning Canon 60D. This camera was working Saturday night, but when I got up Sunday morning to prepare my gear discovered that my generally reliable camera body would not start. I suspected all manner of grievous harm to the motherboard, and grumpily decided that I would return it for a refund or exchange at the store where I bought it (I had bought the extended warranty).
Because such misfortune can strike at any time, I have a backup body, the Canon 450D (Rebel XSi), which I took on the trip to Burnaby Lake.
While out in the glorious sunshine, seeing the spring springing and the birds and insects becoming active, my mind was still cloudy thinking about my traitorous camera back home. Instead of fully immersing myself in the sight of testosterone-fueled combat between Canada Geese, or sunbathing fireflies, my thoughts were elsewhere, and after a couple of hours I packed up and headed home.
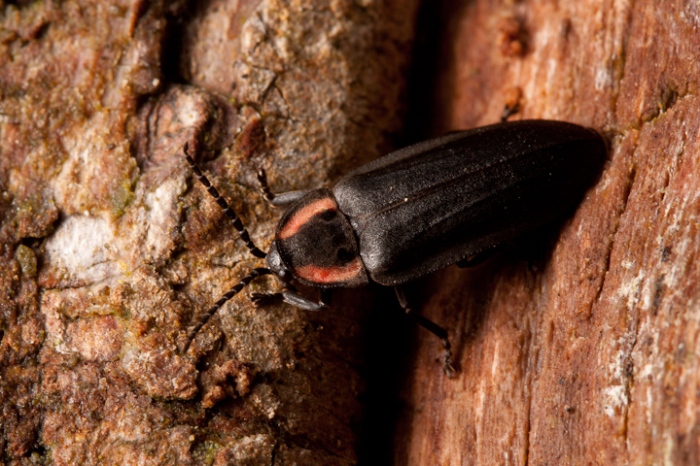
Several Ellychnia hatchi , large, diurnal fireflies. were sunbathing on exposed bark.
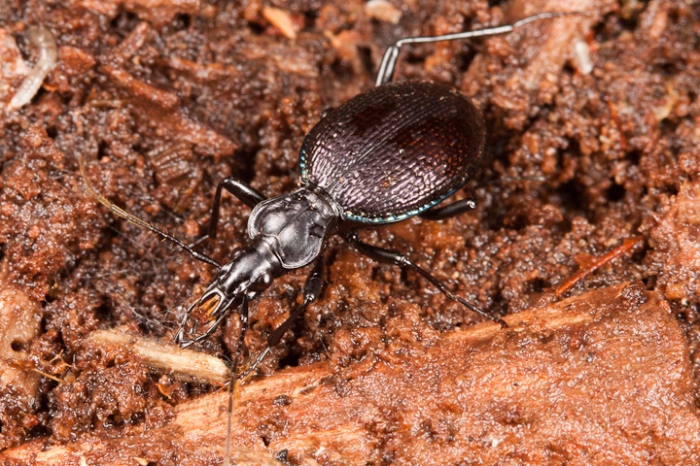
This Scaphinotus marginatus (ID courtesy Todd Lawton) was a new one for me. Generally, the most common Scaphinotus here are the larger Scaphinotus angusticollis. These odd Carabids are specialist predators of snails, and their elongate rostrums are thought to be an adaptation for extracting them from their shells.

I did not get a great shot of the behaviour, but the Canada geese are getting their spring on with some feisty combat.
When I arrived back home, I called the store asking about the procedure for returning the camera. While I was waiting on hold, I started idly wiping the battery terminals with some cloth, thinking it might just be a connection problem in the battery compartment. Sure enough, it ended up being the case that the sole cause of the camera’s mysterious reluctance to boot was dirty contacts on the battery terminals.
Although this Weekend Expedition produced some okay shots, I find that I was dissatisfied with the day. Whereas I had planned a leisurely 4-5 hours ambling around the lake shooting birds and bugs, I ended up truncating the outing, and not really being fully present to make the most of the time I did take.
So there is a lesson in this, I think. While it is important to have a decent lenses and a working body for your expedition, it might be more important to bring a clear mind.
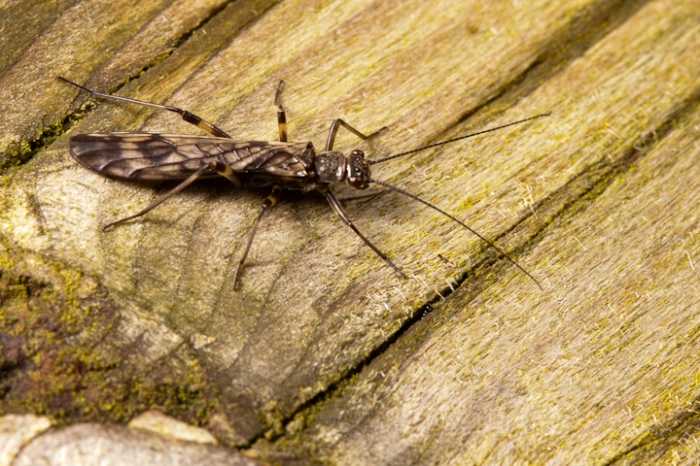
This Stonefly (ID anyone?) was sunbathing on a railing, and fled from my approach. After a time, it resumed sunbathing, so I could take this shot.

Even the Chrysomelids were out to soak up the rare Vancouver sunshine .

Playa.
This weekend, I hope to get out to Burnaby Lake, a large glacial lake in the Central Valley in Burnaby. This is right off the SkyTrain line, and has a variety of habitats, especially wetlands and some conifer groves. I have no set plans, and may focus on arthropods or birds, depending on what I encounter.
Music: DJBrownBum “like a jungle”
In lieu of a more substantive post this week, I must resort to some footage of a Red Acouchi (Myoprocta exilis) coming to some Astrocaryum seeds. This I took in March of 2011 while testing out a DVR which I was going to use on the caracaras. Having this equipment on hand during the our field seasons was a cool opportunity to get some footage of interesting animals (as well as providing large portions of our data). In future posts I will put up some more of these jungle camera-trapping clips, as I think they can be fun and informative.

So far on Cheapskate Tuesday I have desscribed two different ways of getting close to a subject, with macro diopters, and the use of extension tubes and cheap 50 mm lenses. I have also covered flash diffusion and radio triggers. There is one element missing for a cheapskate macro rig, and that is some kind of bracket to mount the diffused flash to the camera. This is necessary because although it is sometime practical to hold a speedlight in one hand while shooting, it is often nice to be able to hold and fire everything with one hand free to hold back vegetation, or steady the subject.
Below is one easy option to accomplish this.
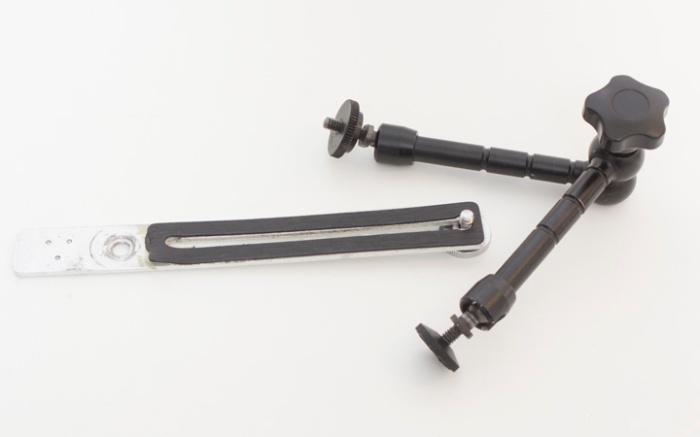
On the left is a simple aluminum flash bracket (or a piece of one anyway). They can be found on ebay, if you search for “flat flash bracket”. They may run anywhere between 3 and 10 dollars. A better option would be to visit a used camera store, as they probably have oodles of these sitting in a dusty box somewhere. The second item is an 11″ variable friction arm, also available via ebay. This device allows you to connect any two objects that both have a female 1/4″ thread. The arm allows you to flex the central joint along one axis, and a great range of movement on the ends via a ball and socket type linkage. When the main knob is tightened, the whole assembly locks rigid. These two inexpensive items can be put together using a 1/4″ nut, some washers and a lock washer.
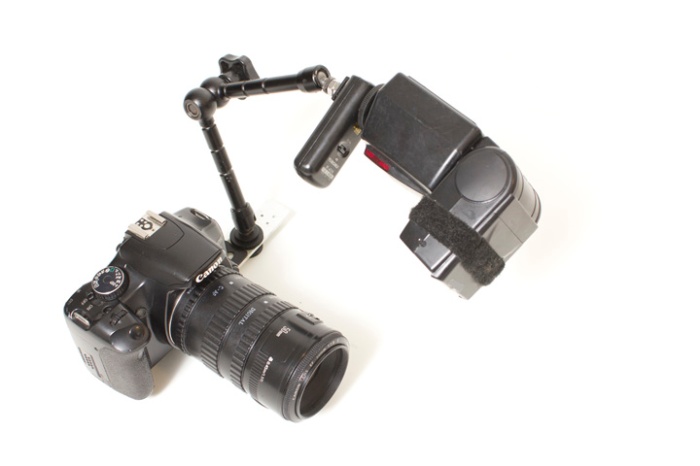
The arm can be used to cantilever the flash (with triggers or ttl cable, and diffused!) out over or beside the subject.

The flash can be oriented to either side, or the entire assembly can be rotated so the friction arm is to the left or right.

The bracket can be used as a standard flash bracket as well, and can bring the flash nicely off-axis for paparazzo-style shooting with wider lenses.
See below some examples where I have used this type of bracket. I have found it is a simple, cheap and lightweight general purpose bracket for many shooting situations. .
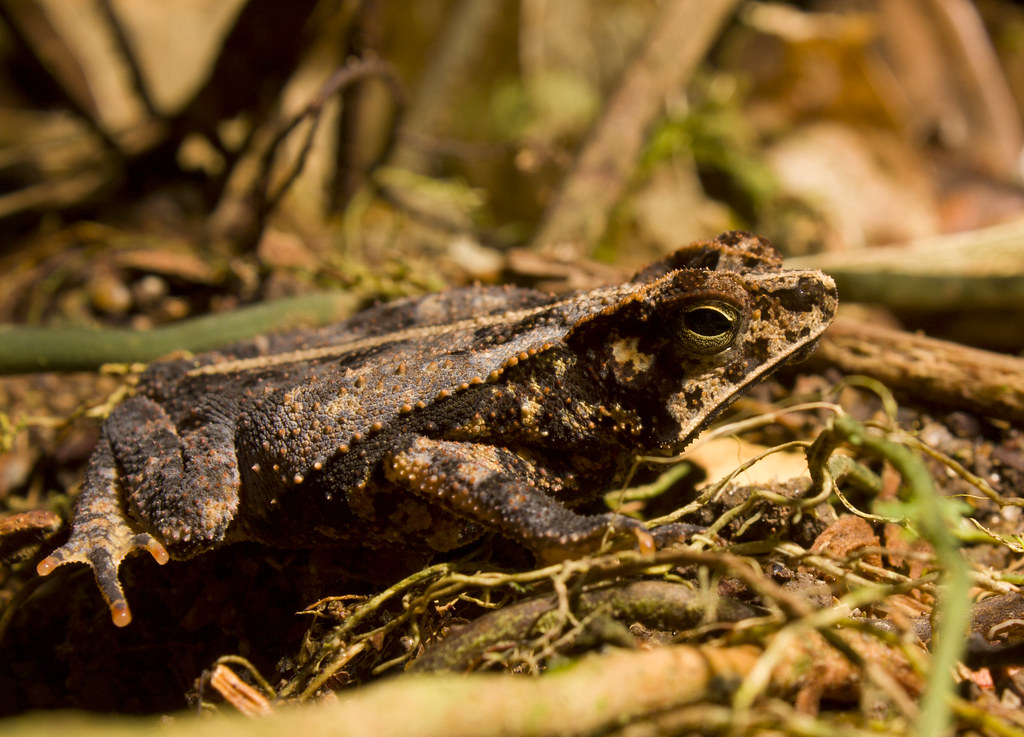
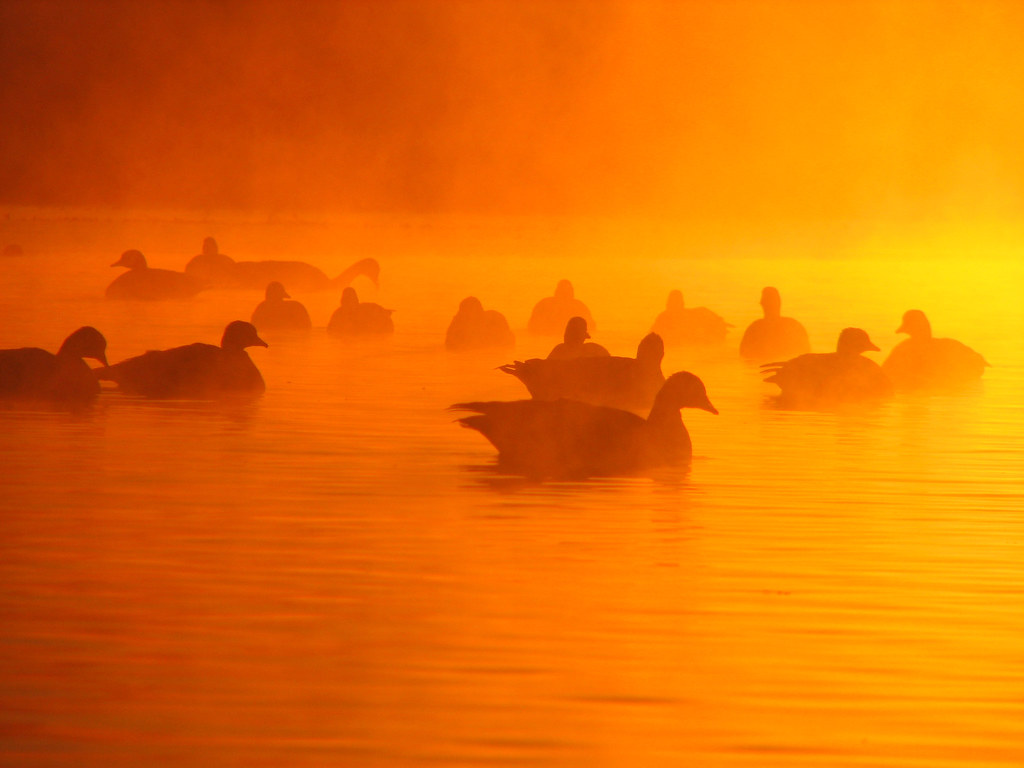
This French Guianan toad was illuminated from above using the friction-arm mounted flash.
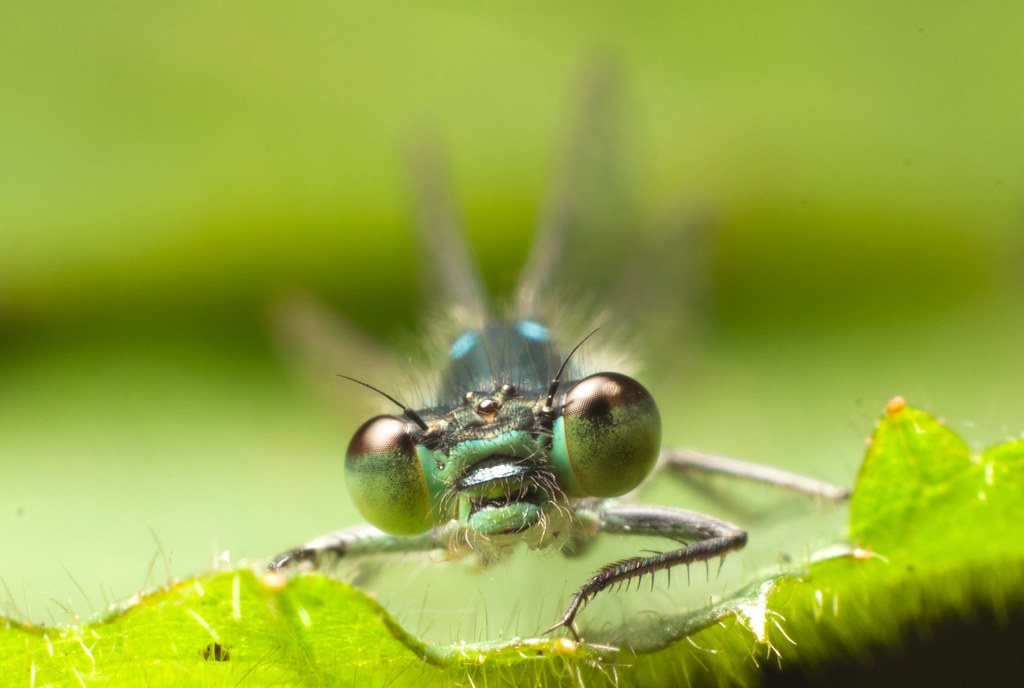
This setup works especially well working very close, as in this portrait of a damselfly.
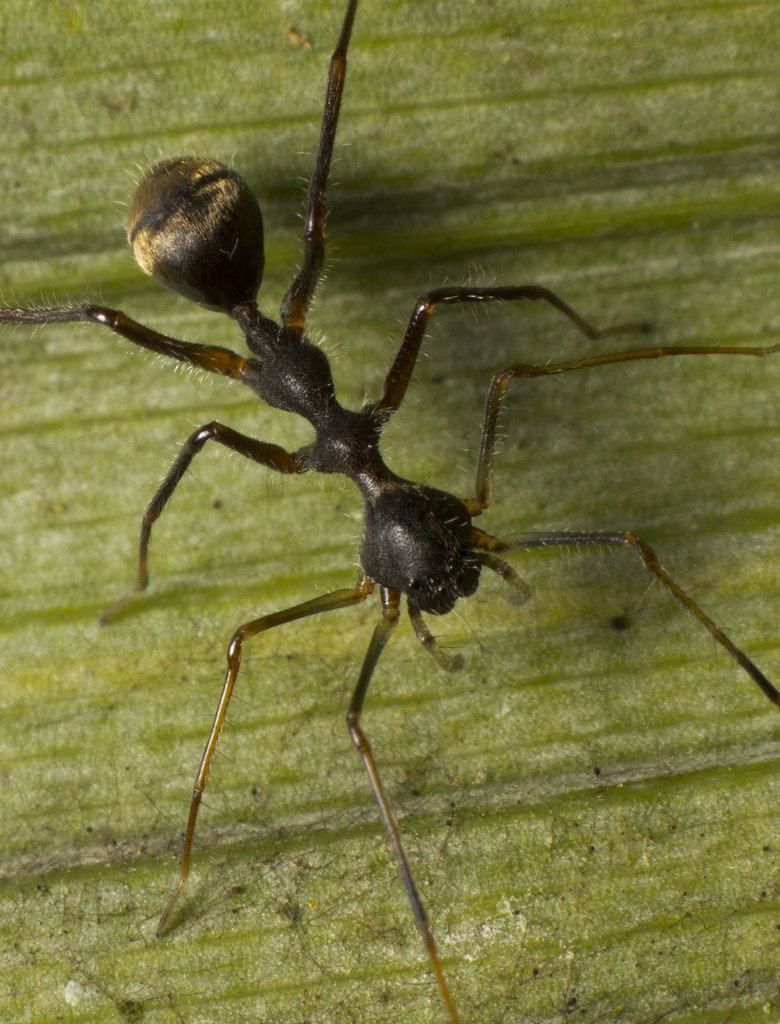
This ant-mimicking spider was also amenable to use of this bracket. Because the subject is illuminated from such a close source, falloff is a problem. In an upcoming Cheapskate Tuesday, I will share how I get around this problem.
As I suspected might be the case, this Weekend Expedition was more of a working holiday, as we went over to help Catherine’s parents move. The ferry rides provided the majority of the good photo opportunities, but this is not a bad thing! A trip from the mainland to Vancouver Island provides a lot of photographic potential. Check out the results below to see what I mean.
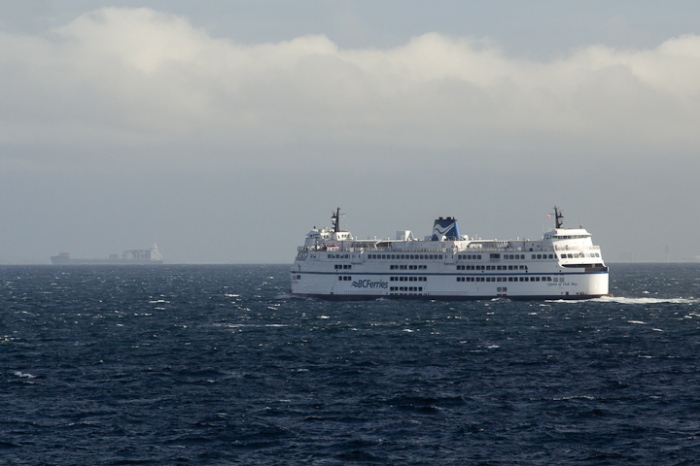
Regular ferry service between Vancouver and Vancouver Island principally services two cities: Victoria and Nanaimo (home of the Nanaimo Bar). We took the trip from Vancouver to Nanaimo, from which we got a ride to Comox (thanks Sidnee!).
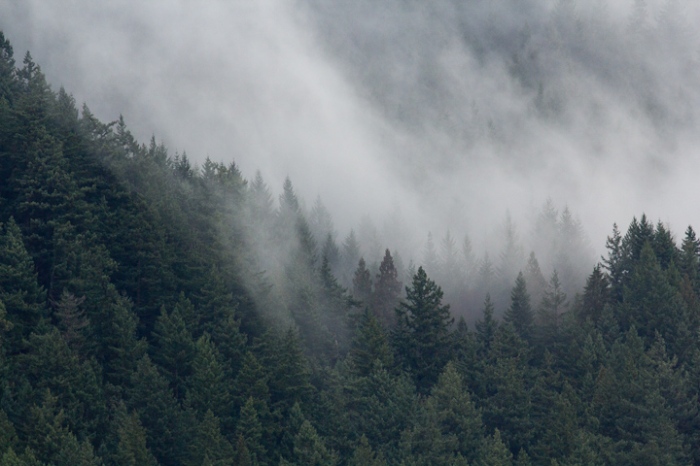
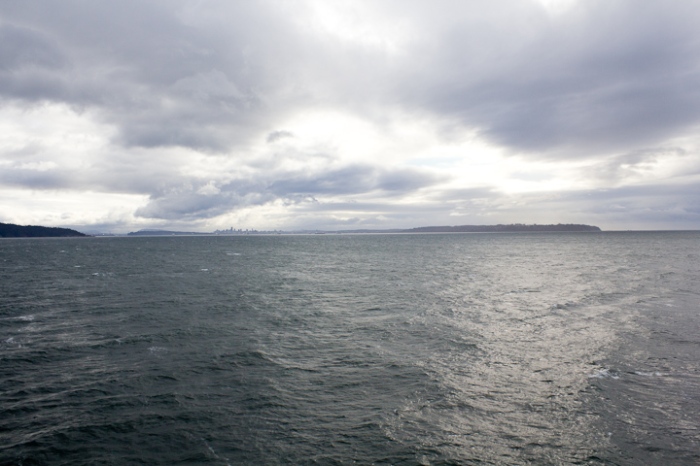
The mist-enshrouded evergreen hills of BC. I used to fantasize about living here when I was a boy, imagining all the amazing animals in this relatively unspoiled province.

Winter light on the seascape can do some odd things.
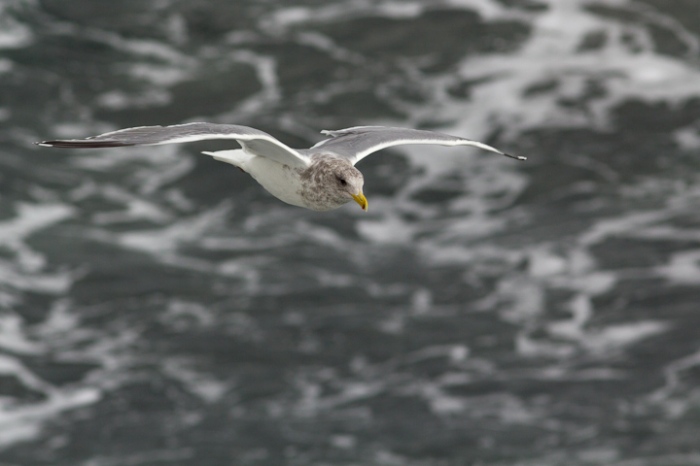
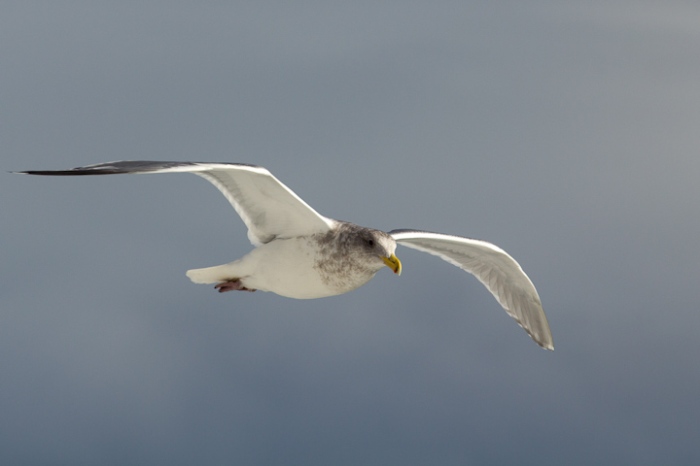
One of my favorite things to do on the ferry decks is shoot gulls. It is one of the best opportunities to practice in-flight shots from all angles.
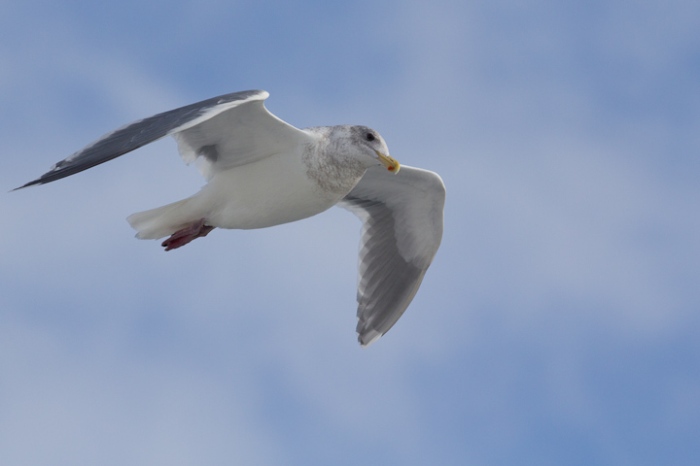
On the outbound trip, there was even some blue sky. The gull looks surprised too.
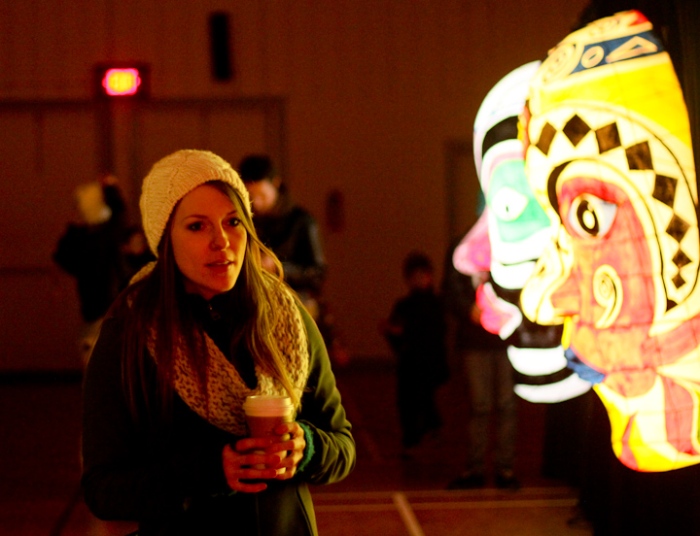
Saturday evening we took in some local culture. In Cumberland, there was a Taiwanese Lantern Festival.
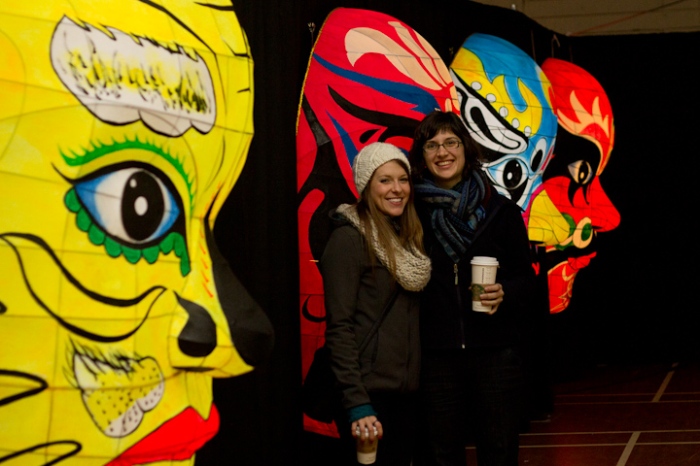
These large lanterns made for an interesting backdrop. Bounced flash off the ceiling allowed some detail to come out in Catherine and Julia.
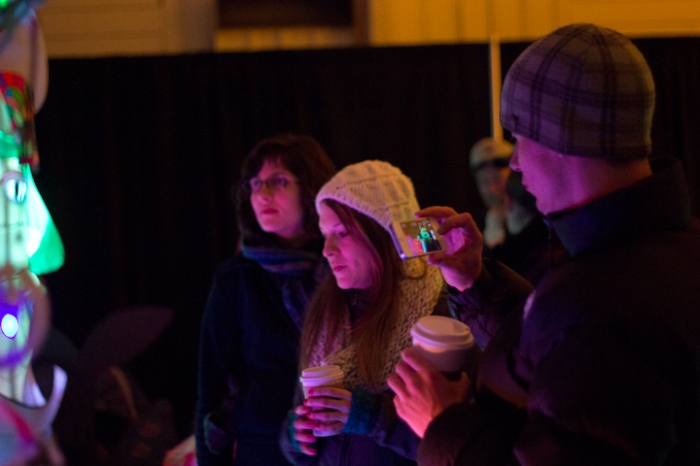
Shooting in the dark! The ambient lighting is interesting at least.
The lantern festival culminated in a launch of aerial lanterns. I sewed up some stills into a movie to give a sense of what that looked like.
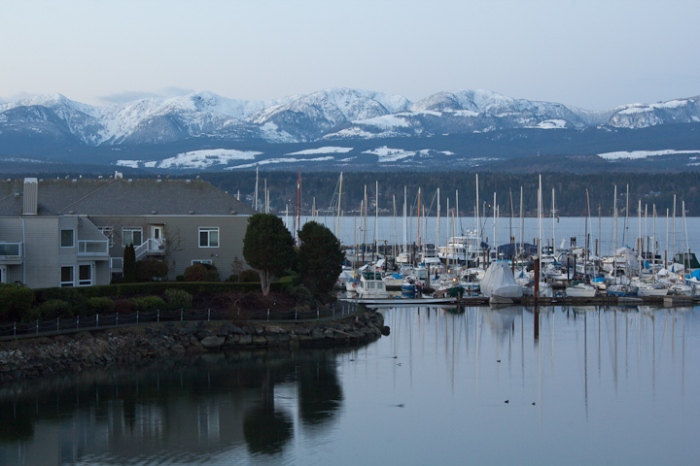
This was the view on Saturday morning. On Sunday morning, the wind was raging, and dozens of eagles flew right by the window. It was too dark for photography however.
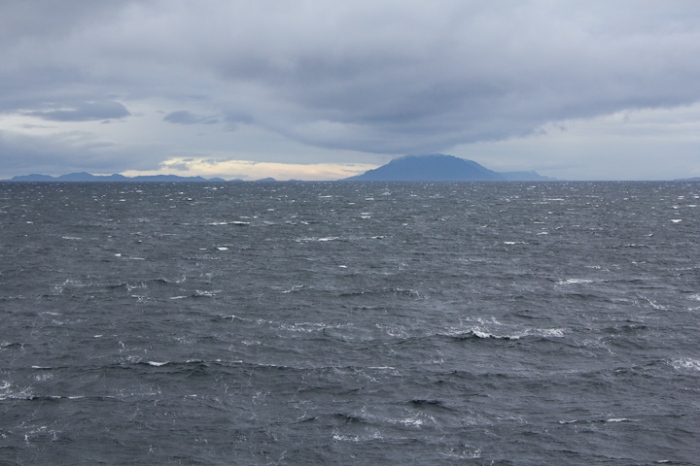
The return ride was a little more choppy, but the seas are quite pretty in a grim and cold sort of way.
Vancouver from the north with 18 mm (check out the boring composition…how not to use a wide lens!). This shows the full extent of downtown to UBC.
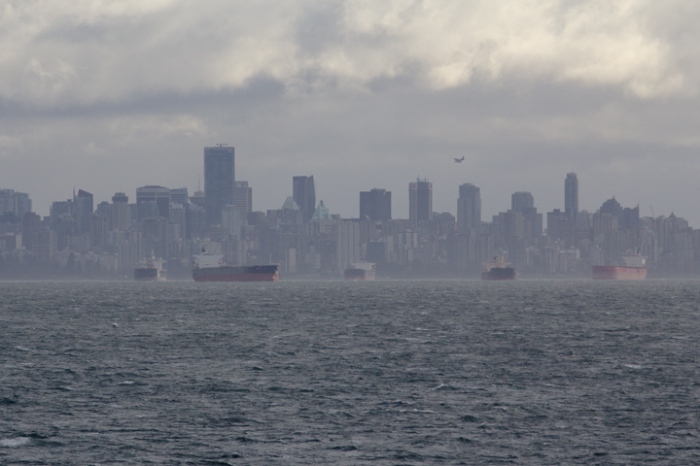
Vancouver as seen from the North with a 300 mm lens.
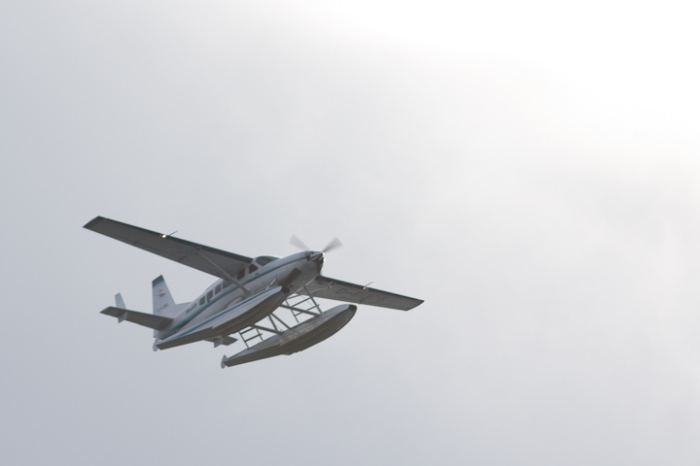
This would be the faster way to go!

Vancouver is crowded, but this looks a bit isolated even for me!
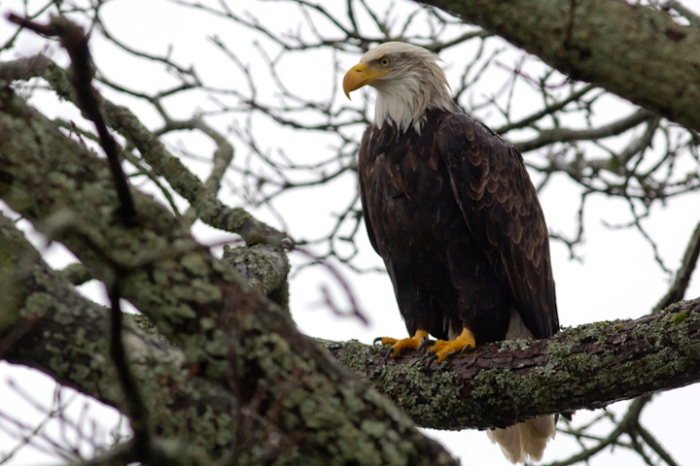
Wet Eagle 1
This weekend I have no fixed expedition plans… Tomorrow Catherine and I head out to Comox on Vancouver Island to help her parents move, so it could be that the only photo ops come from the ferry ride. That being said, last time I was at the old homestead, there were two wet eagles perched about 20 feet off the balcony, so that was something!
So the details of the expedition are sketchy and mysterious as of now, but sometimes these turn out the best…Stay tuned for the results!

Wet Eagle 2

Trumpeter Swans are another Comox Valley wintertime treat.
We had a representative of High Speed imaging Inc. in the lab today to demonstrate some high speed cameras…So what did we record? Some blowflies of course!
Check out how these awesome flies take off:
We have used high speed cameras before, but this one was pretty impressive. This video was recorded at 4000 frames per second, and is slowed down to 30, so it is about 133 times slower than real life. No wonder they are so hard to catch!

One of the cheapest and highest-quality ways of getting into closeup and macro photography with a DSLR is to use your nifty fifty on extension tubes. Extension tubes are a time-honoured way of decreasing the minimum focusing distance of any lens by moving it further from the image plane. The magnification you can achieve depends on the focal length of the lens and the amount of extension.
Perhaps the best illustration is to show a familiar object at three different focal distances with different combinations of tubes.
Here is what the 50 mm can do at its closest focusing distance on a cropped-frame camera:

with just 12 mm of extension, here is the same subject:

And with all 65 mm of extension tubes added, we can get really close:

Clearly, there is a great difference in close focusing ability with the tubes mounted. Also, I used an American penny as we just got rid of ours.
When you buy extension tubes, they often come in a set of three. mine had 13, 21, and 31 mm tubes, for a combined total of 65 mm.

As you can see in the photo above, the tubes have contacts to command the lens’ focus and aperture from the camera. While these that I bought some years ago are often the cheapest of the products available (about 50 bucks a set), I recommend buying the more expensive Kenko branded ones (maybe 170 if you shop around?). My old tubes are mostly plastic, and the mount pieces are starting to wear and break. Kenko tubes have metal mounts and thus should last much longer. Sometimes being a cheapskate doesn’t pay off! That being said, if all you will mount will be the 50, the plastic tubes should last a good long time. With heavier lenses, there is bound to be more strain on the mounts.
With 65 mm of extension on a 50 mm lens, we can achieve slightly better than 1:1 magnification. This means that we can fill the frame left to right with a subject measuring 22 mm on a crop frame camera. This is pretty darn good for most insect work.
Where extension tubes get difficult is that to achieve different magnifications, one has to keep swapping them out and re-combining them. While all this fiddling is going on, your subject may be some distance away! Also, while the tubes are mounted, you have only a narrow Goldilocks zone of focus, and you cannot focus to infinity. If you were crouched down shooting a butterfly and Bigfoot walked by, you might miss the shot, while your buddy with the compact camera and the quick-dismounting Raynox DCR 250 would nail it!
Nonetheless, this is a great method for getting into macro and closeup photography.
So what kind of real-world results can be achieved?
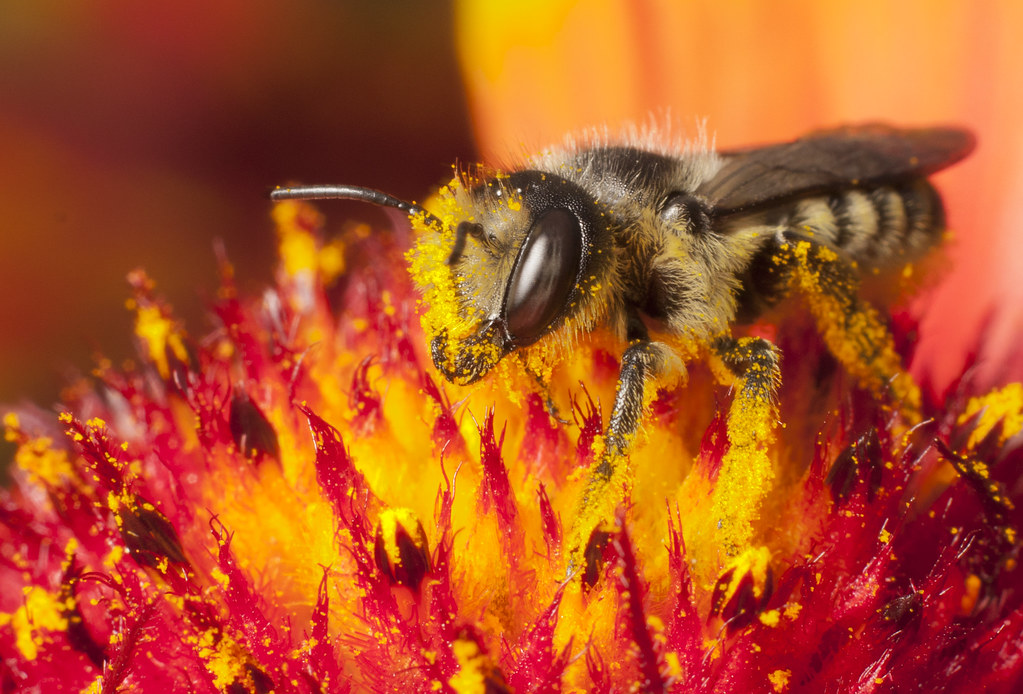
This megachilid bee, photographed at Iona Beach, is brought in very close with the 50 mm on 34 mm of extension tubes.
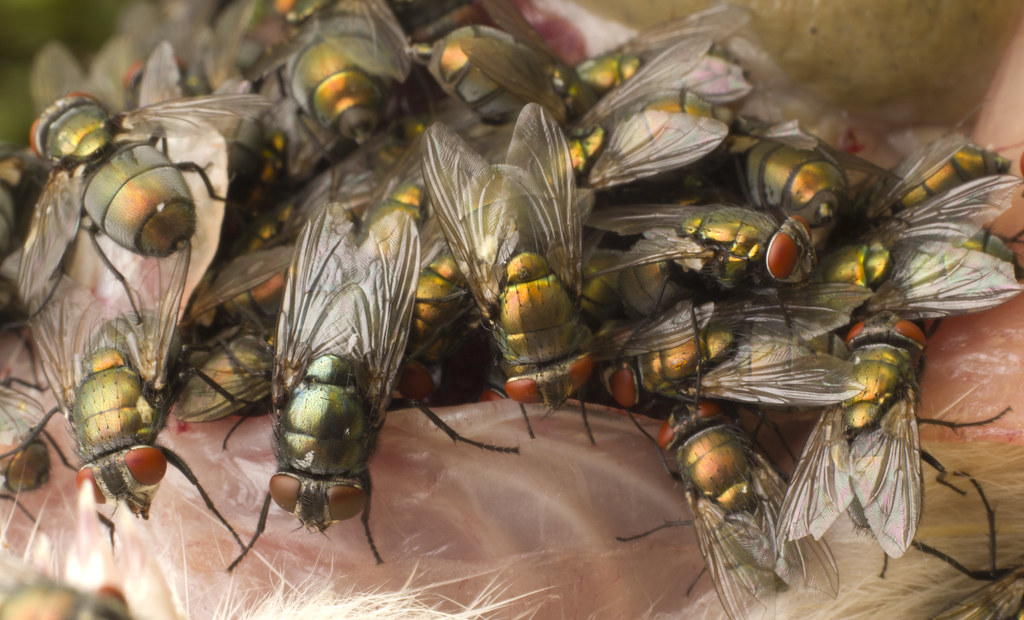
A group of Lucilia sericata and a lone Phormia regina feed on the abdominal cavity of a dead rat. This shot used the 50 mm on just 13 mm of extension.
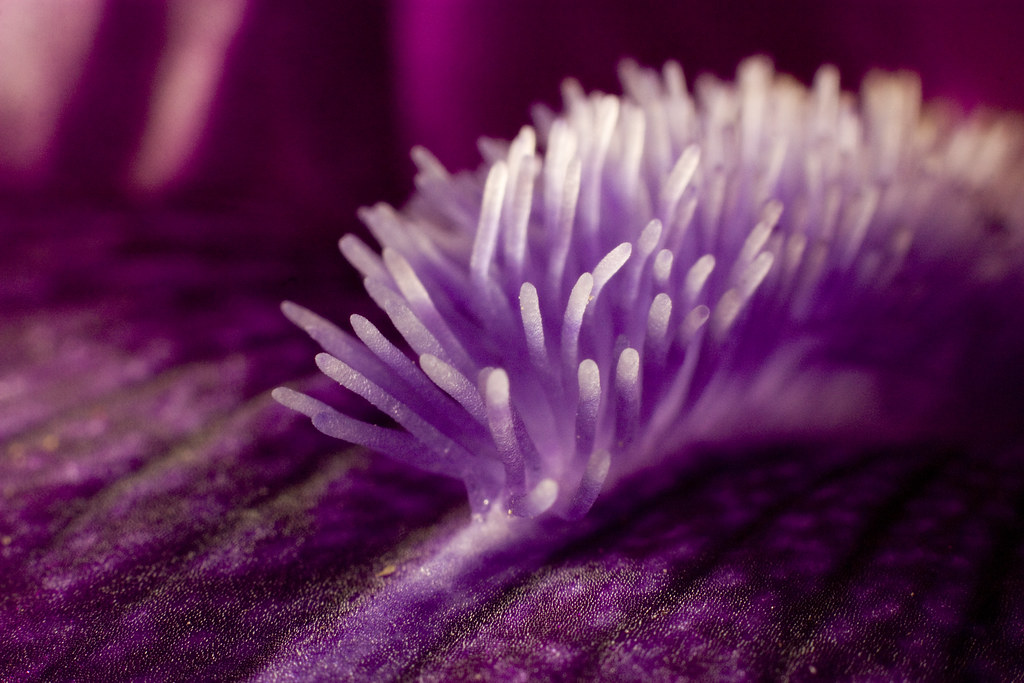
This detail of an Iris almost makes it appear to be a sea creature…Thanks, extension tubes!
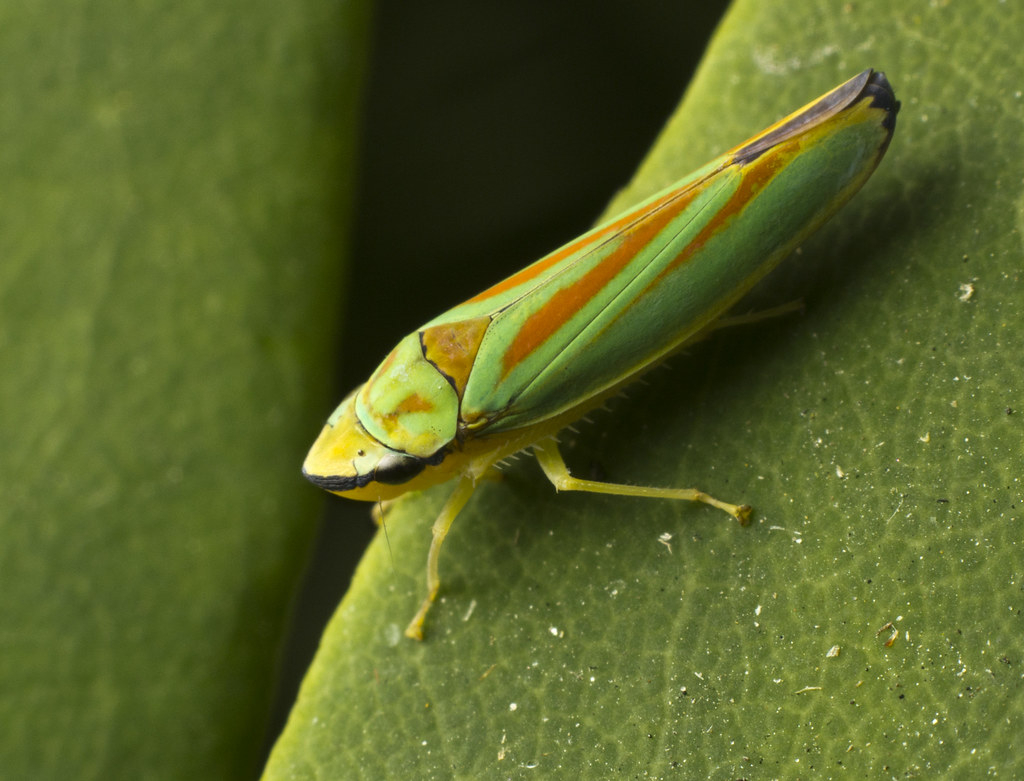
To get this Rhododendron Leafhopper (Graphocephala fennahi)to fill the frame, all 66 mm of tubes were used.
Provided your subject is still, getting in close is not a problem.
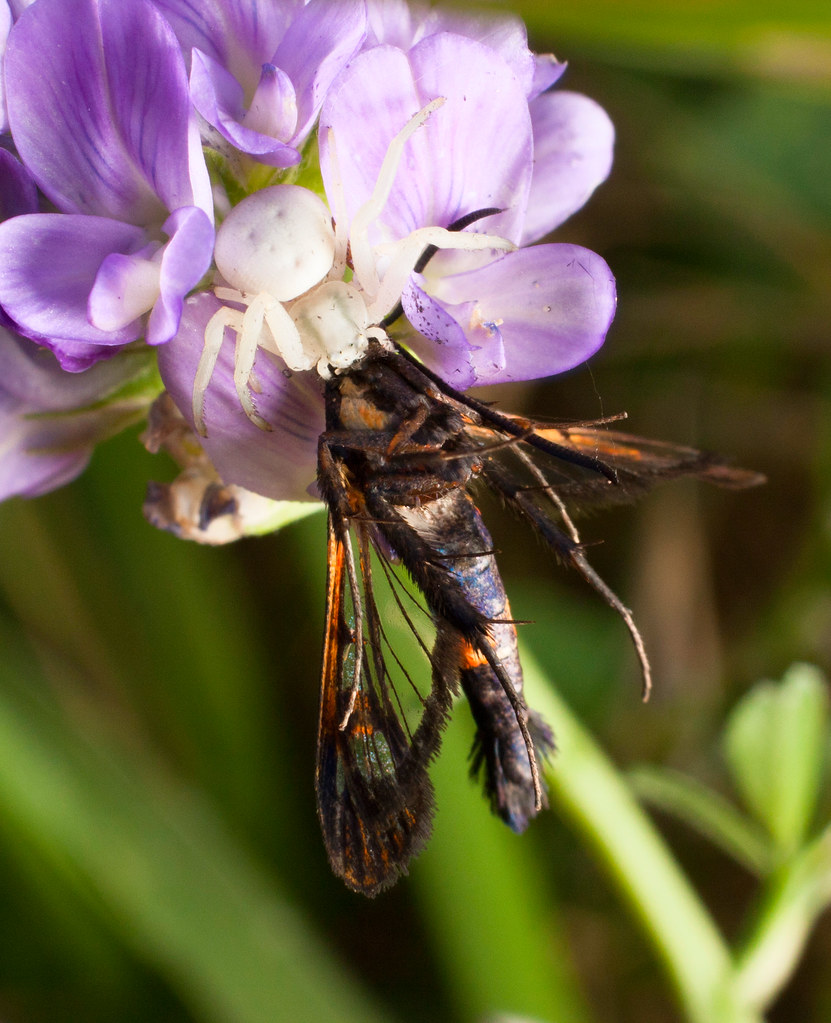
The modest 21 mm of extension brought this life and death drama of the crab spider and the Apple Clearwing into focus.
Extension tubes can also be used with shorter lenses, but get much past 35 mm and the working distance is going to be very tight and possibly unworkable. With longer lenses, the magnification gains are more modest, but sometimes the shortened working distance can be useful. I also get nice results with the 300 mm f4 and tubes, but I will wait til spring has sprung and I shoot some more material before I post about that.
Anyway, I hope that I have been a good advocate for the use of tubes and cheap 50s to get in close. If you cannot afford a macro lens, but would like to make some nice closeups, this will get you started and keep you happy for a good long while.
