Archives

Cheapskate Tuesday: (wideish) macro part 1, the 18-55 kit lens

When I have not been blogging for a while, I usually start posts off with a bit of self-flagellation, followed by apologies and a promise to do better in the future. But to heck with that, what about a bit of shameless self-promotion instead? Nah, that does not work either.

But something wakens Ibycter from her mighty slumber, and that is as shameful desire to take part in Science Borealis’ People’s Choice Award:

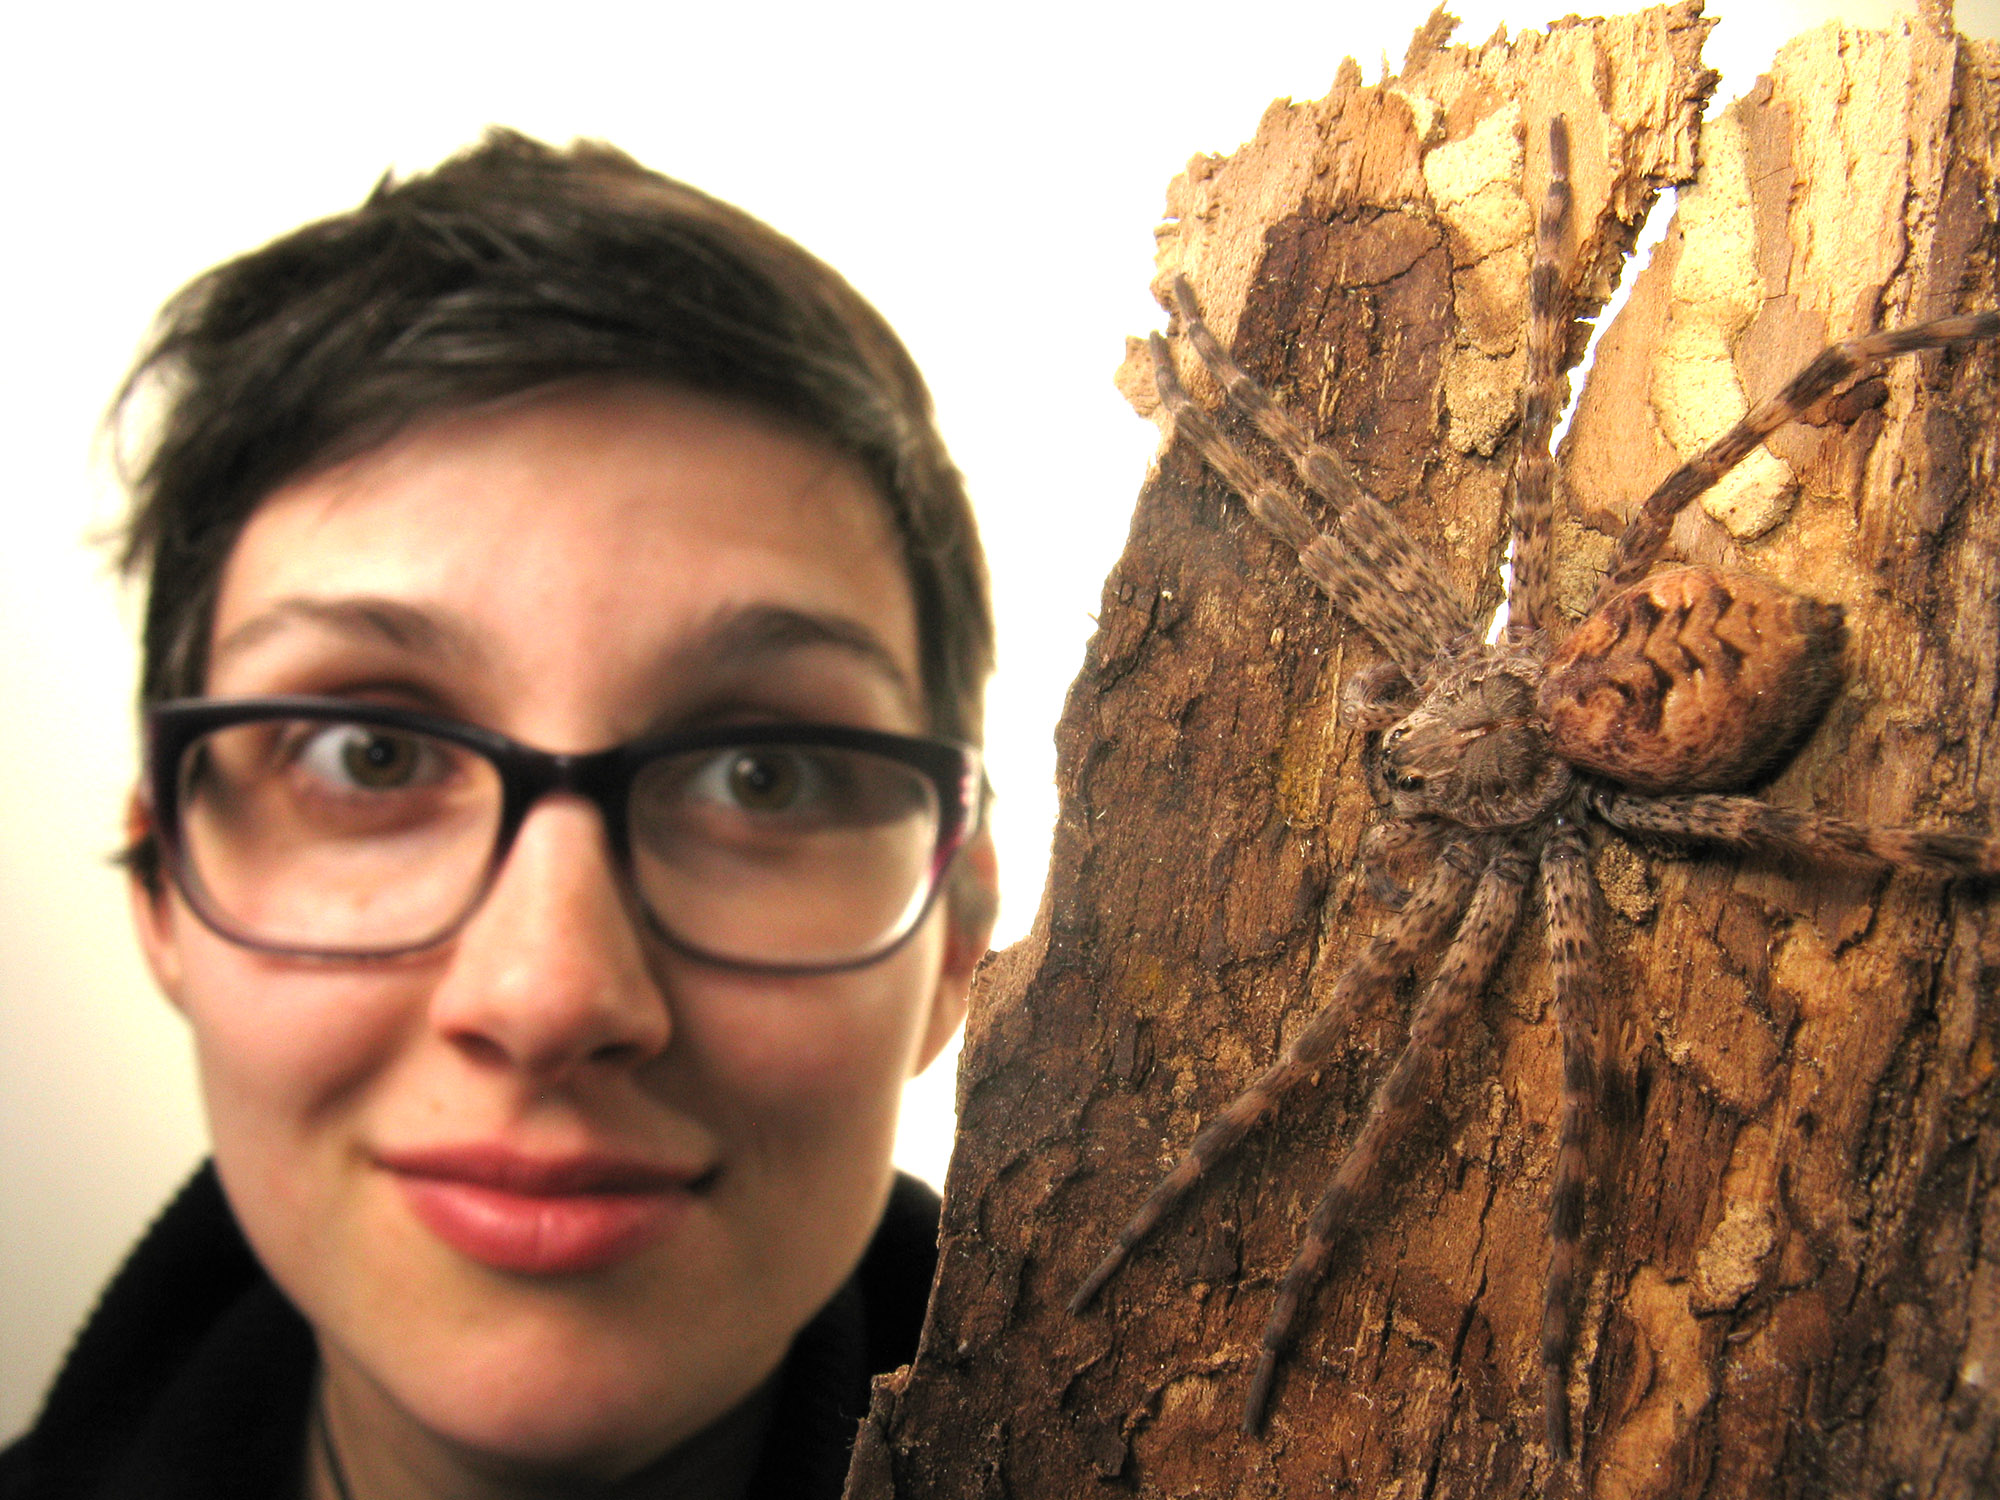
Now, for the self-flagellation: By no means can I hope to be the people’s choice in this, or anything, as my blogging has been abysmal the  past year. But I have been doing regular sci comm activities on Twitter where the majority of our current fieldwork on black widow spiders has been communicated. Of course, I have been throwing in a bunch of photography and the like, and often post images taken during my early morning sojourns to the fieldsite and beyond.

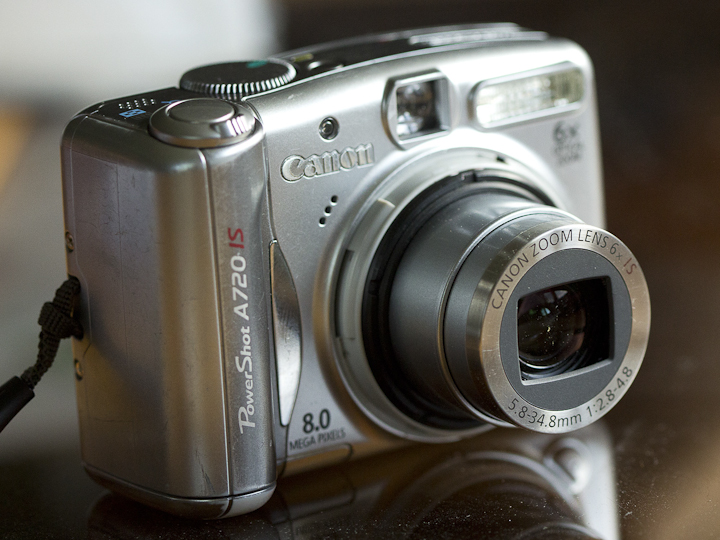
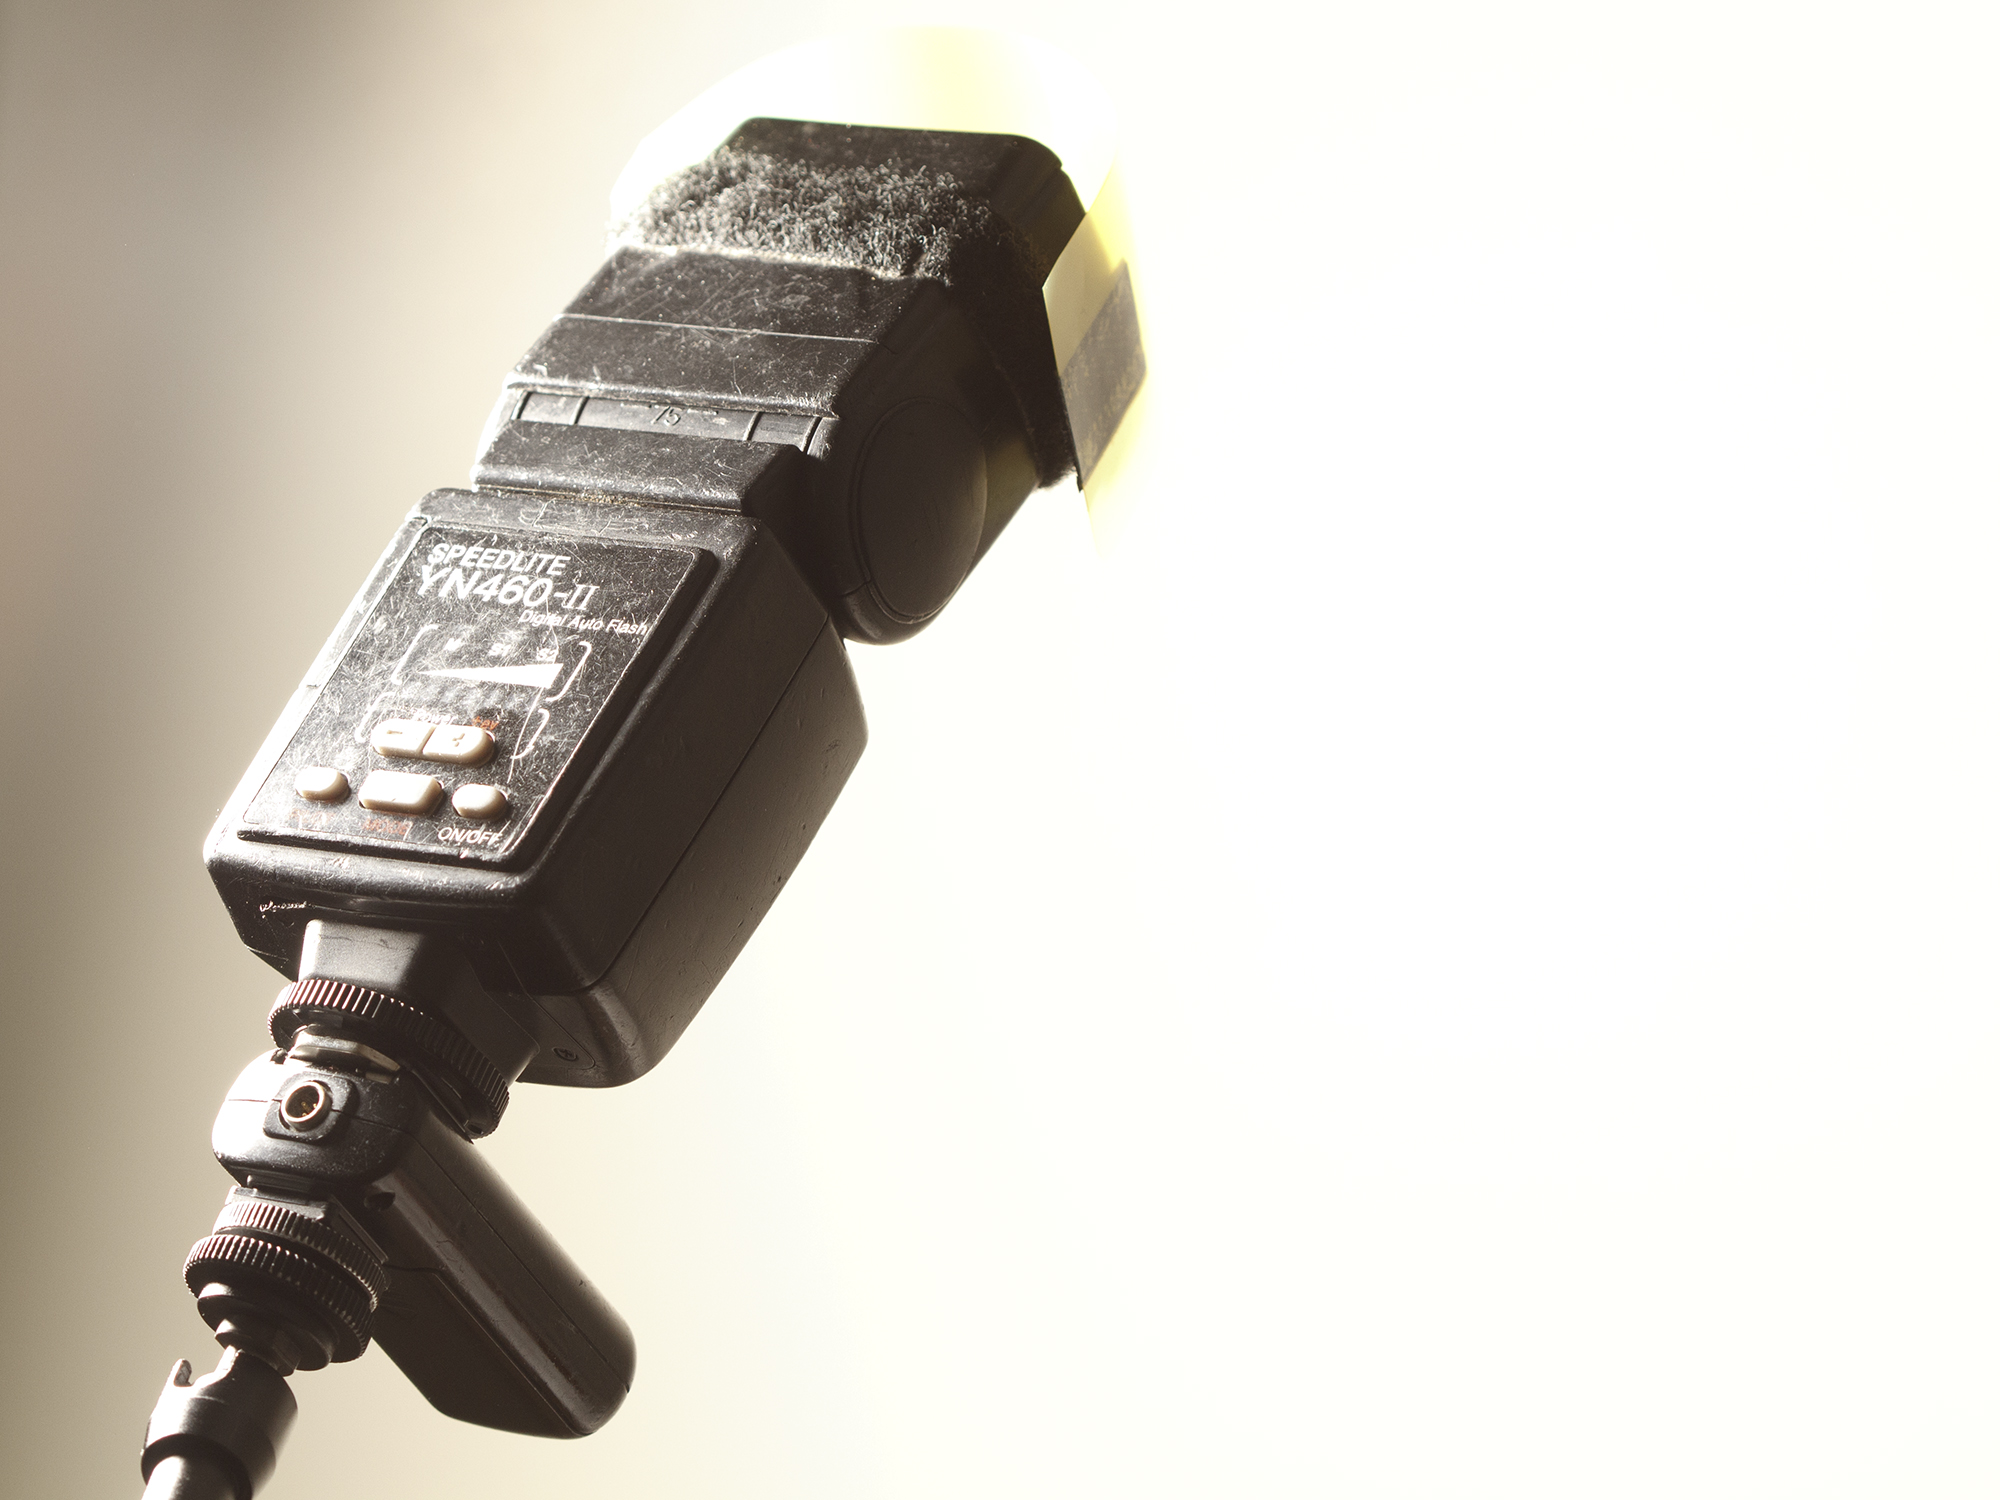
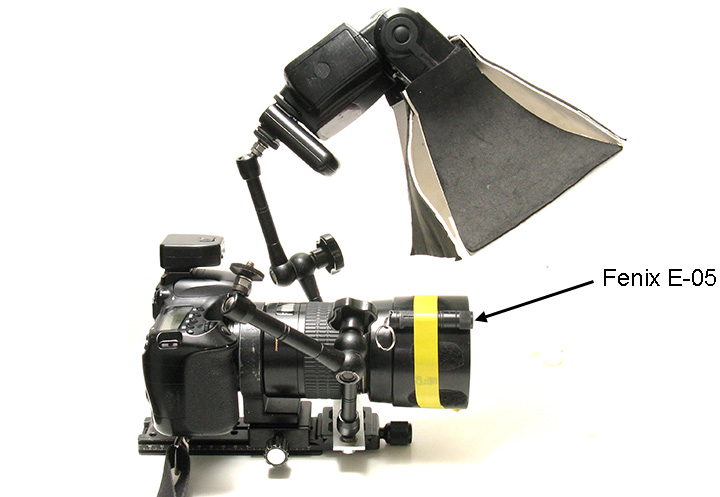
This season, I have been wanting to explore in more depth the possibilities of wide angle macro with an SLR. Last year, I was attempting to do so with the venerable A720IS, but I was getting really tired of having to trigger flashes via slave mode (it does NOT work well in the sunlight!).

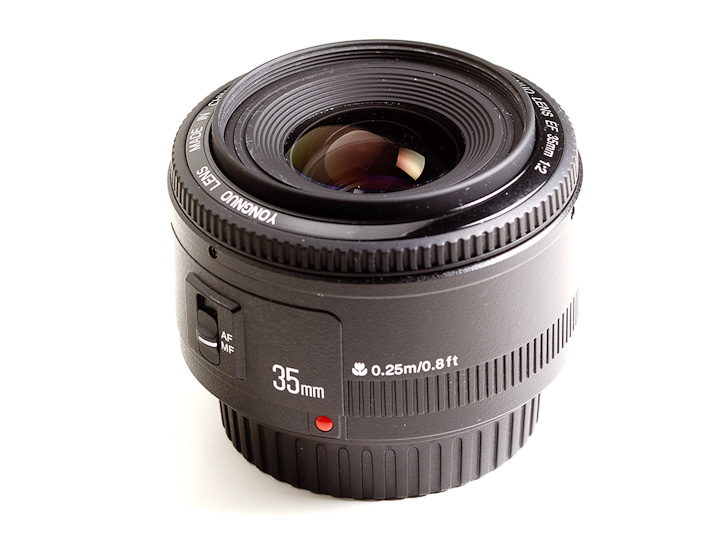
So what wide lenses do I have? Well, the widest has got to be the old 18-55 kit lens, and often-derided, but actually quite nice little stabilized zoom lens, sold with many Canon kits (other manufacturers often have one too). My copy is a little on the old side, and the autofocus no longer works, but it should serve well for playing with.

So I slapped together a hideous contraption, added 12 mm extension tubes, and took it out a few times this season. I will show results in the wide, wideish, and definitely not wide focal lengths to give you an idea what I was able to achieve.

Definitely Not Wide

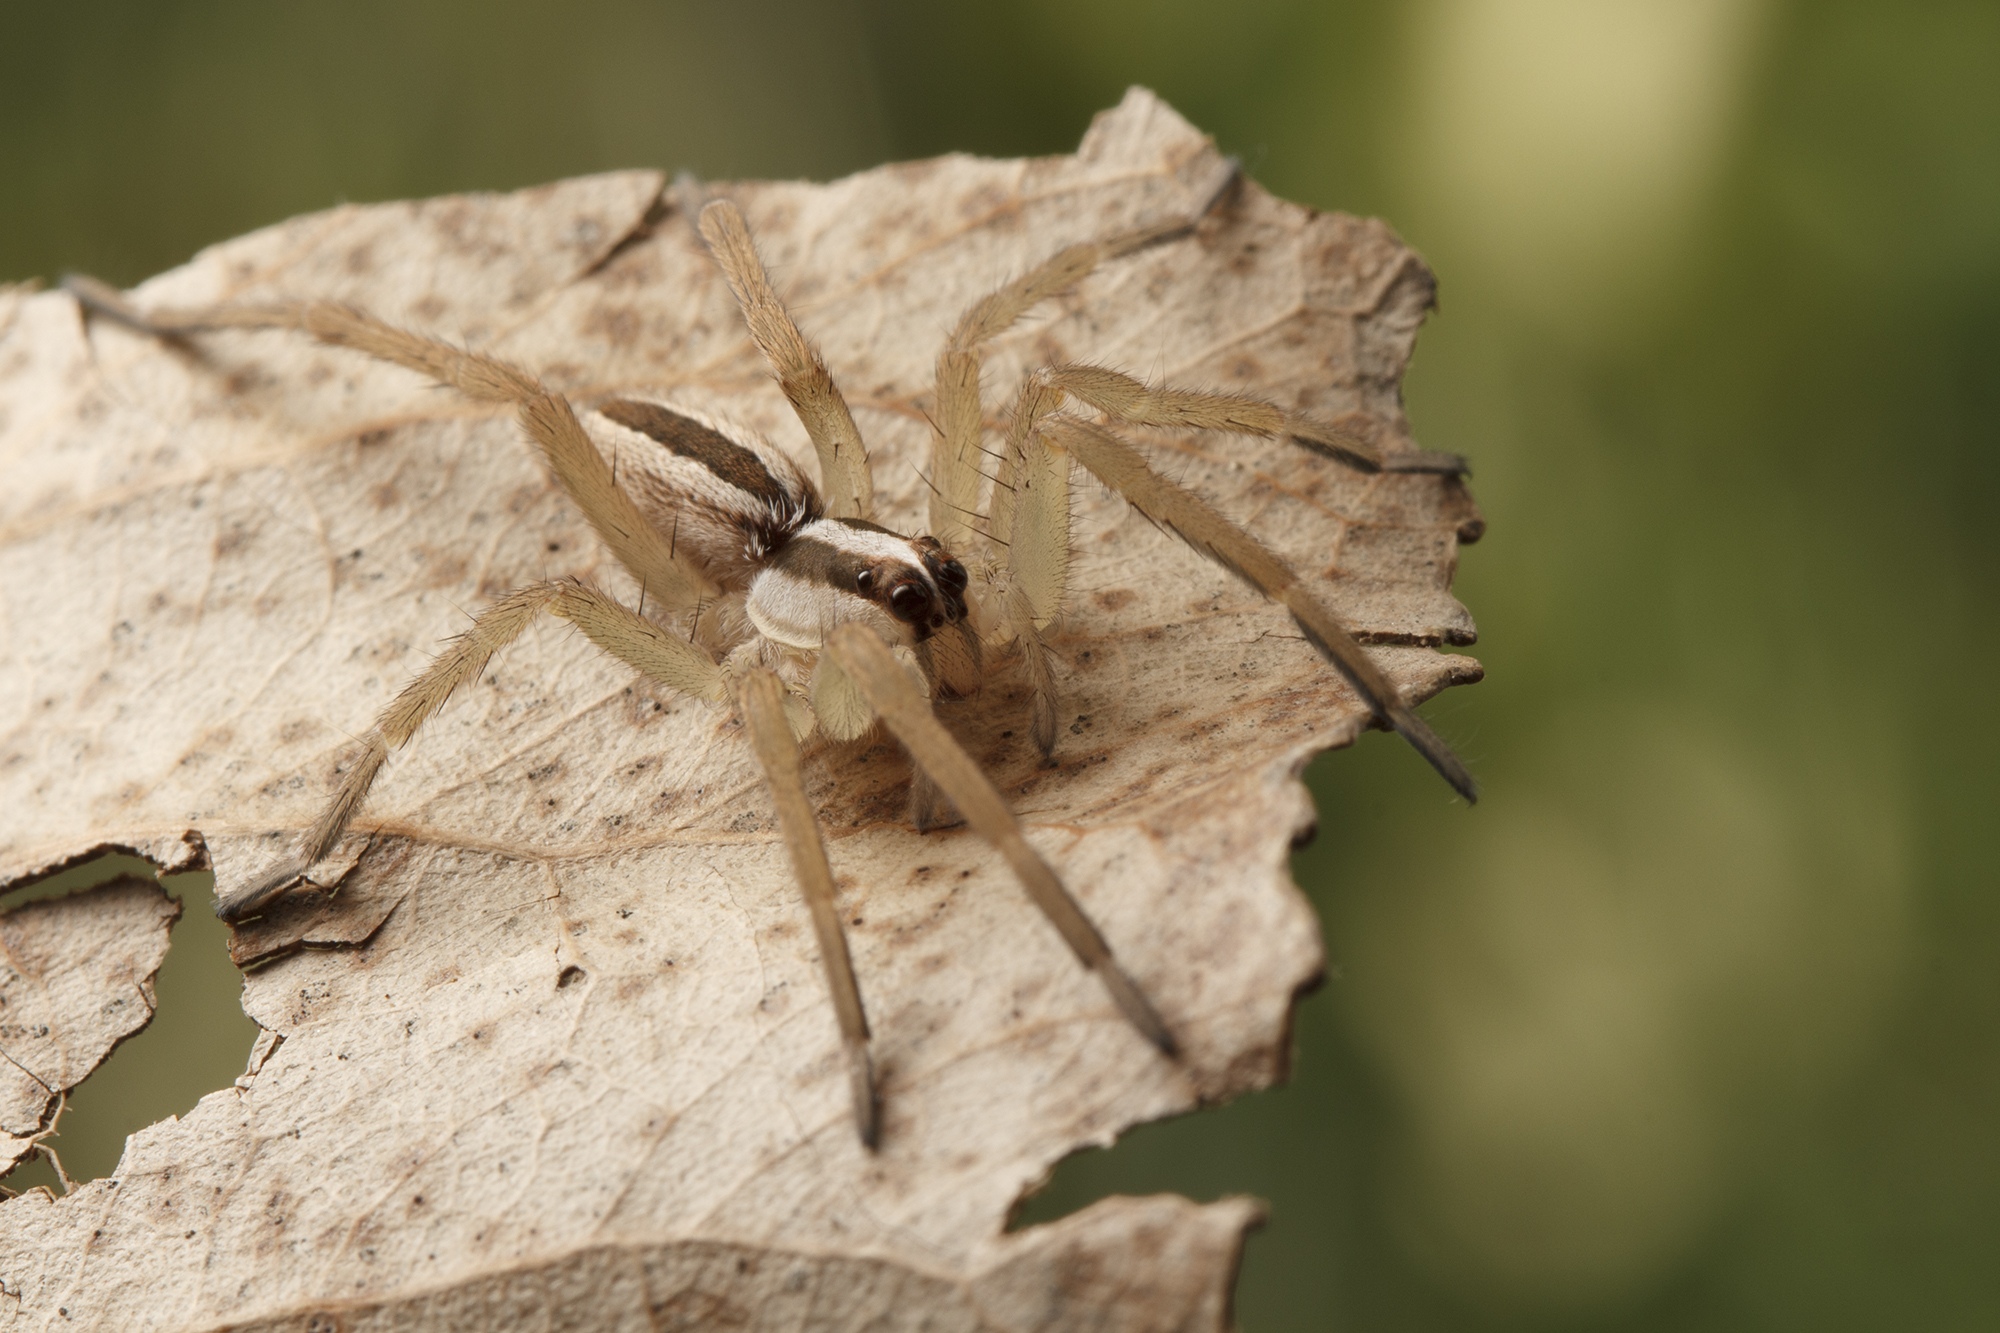
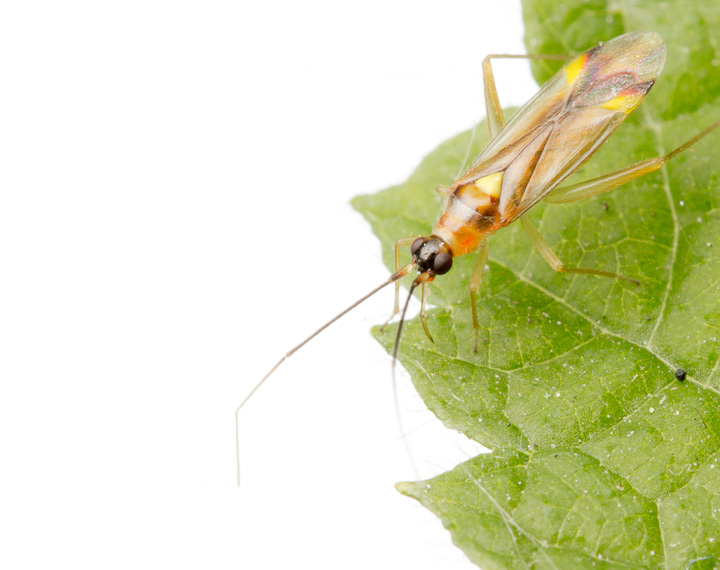
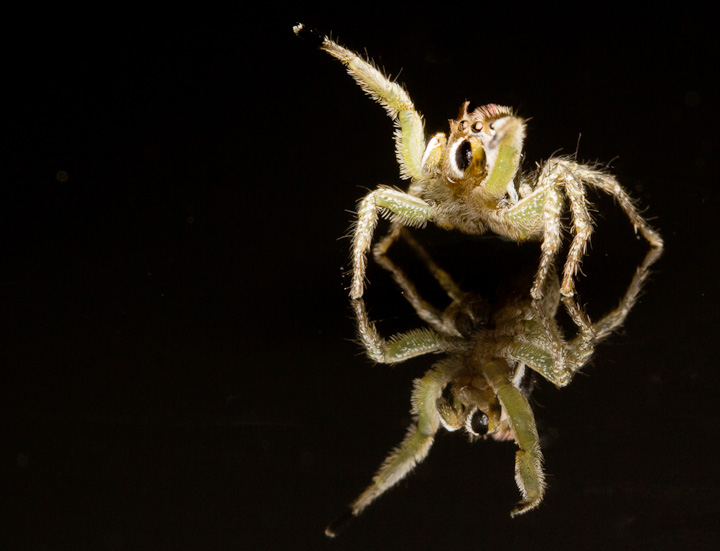
The 18-55 on 12 mm extension tube, zoomed fully to 55 mm. At this focal length, the lens serves well as a moderate focal length macro lens, with decent colour rendition and acceptable sharpness. This is an image of what I believe is Megachile perihirta.


Here again at 55 mm, the lens shows good characteristics for macfophotography. The downside is the hexagonal rendition of out of focus highlights (in this case the sun)…Even stopping down to f22 will not round out these edges significantly. My advice is avoid such situations when shooting with this lens.

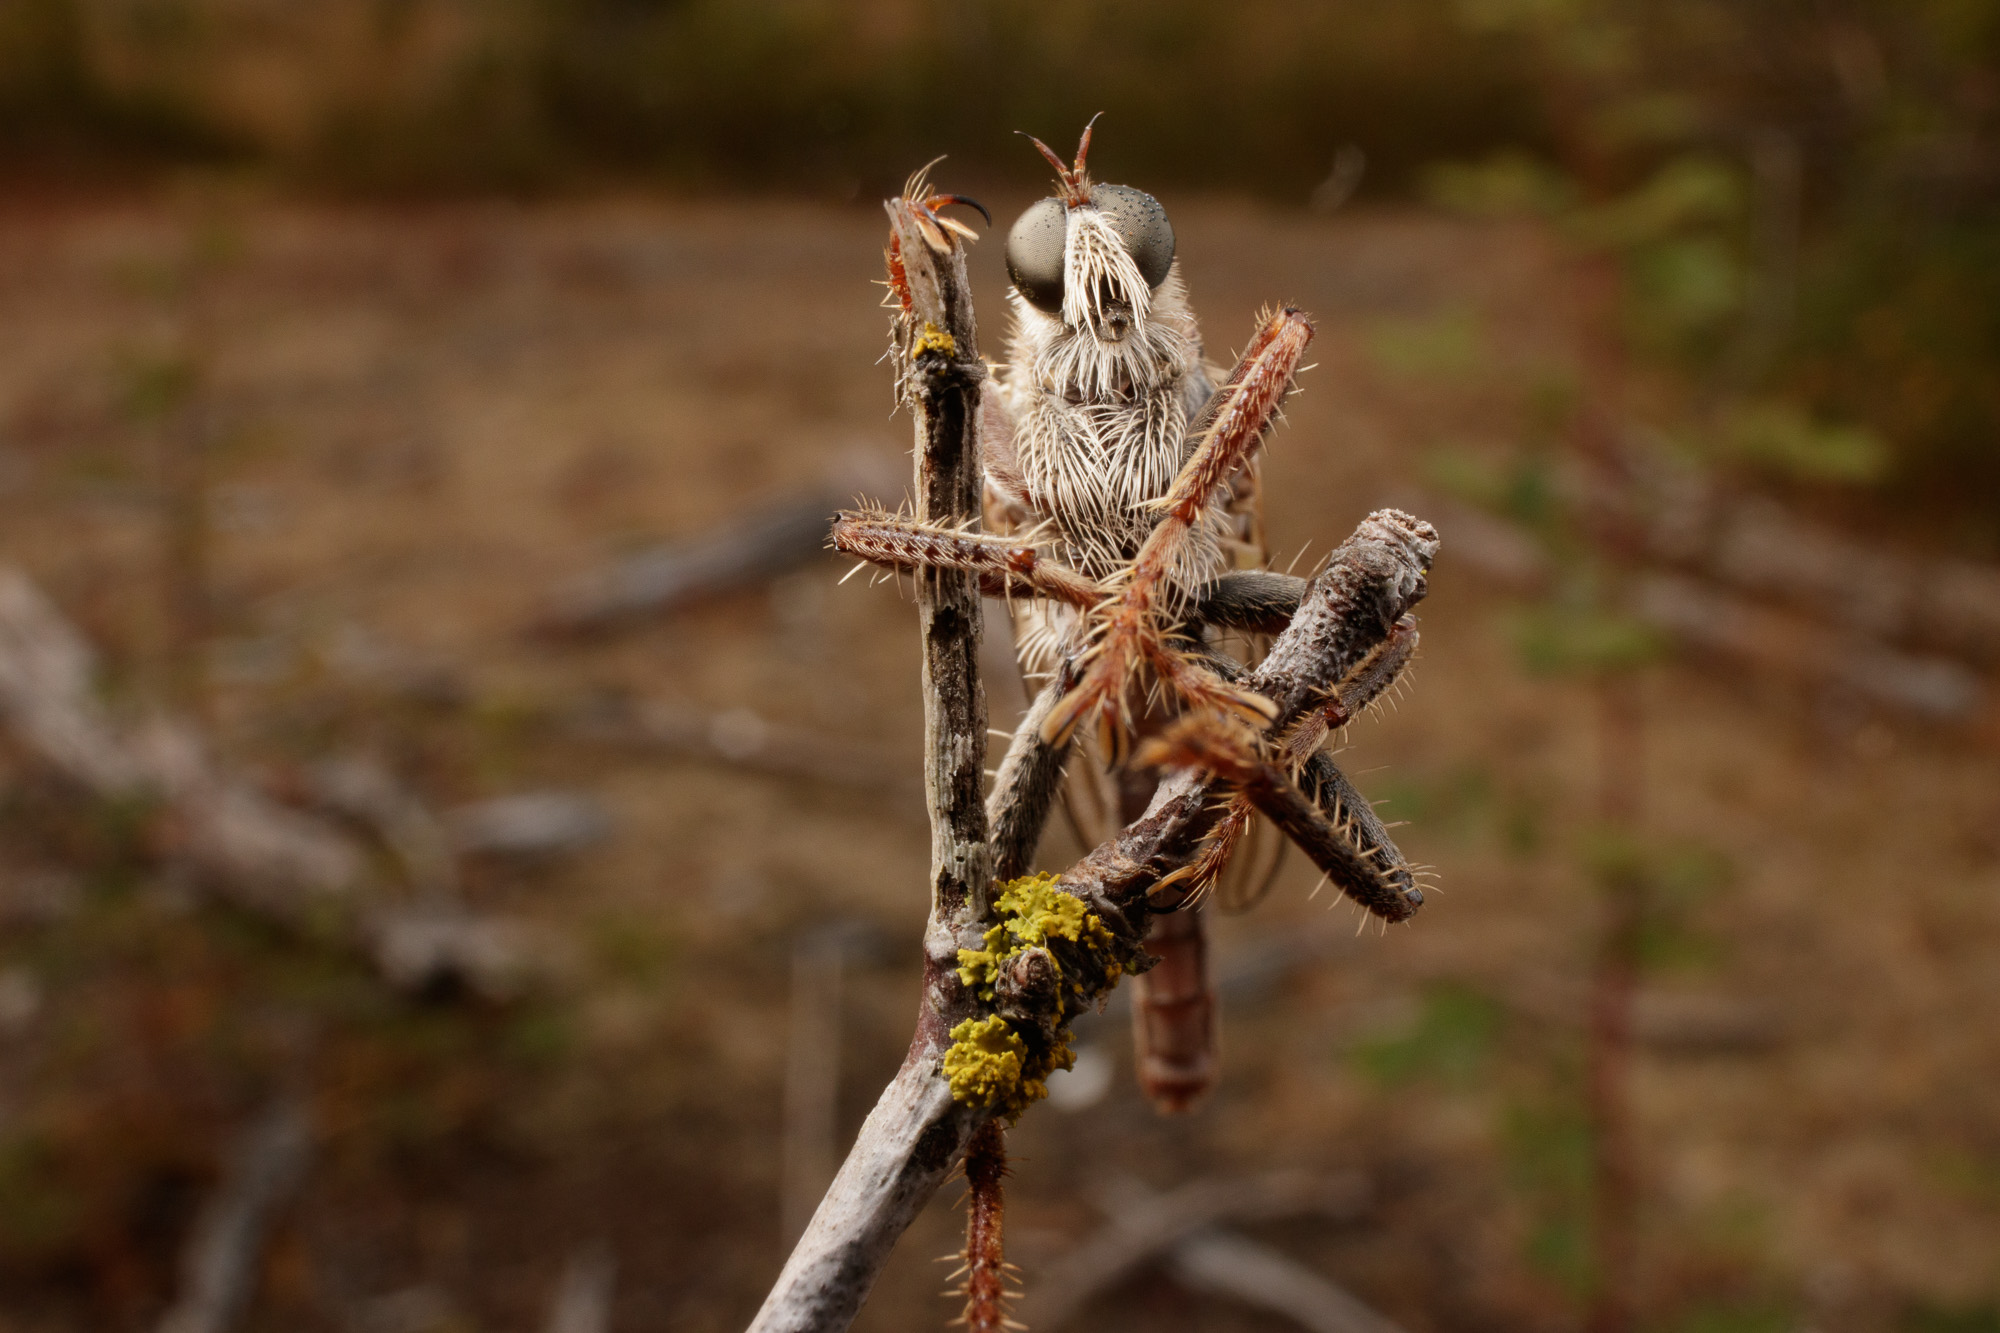
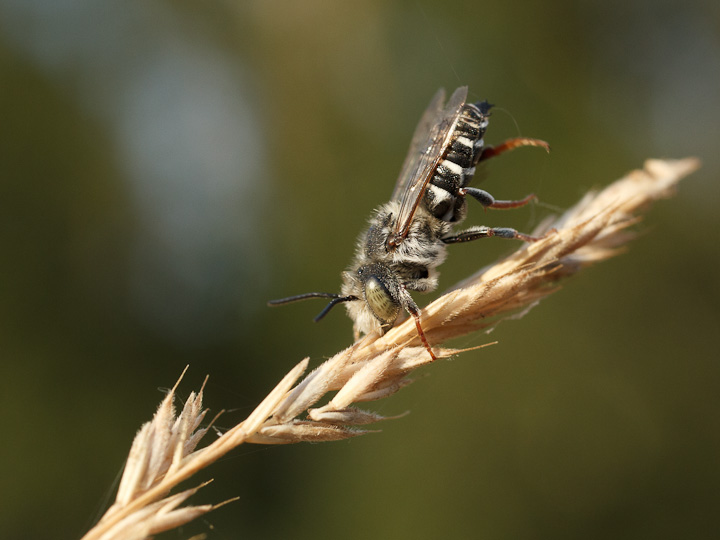
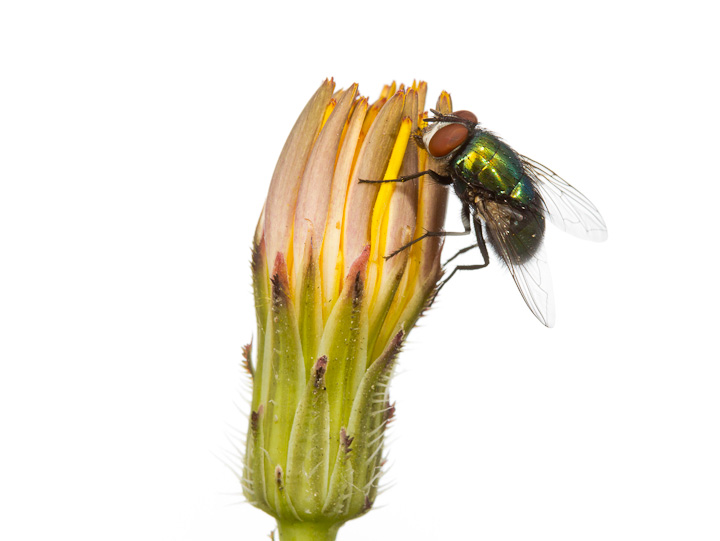
This image of Scleropogon bradleyi (a big late summer robber fly) is also shot at 55 mm. Pretty decent sharpness, not too bad with colour rendition and contrast.
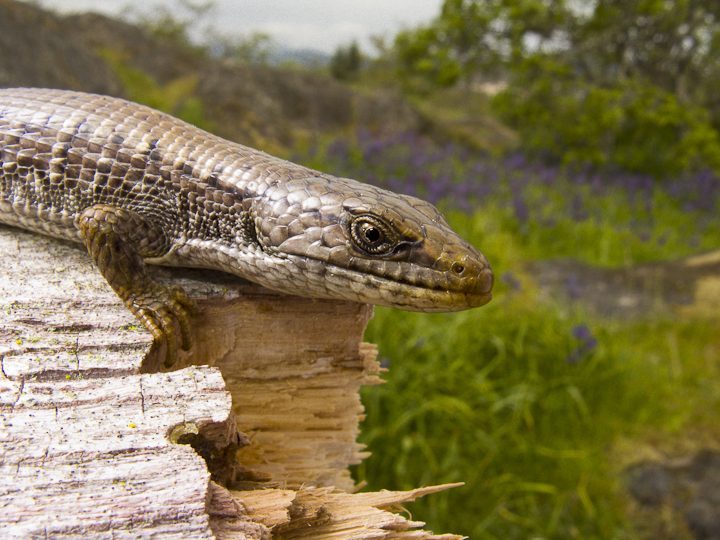
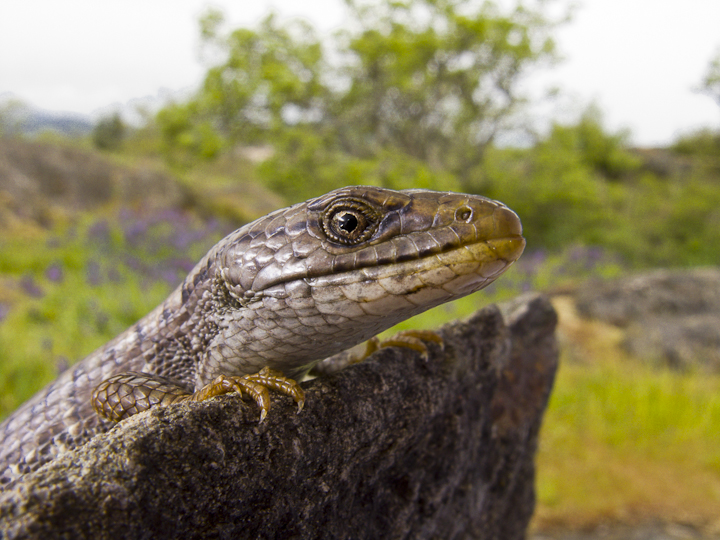
Wideish

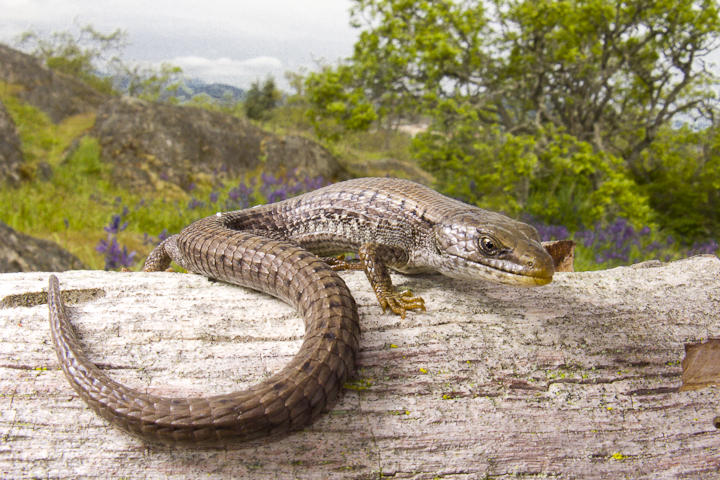
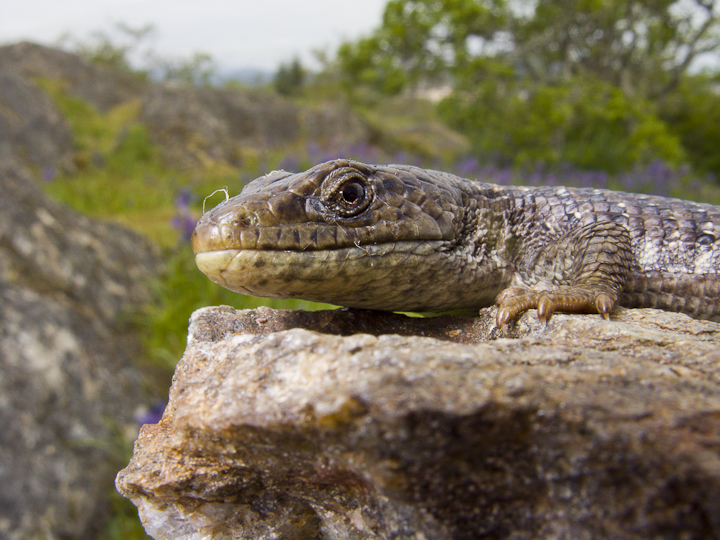
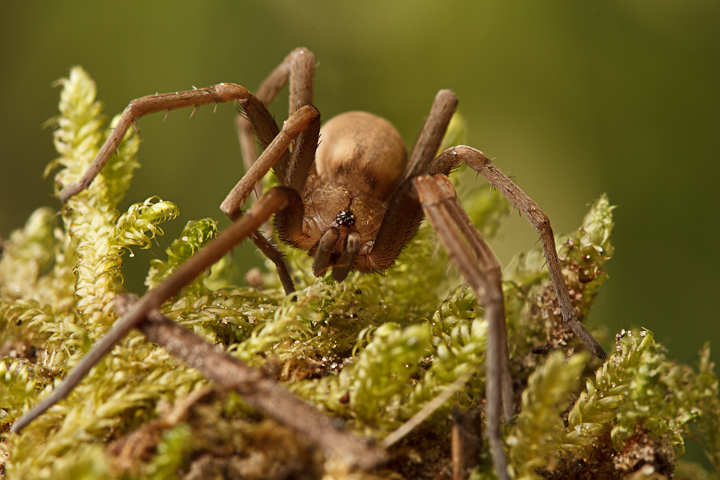
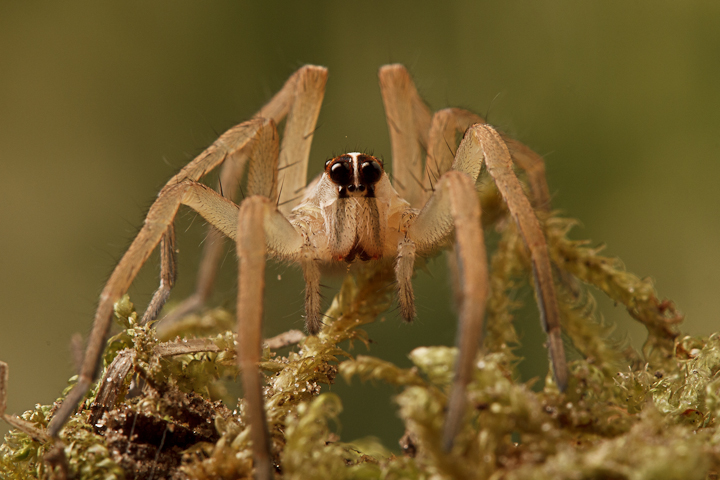
This image of a western red-backed salamander I shot at 25mm. It is wide-ish bringing in a bit of the background.

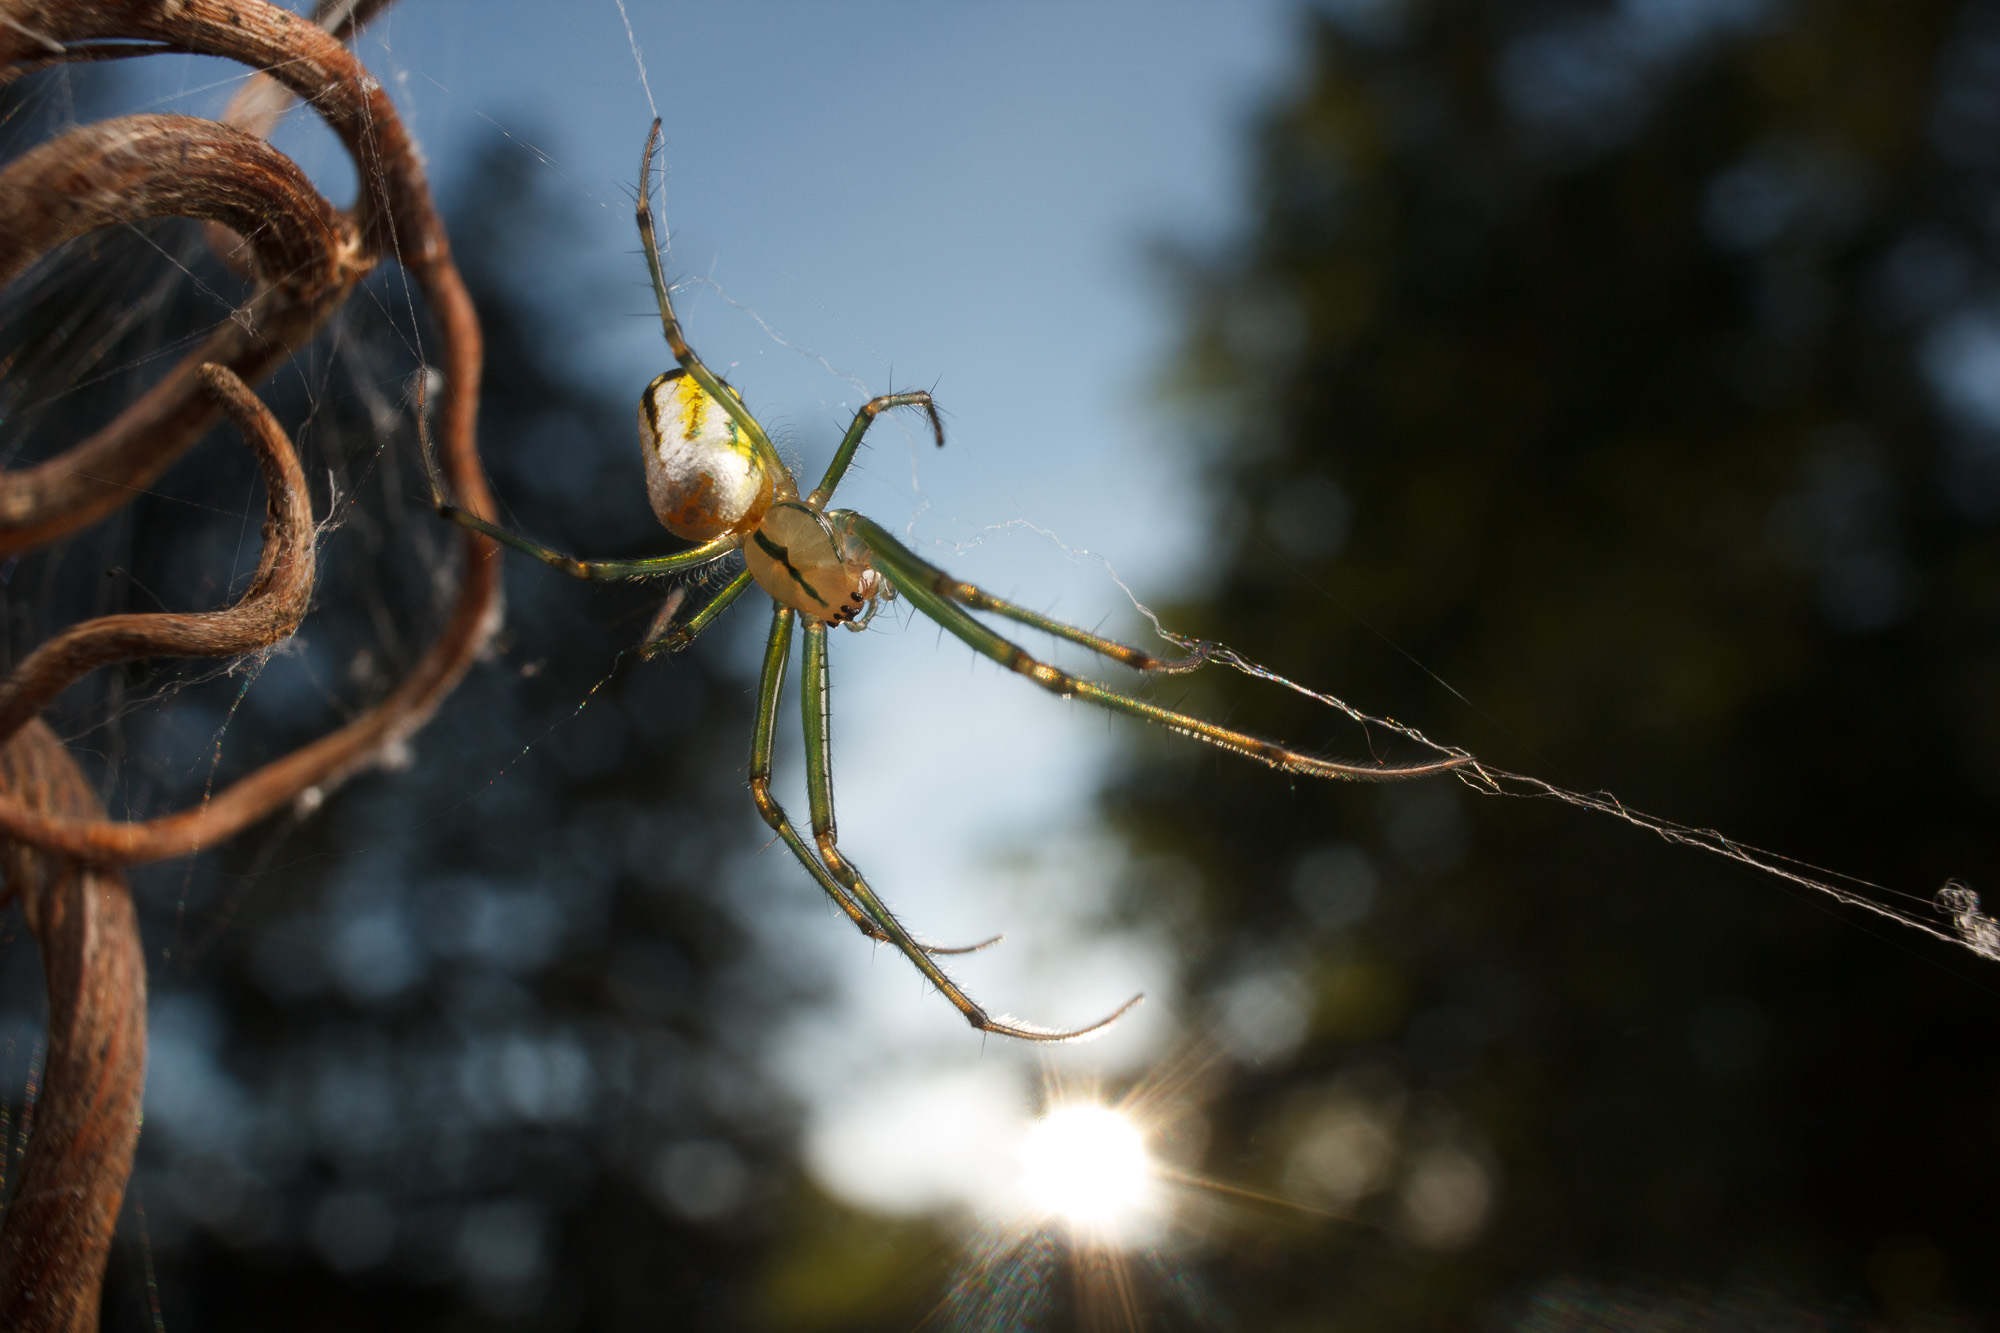
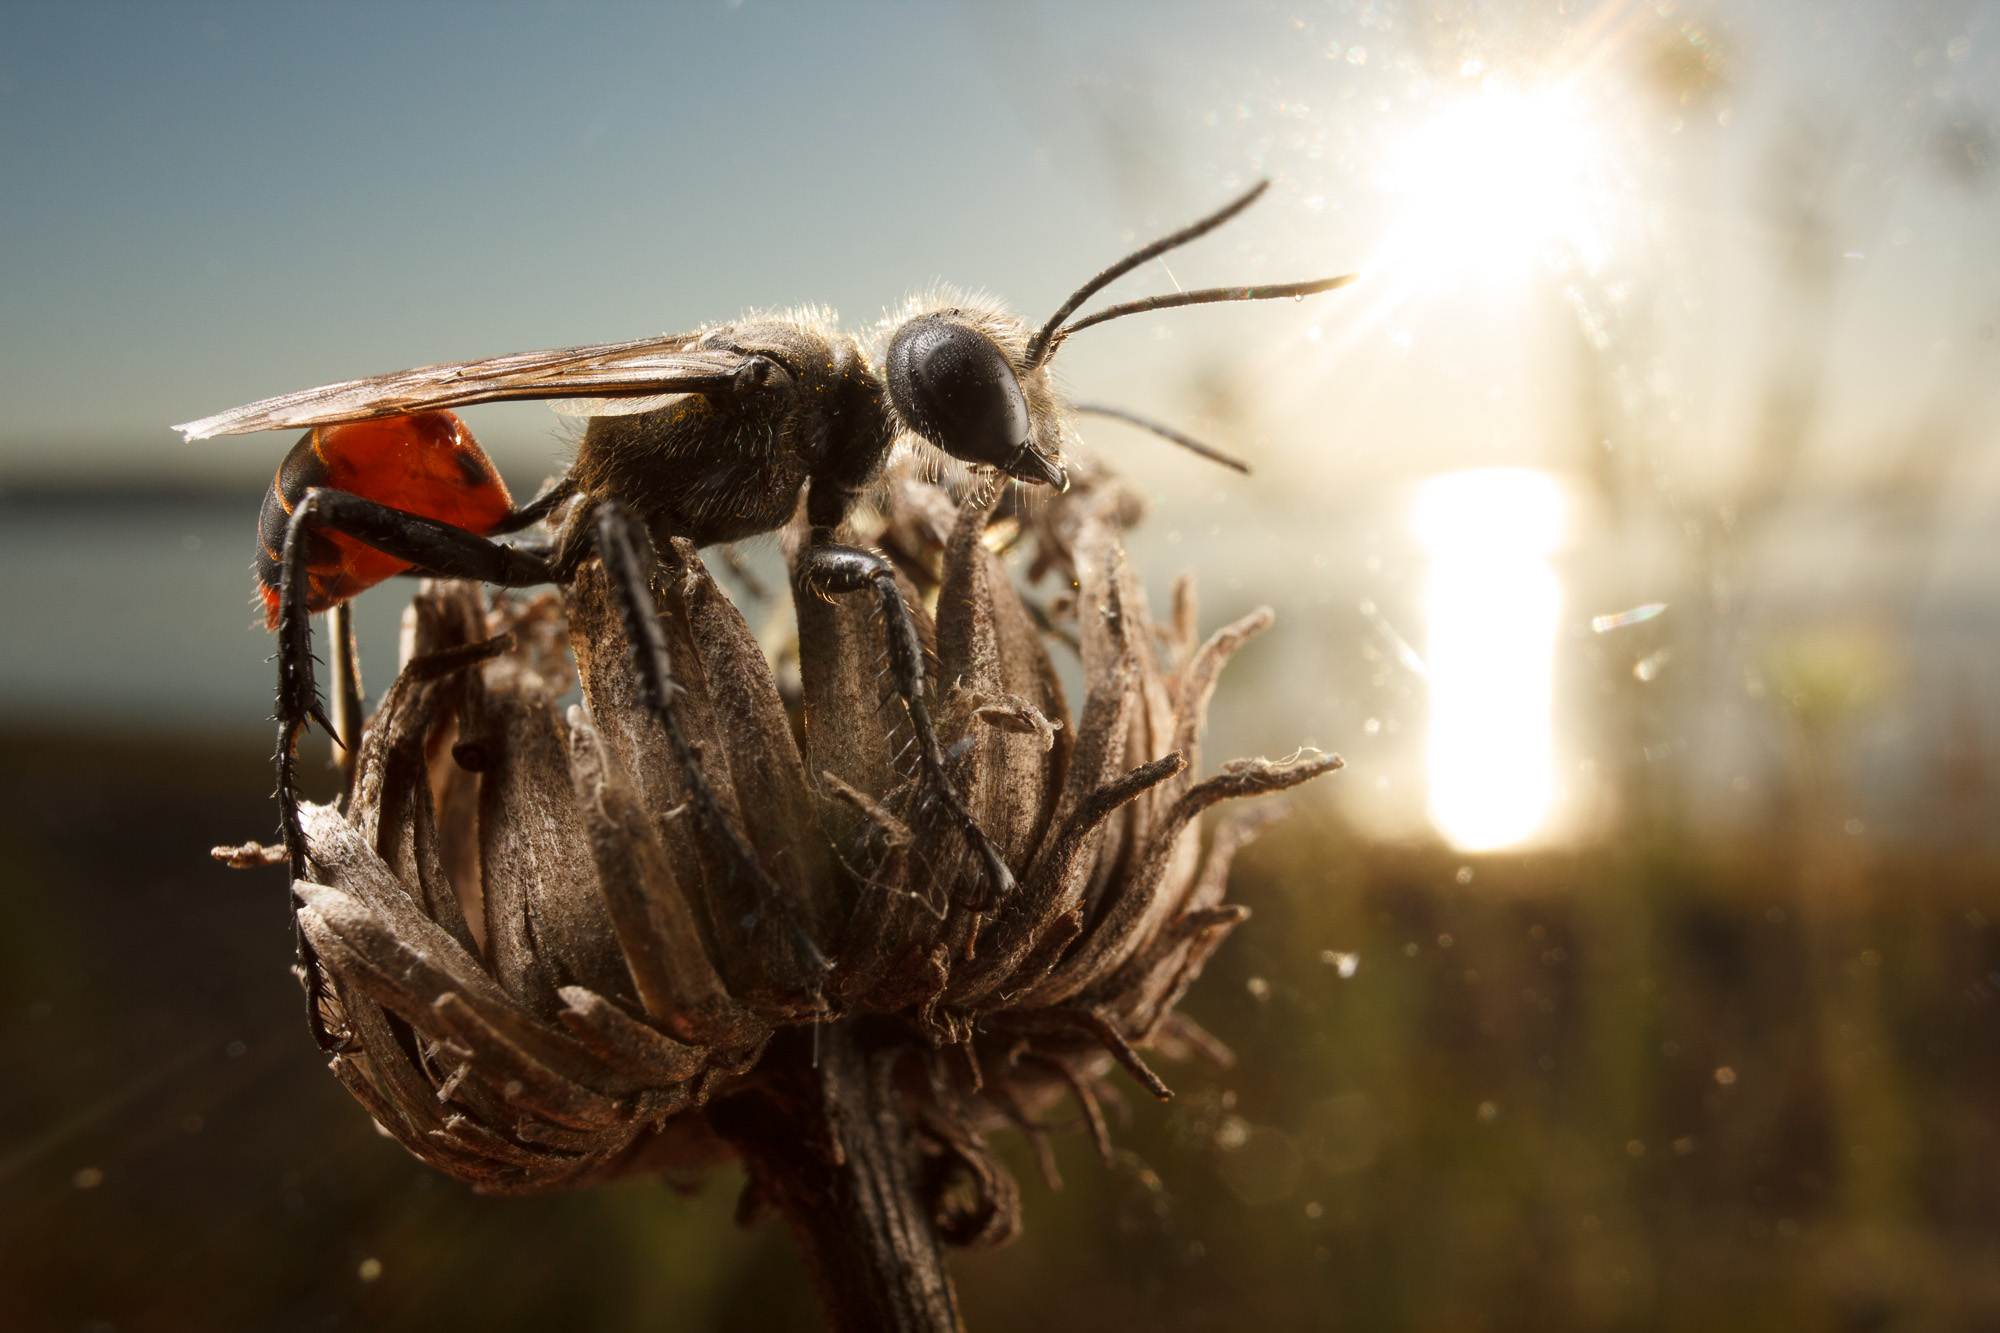
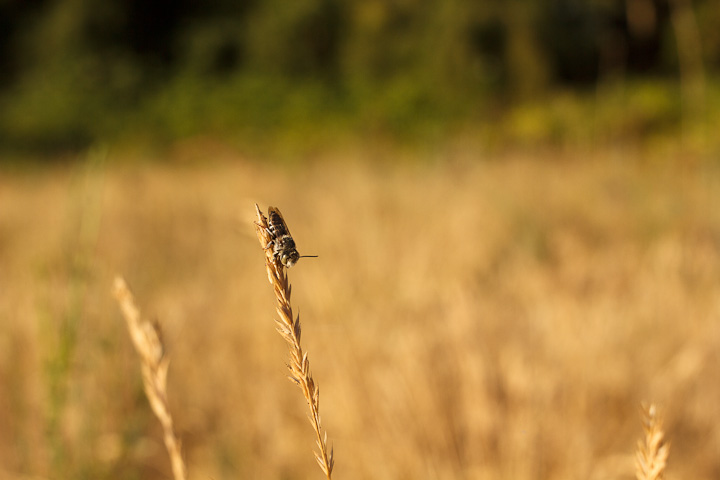
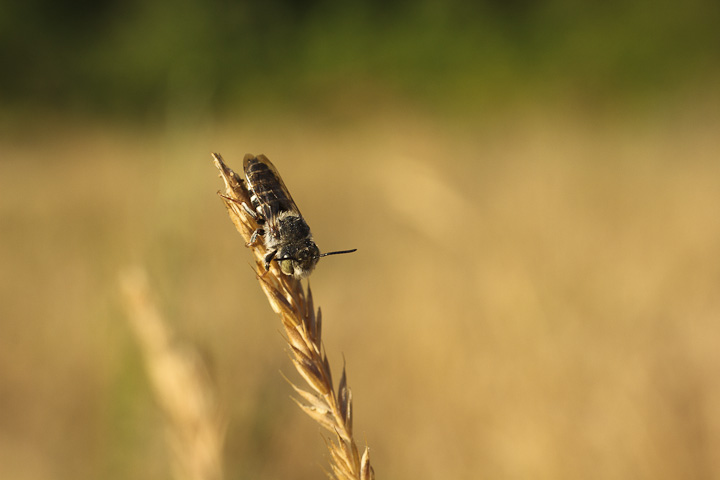
This image of Prionyx canadensis (a sphecid wasp) was shot at 27 mm. It brings in a decent amount of background, showing that this was shot by the water at dawn. Note the hexagonal highlight below the wasp’s head. This is a harbinger of bad things to come…

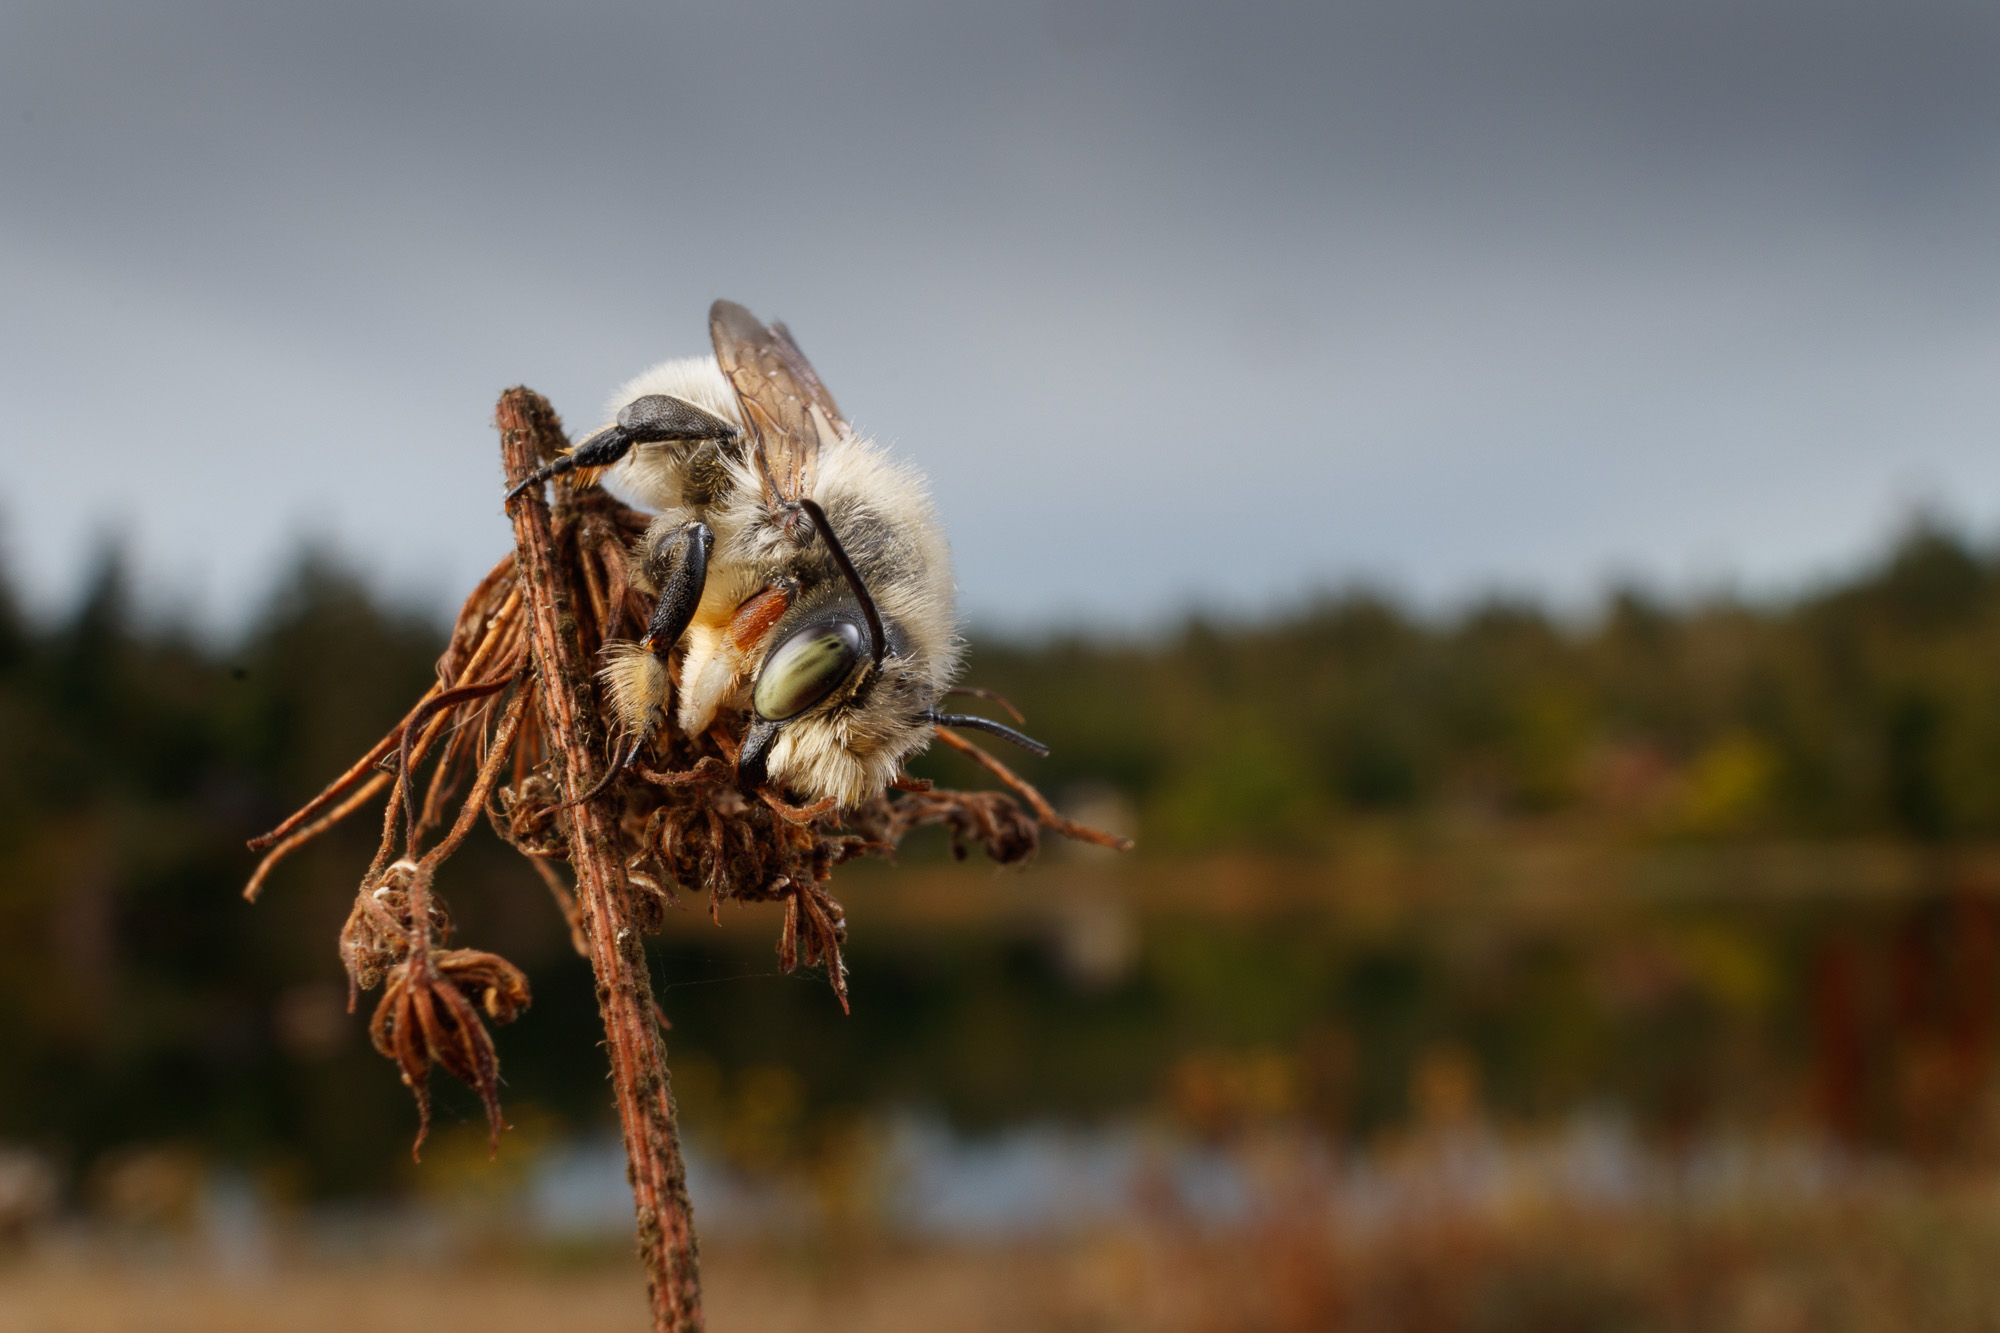
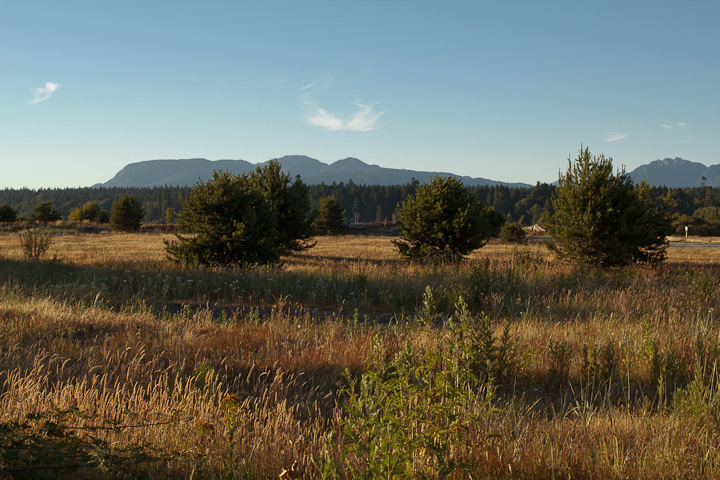
Another shot of the Megachile male, showing it in front of Albert Head Lagoon. This was shot at 25 mm, and I was quite impressed with the contrast.

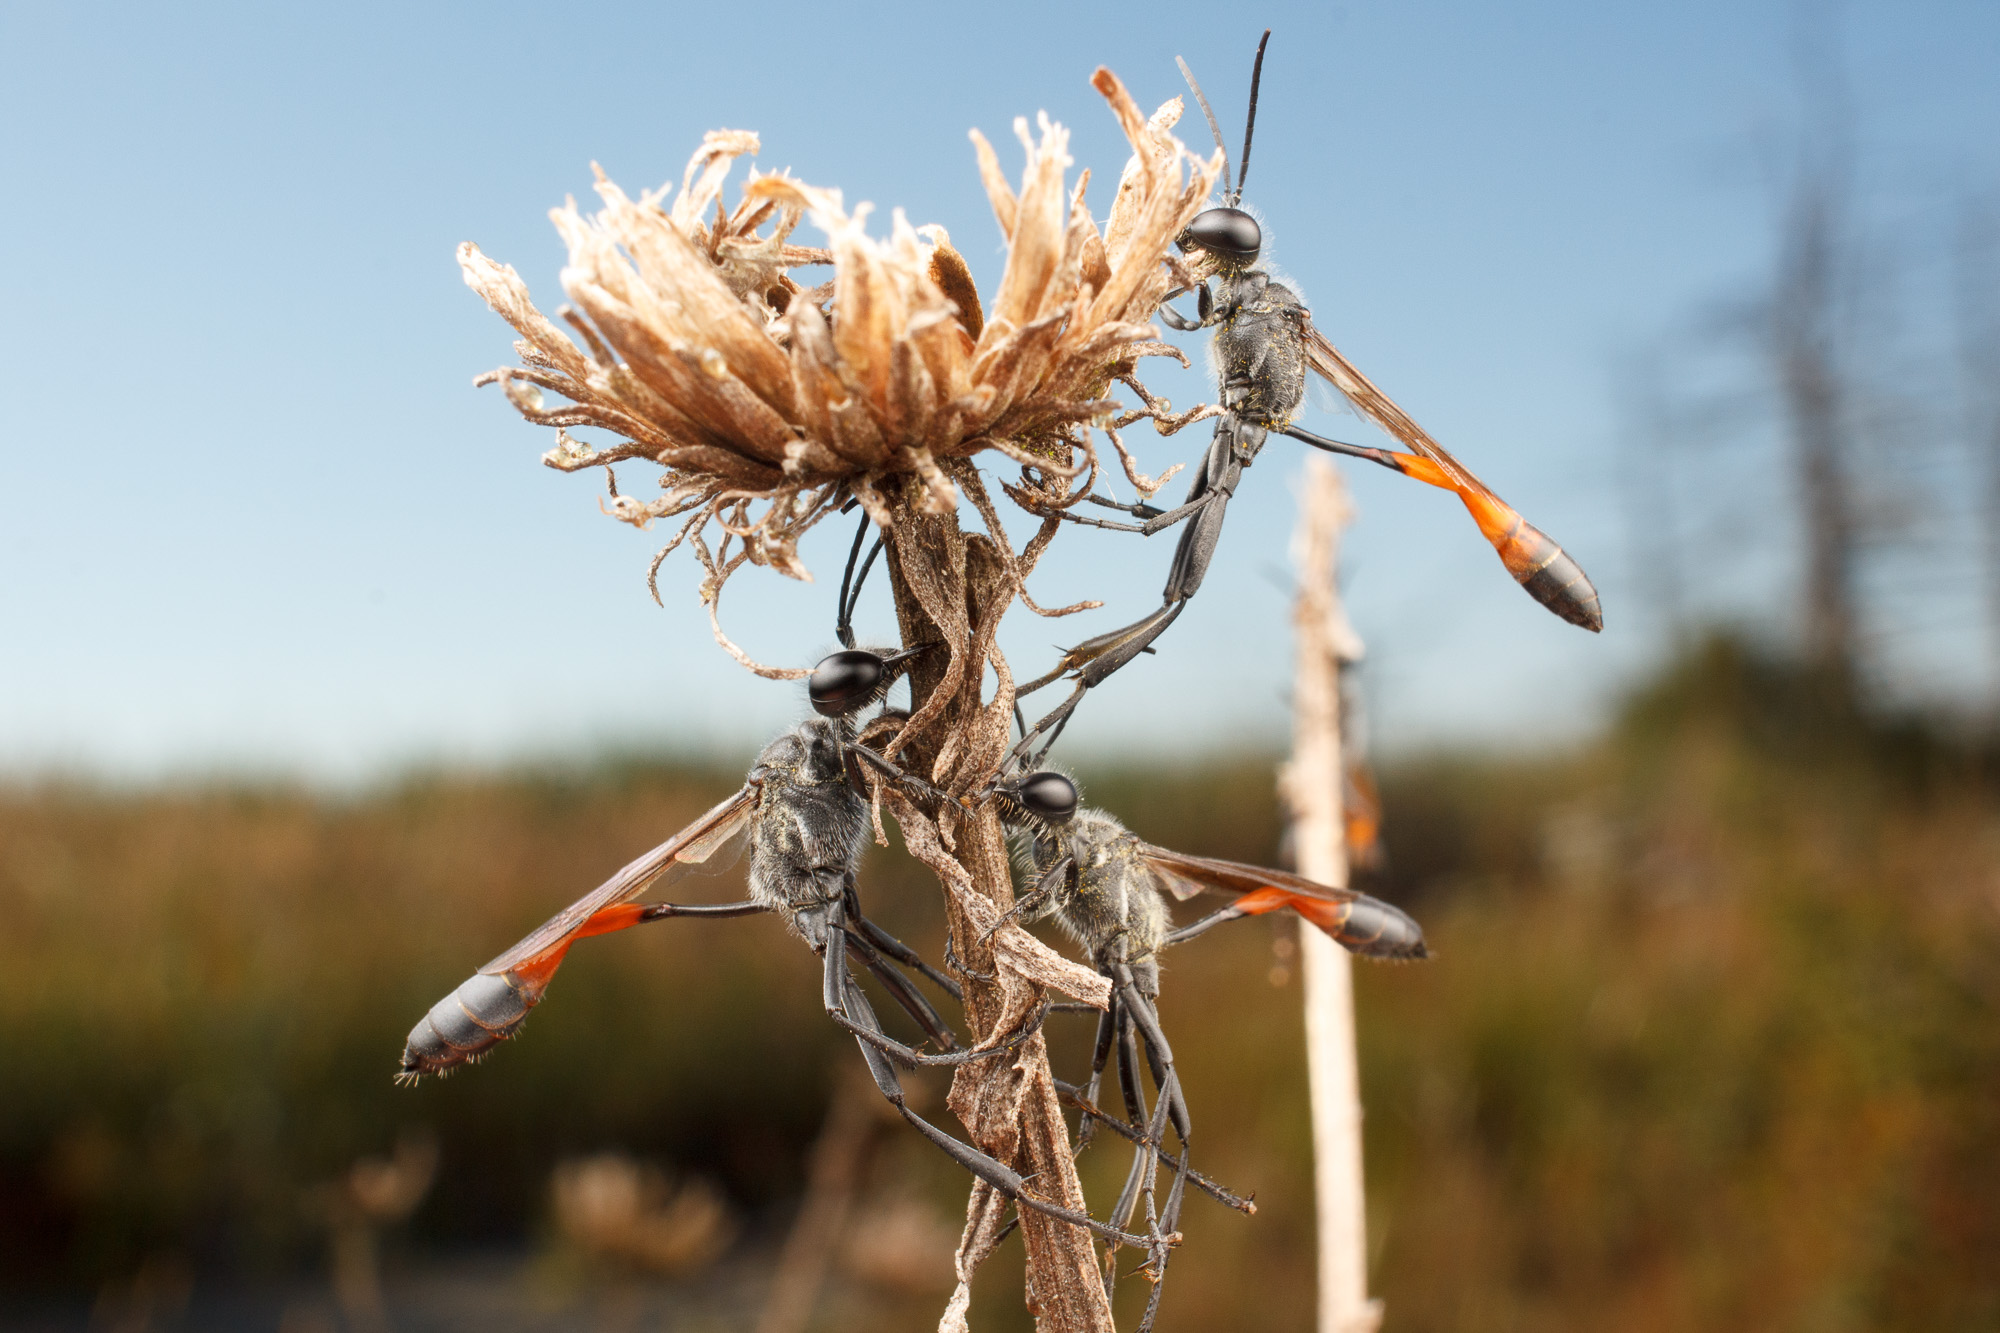
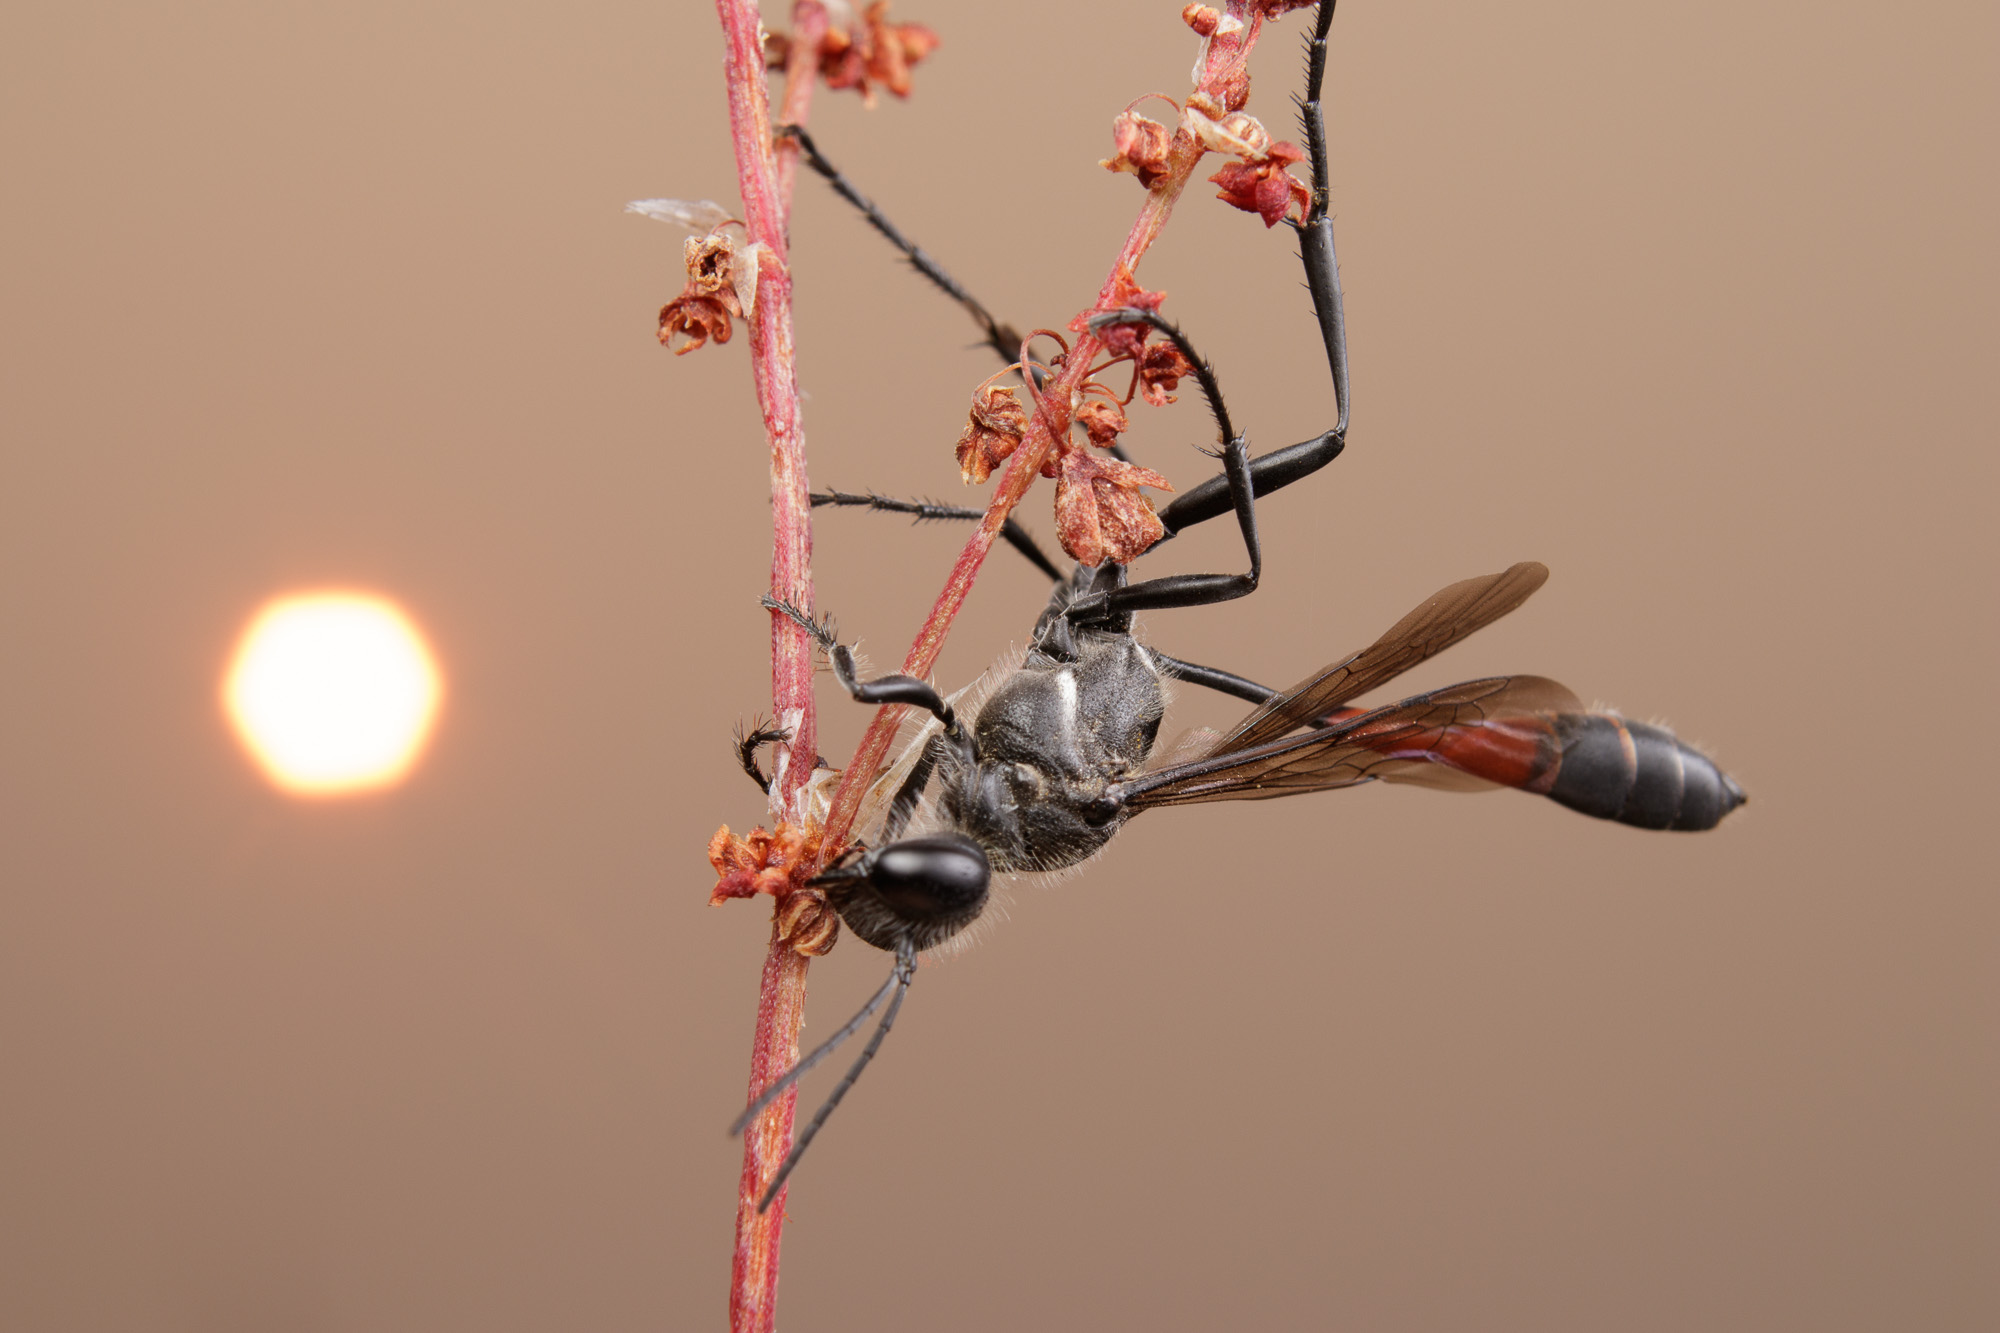
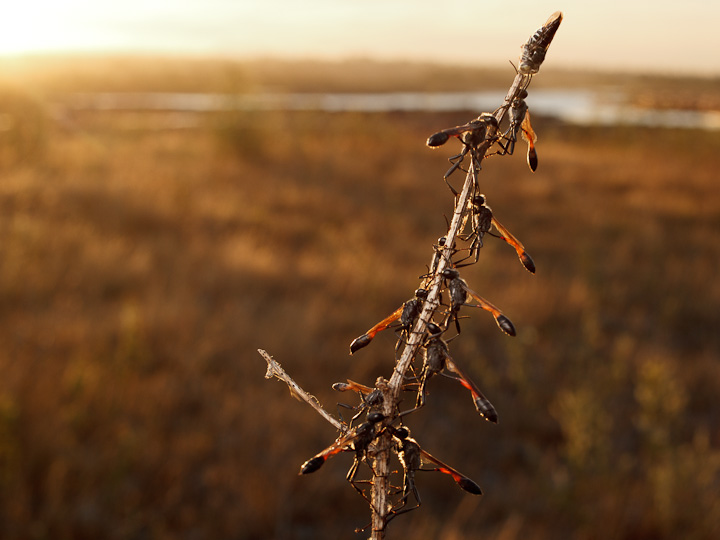
A group of Ammophila resting on Puget Sound Gumweed. This I shot at 28 mm, and I do like it…
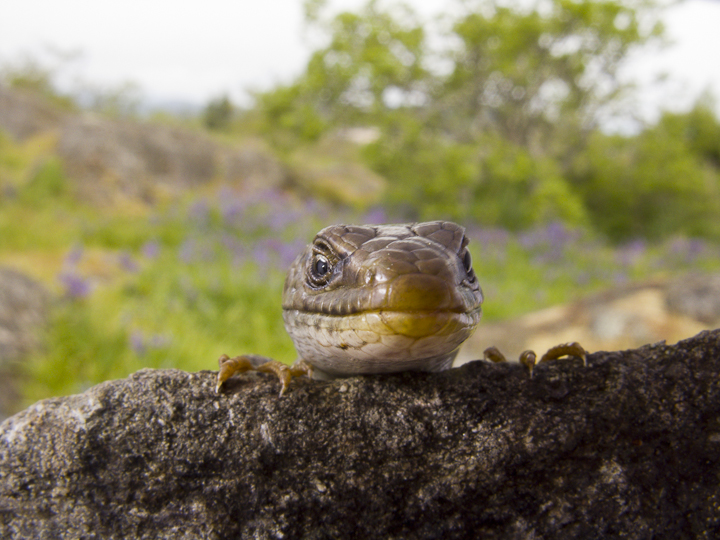
Wide

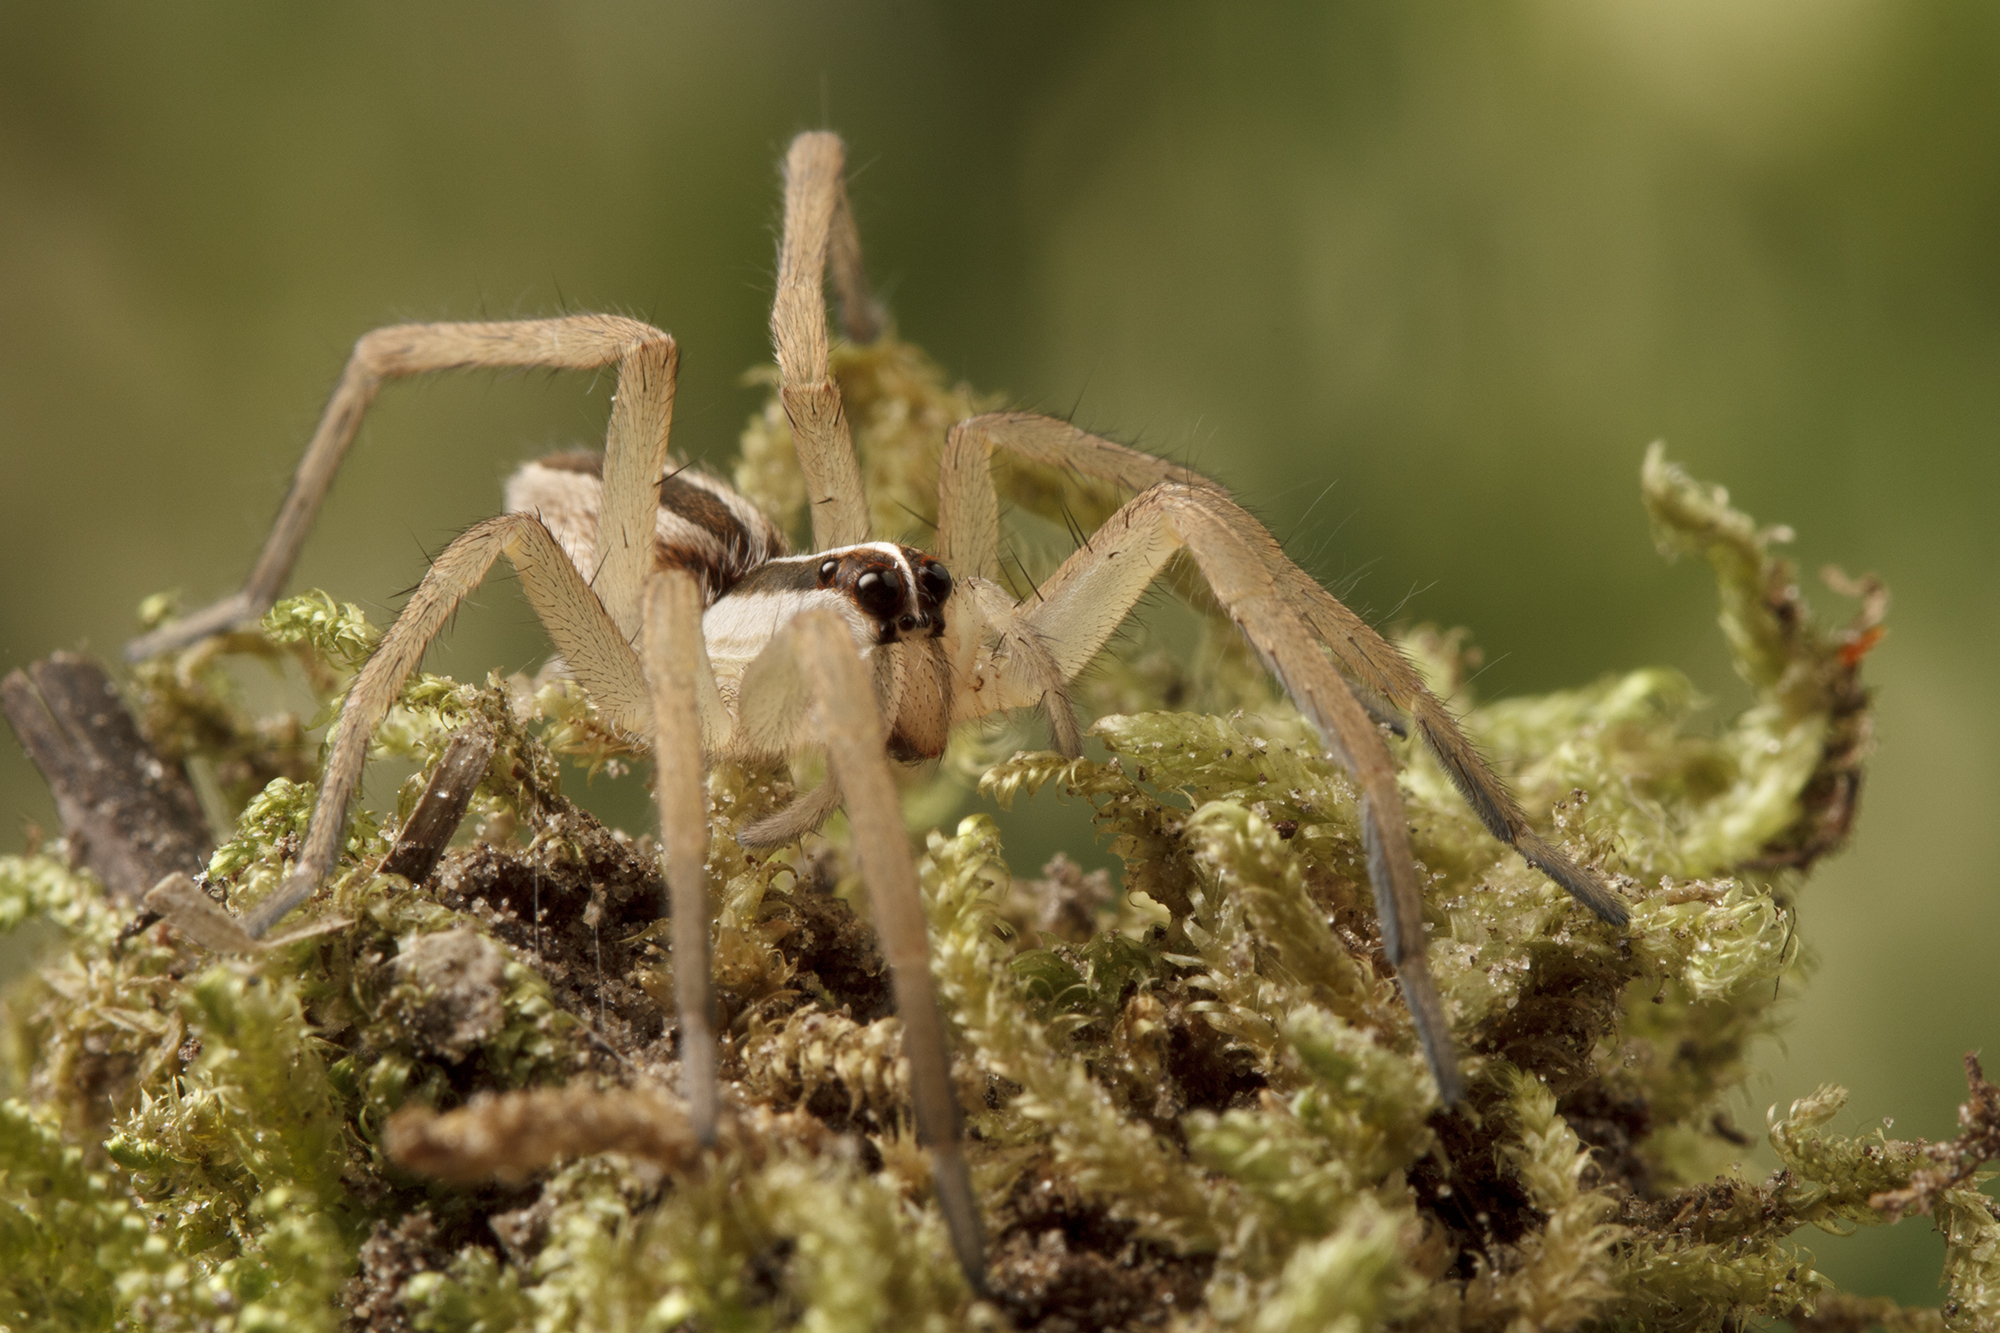
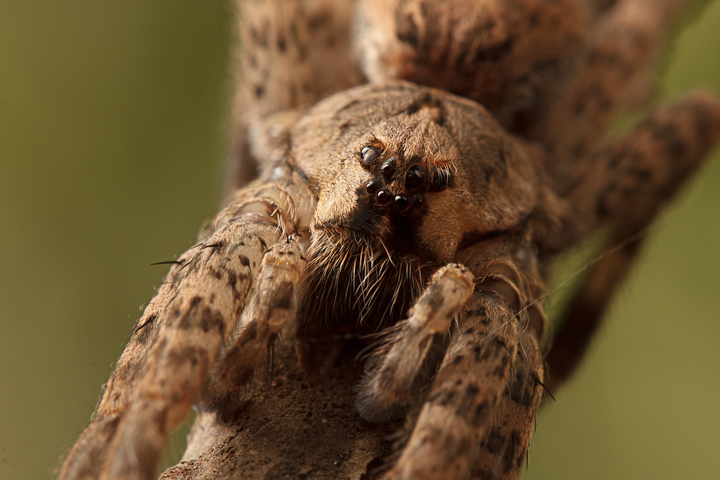
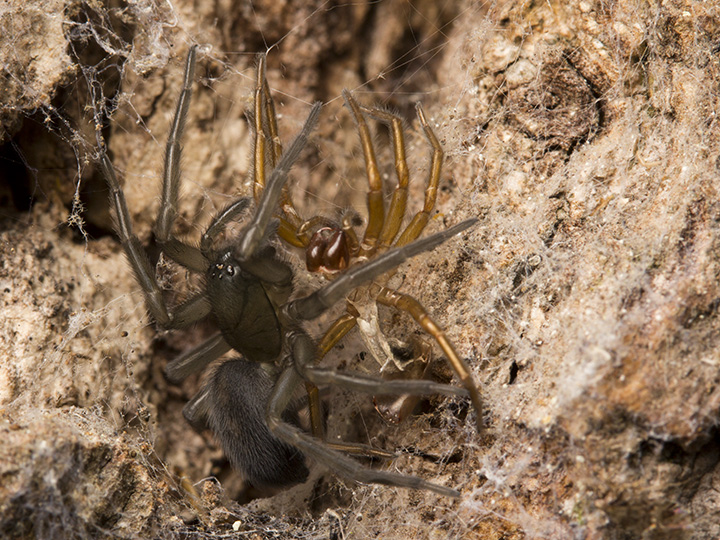
This is a shot at 18 mm, as wide as it goes. Yikes! Look at all that crap! This focal length is very close with a 12 mm tube, and the point of focus is very near the front element. This means that crud in, on, under and around the front element is fairly well in focus. Being a zoom, the interior of the lens is definitely not pristine. This problem is exacerbated by the need to pump light close to the lens, resulting in ugly flaring of the crud as the front element is obliquely illuminated. I ended up removing the front element for a good cleaning, but the problem has not entirely disappeared. It is more manageable though.


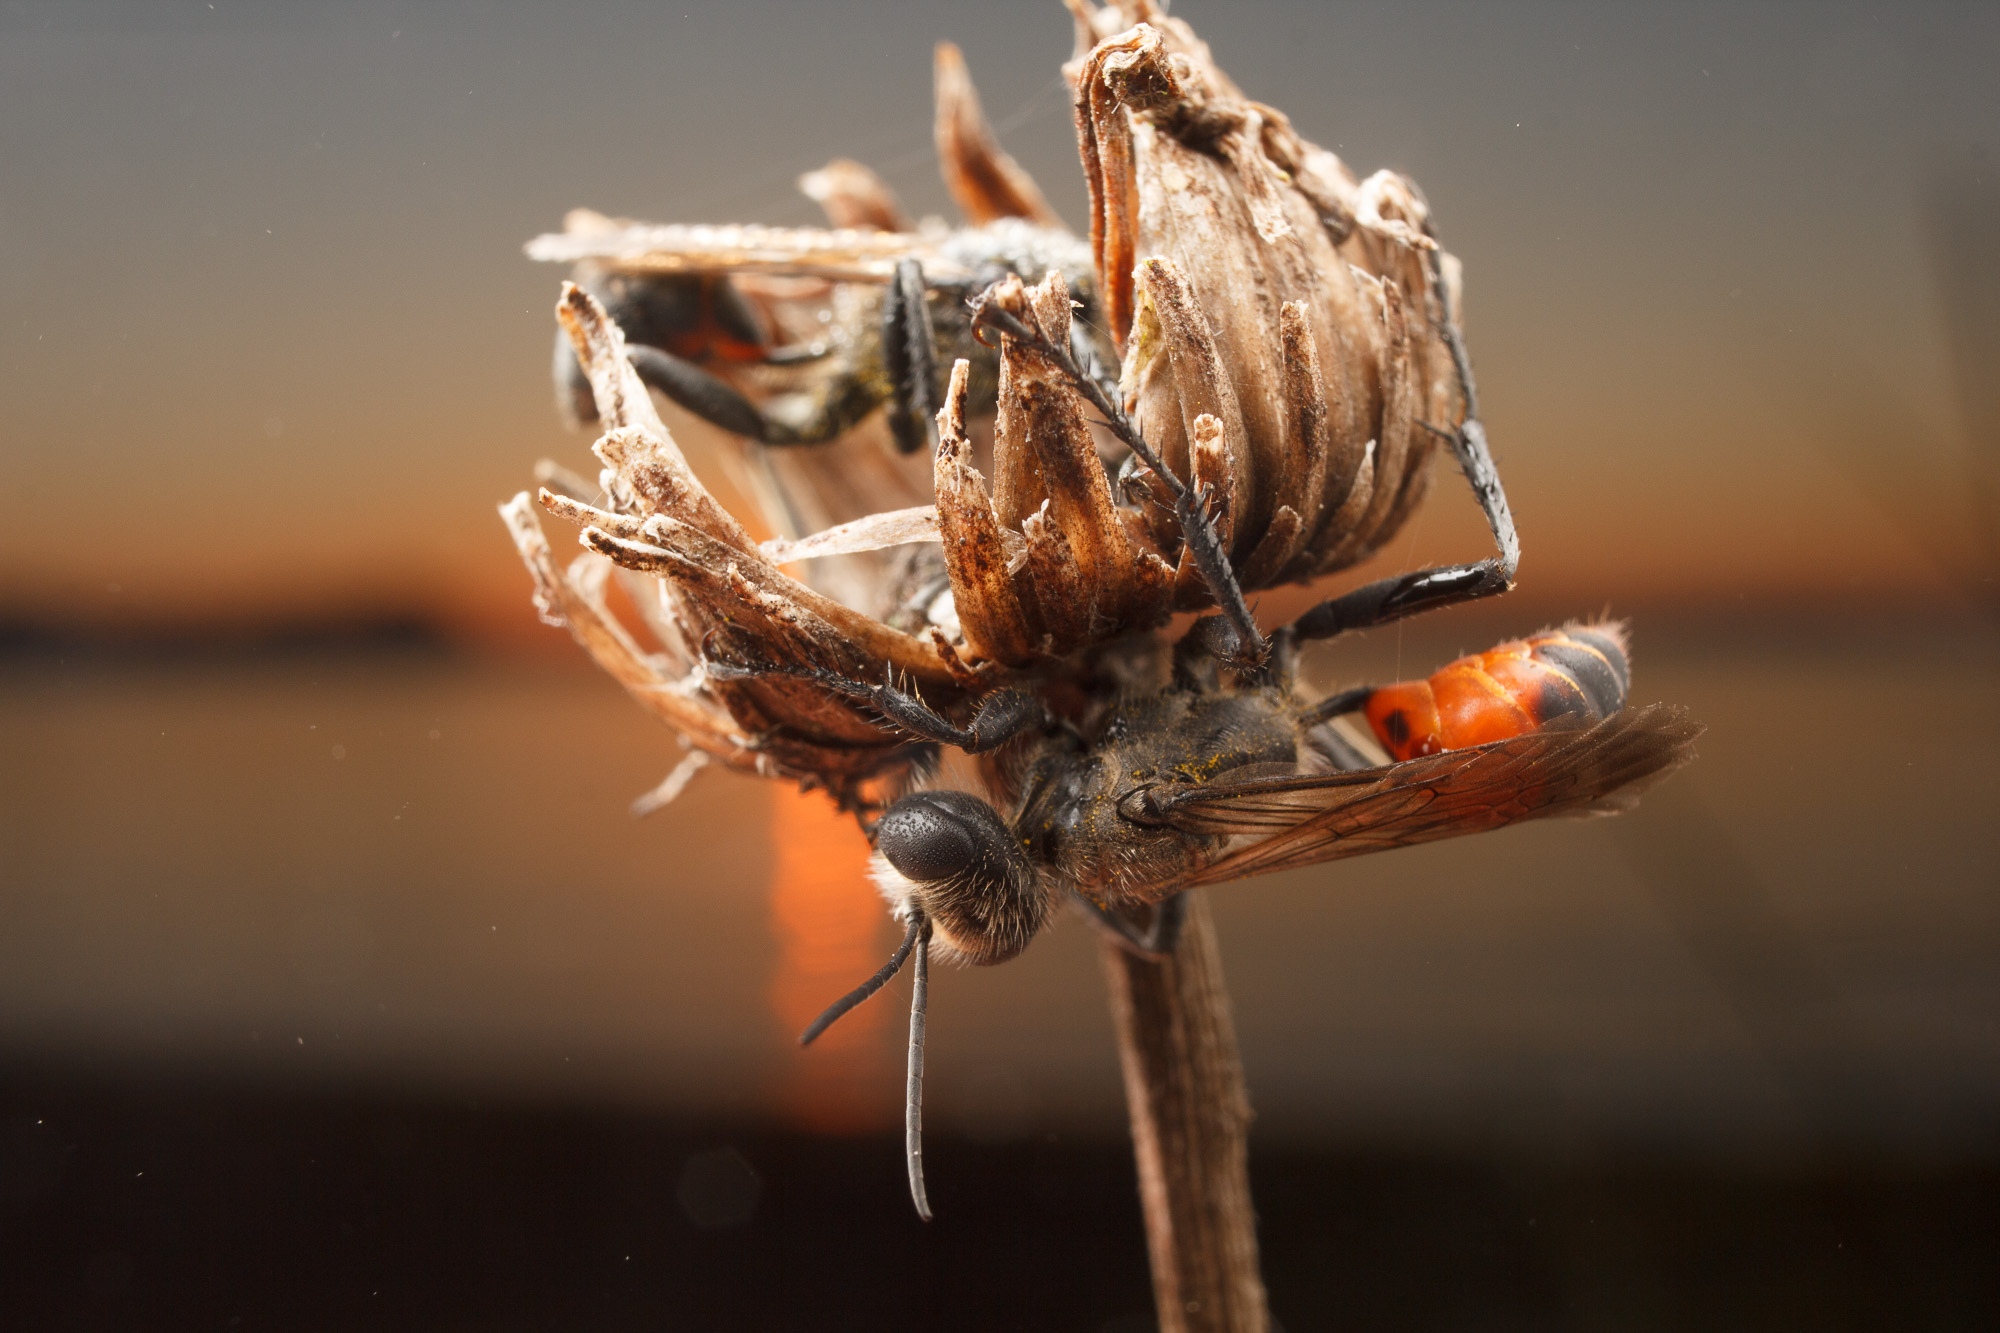
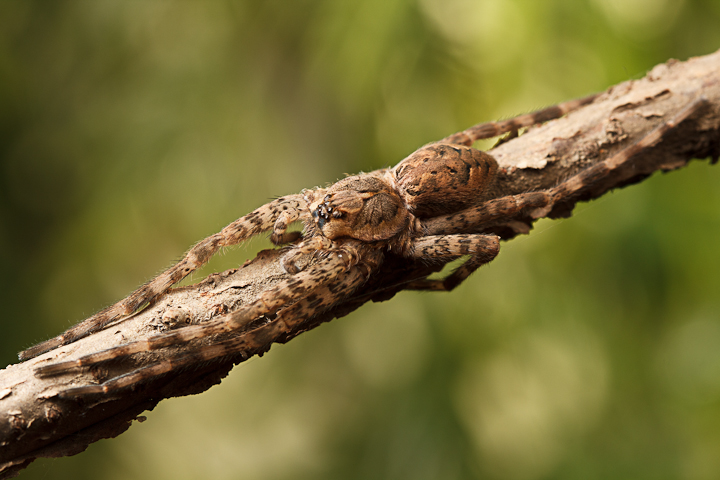
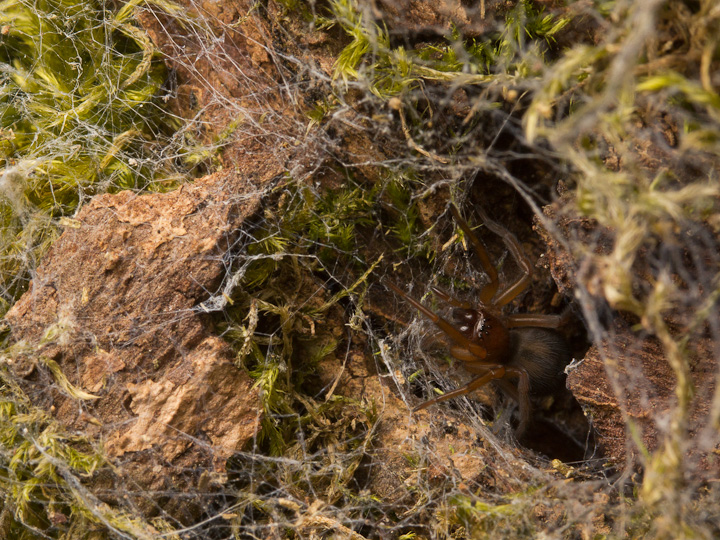
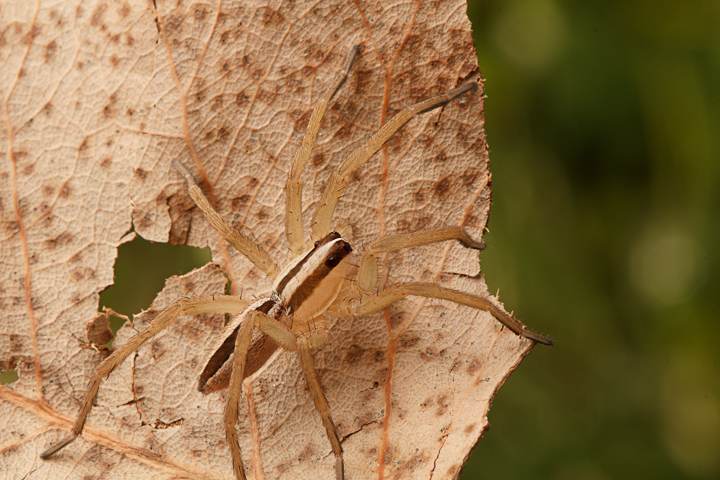
Here is a shot with less sky, again at 18 mm. This shows nicely how the background is not fully blurred, and the scattered logs and moss of the habitat are visible.


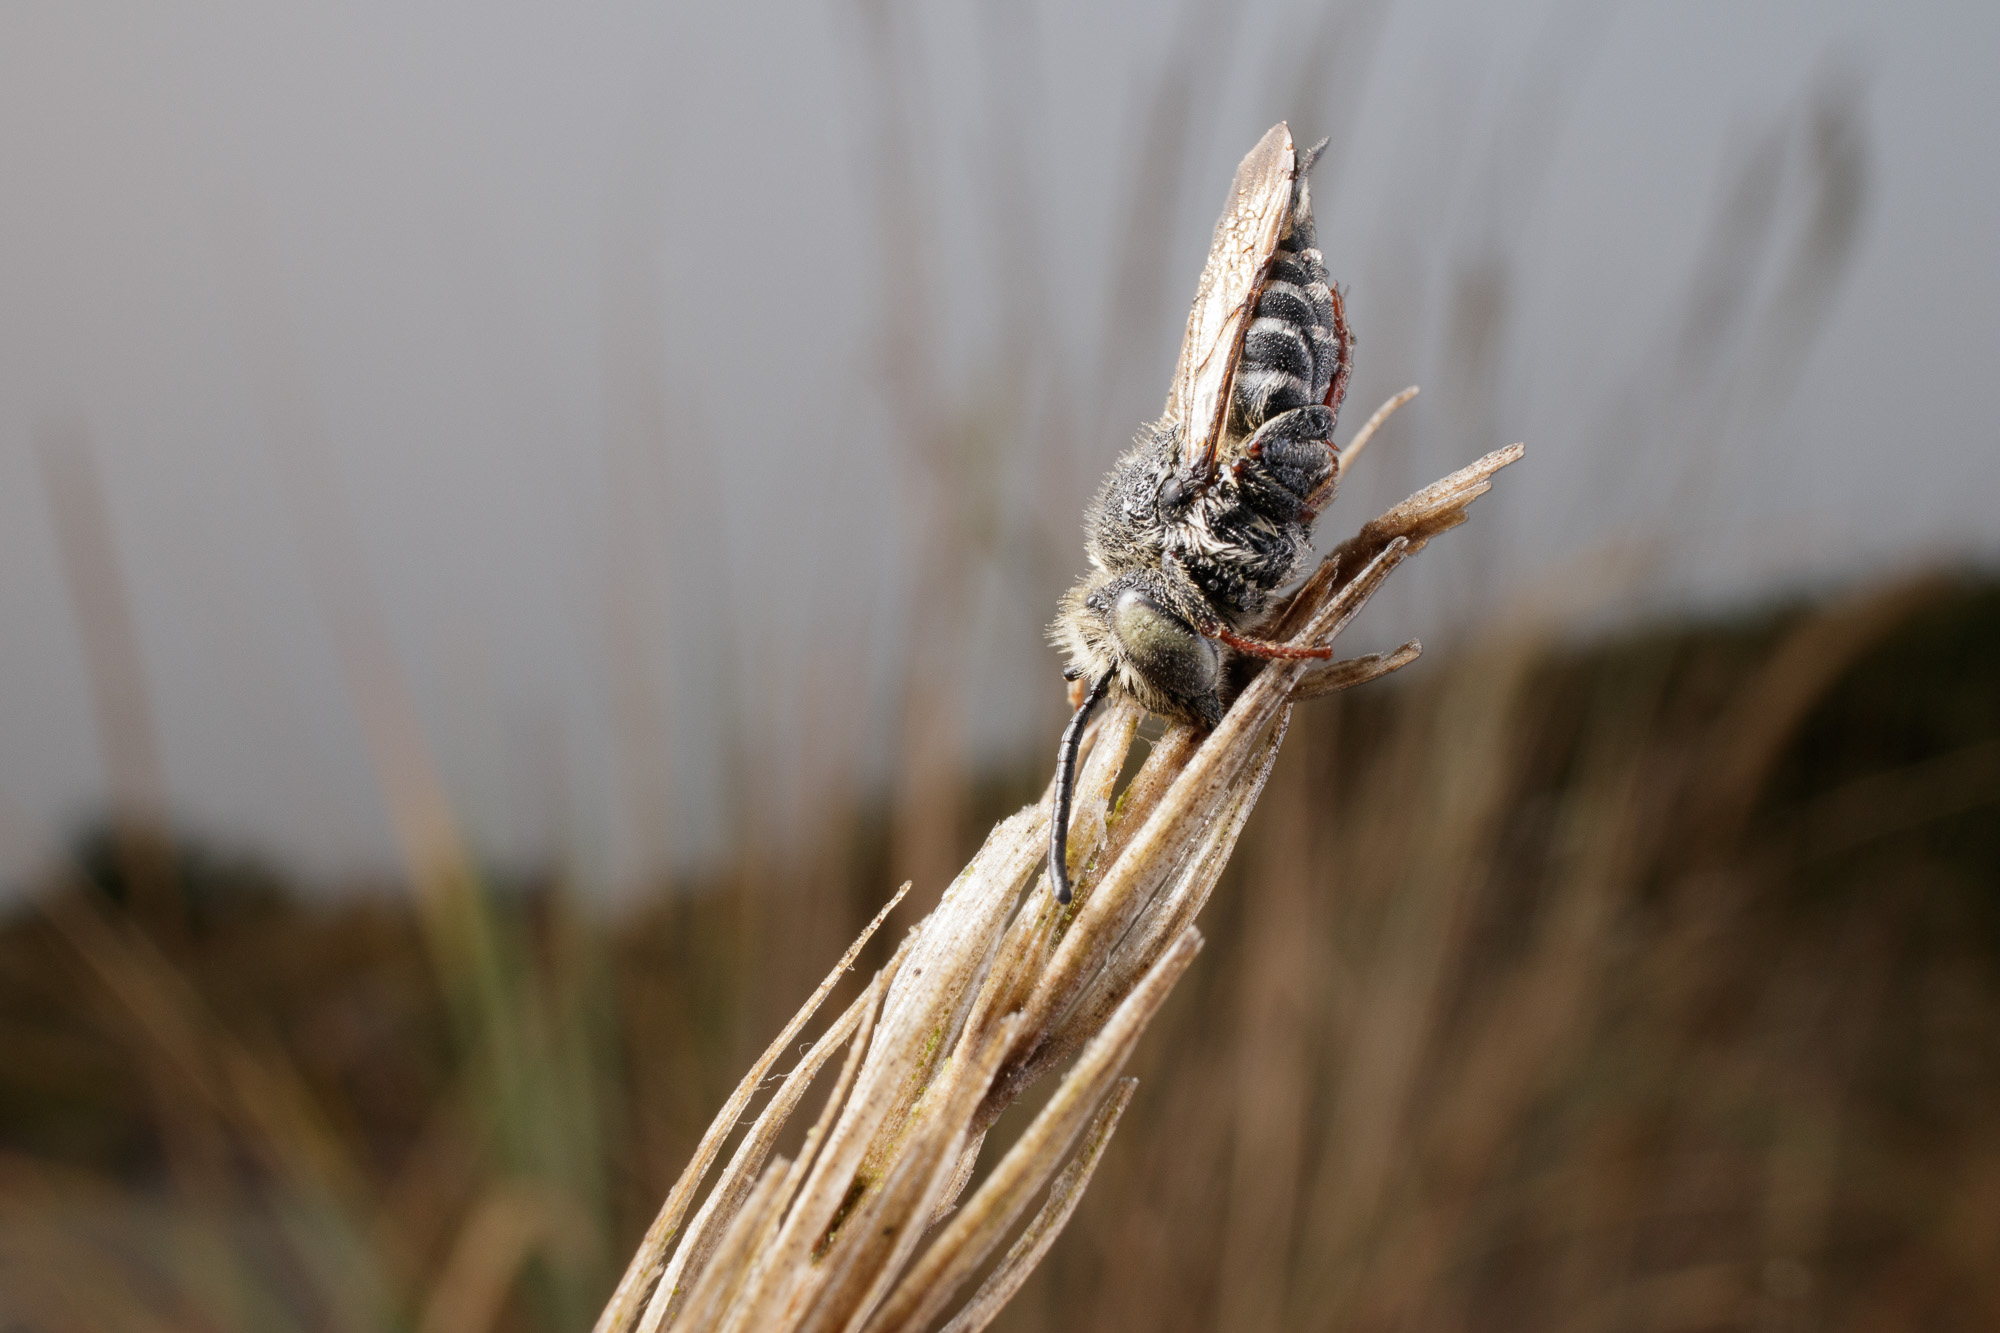
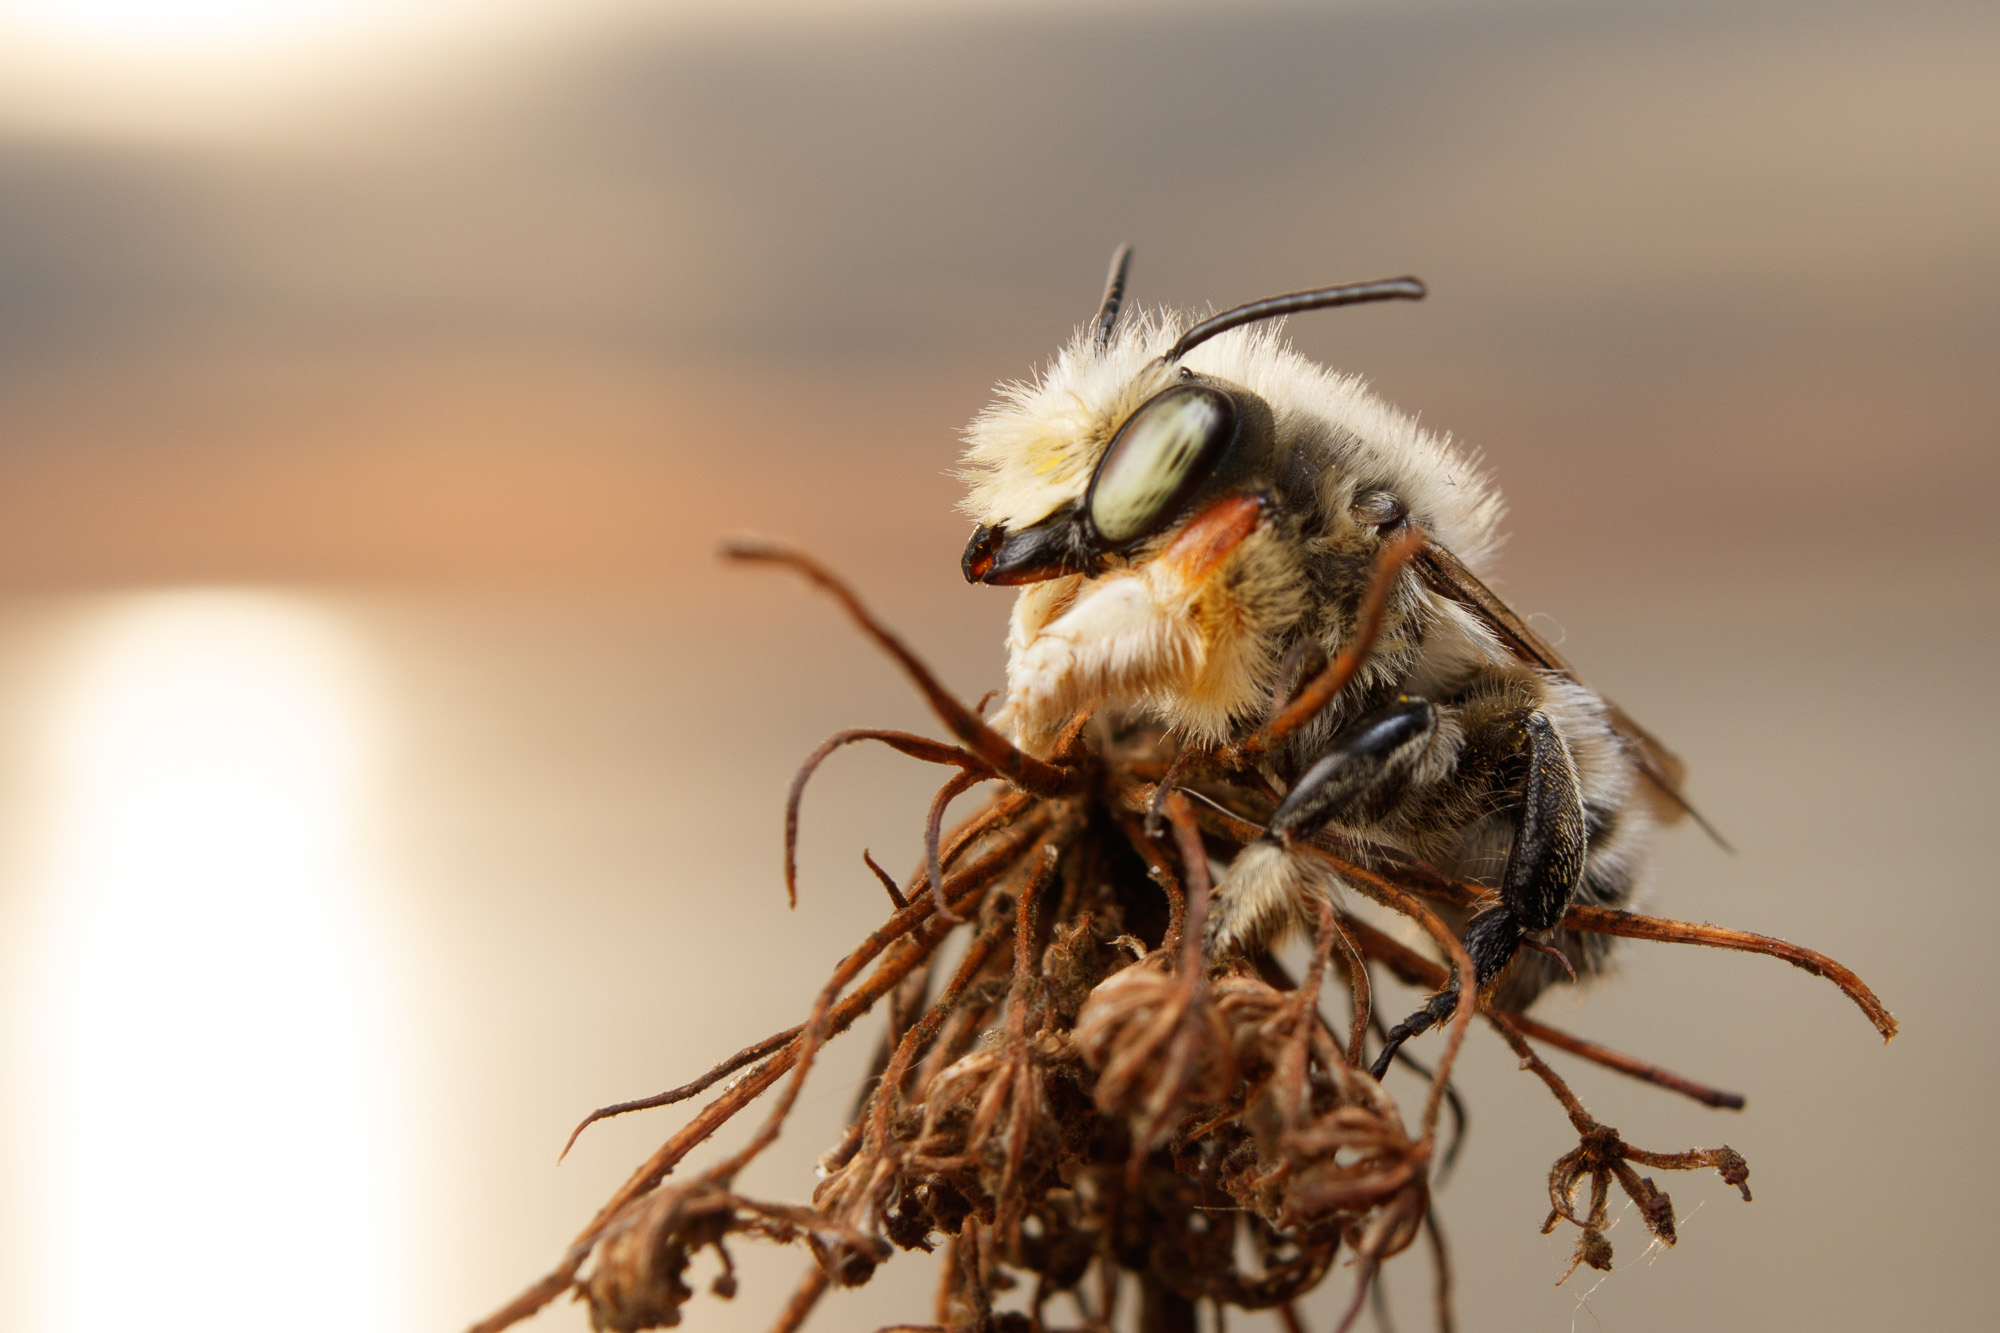
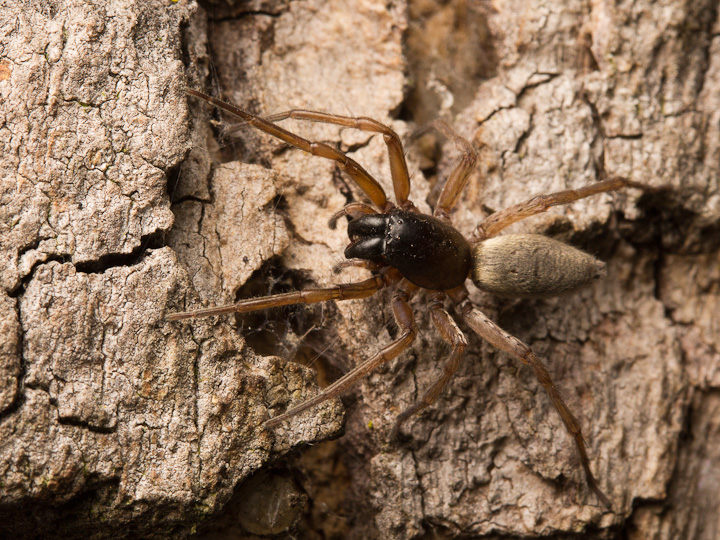
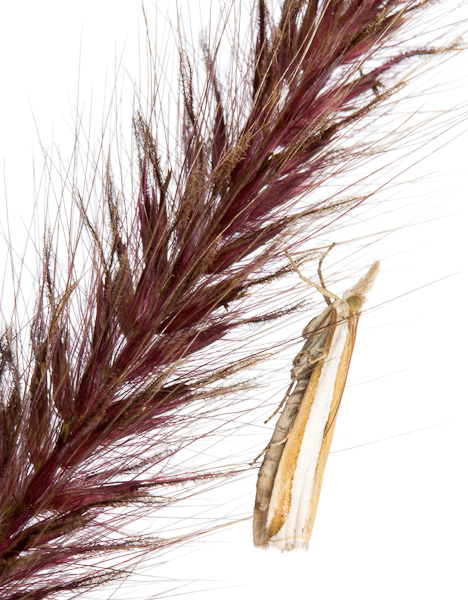
What would a post be without a Coelioxys? Here is one on Island View Beach, sleeping on grass. This too was shot at 18 mm, and brings a bunch of the background elements into semi-focus.

I will sum up in a future post, but for now, let me state that the 18-55 is an underrated lens. It is tricky to use at the widest setting, but at moderate and long focal lengths is a decent stand in for a macro lens. The hexagonal highlights are not very attractive, but given care as to the field of view and lighting, it is very usable for both short tele and wide-angle macro. I have not tried it with autofocus, as my lens will not do this anymore (maybe I will get the guts to rip its guts out one day and fix it), but at the distances you will have to light macro subjects at, autofocus would be more of a hindrance.

Tomorrow, I will cover another option for cheap wide (ish) angle macro, which I actually found to be much more enjoyable and higher quality than the 18-55. I will also cover briefly how I used both of these lenses.

Cheapskate Tuesday 29: Alligator Lizards with the A720 IS

IMG_2450-2

For this image, I wanted to show the Garry Oak habitat that I found this beautiful Northern Alligator Lizard in, as well as the gorgeous detail of its long body.

One of the greatest trends in wildlife and macro photography is so-called “wide angle macro”, or getting close to a subject with a wide lens in order to show both detail of the subject, and some of the surroundings for context. In addition, the exaggerated field of view places the subject right in your face in a way that standard macrophotography struggles with.

To achieve this with a DSLR, there are a number of lenses that can be used, including some very exotic optics such as the Venus 15 mm Macro (see Thomas Shahan’s video here for a good intro).

Well, here at Cheapskate Tuesday, we can’t afford that kinda thing (yet), so we have to make do. One way to acheive this type of look is both cheap and abundant: old compact cameras! I happen to have a fine Canon A720 IS that I bought some years back for 35 bucks at a pawnshop in Victoria. It focuses extremely close, and from my days shooting the S2IS and S5IS, I knew it could be hacked with CHDK in order to get RAW file capture for improved dynamic range and white balance editing.

IMG_7251

The A720 in all its glory. Truly a fine 8 MP compact!

IMG_7247

This CHDK menu shows some of the great tweaks that are available (in addition to RAW capture). The overrides of both ISO and aperture are very useful, and really work!

Well, working with a compact still has some disadvantages in terms of the maximal quality of the images captured, as well as the limited resolution available…The compact is versatile though, and is very light. One very cool feature of this model is that it has a global shutter and a very high flash sync speed, so flash-illuminated shots can still retain great detail in a bright sky.

The most important thing is that it focuses VERY close even at the widest zoom setting, allowing for the shots of the lizard you will see. There is a set of crazy tricks I used when shooting this image that I won’t detail here, but will cover in a future Cheapskate Tuesday post…Suffice it to say, if you desire the ability to make images like this on the cheap, and don’t mind a bit of tinkering, pick up a similar camera today, if you can find one at a good price….

IMG_2446

This shot shows great detail of the lizard’s head, as well as the rock outcrop and blooming camas in the background.

IMG_2455

Another shot of the lizard posed on a piece of broken wood. Again, note the detail visible both in the lizard as well as the background.

IMG_2465

Head on view!

IMG_2466

Probably one of my favorite shots from this session, just the face and feet are shown in detail, while both the Garry Oak and camas are visible in the background. So cool!

IMG_0191

BTW, this camera can also be used for shots like this one, showing Catherine seeming to be dwarfed by a dock spider…


Cheapskate Tuesday 28: Dollar store plant backdrop

112215IMG_0079

Catherine and I are living in Toronto, an expensive city to be sure, and our finances our feeling the strain. Nonetheless, money isn’t the only thing in short supply as the Ontario winter bears down on us! The insects around here are pretty serious about winter, and are getting extremely difficult to find! Also, though it has not happened yet, the cold of winter is going to make it very difficult to get out every weekend to turn up new creatures. So we come to studio photography! Having some captive arthropods, it is only natural to want to shoot them, but it gets a bit boring to have them either on white backdrops, or low key and black all the time. While we do have a nice south-facing window, and i can and have used it for a “blue sky” shot, it would be nice to have some foliage! In Vancouver, this meant going  out to a vacant lot across the street and clipping some salal, or blackberry or whatever (Vancouver is green!). Here, the lack of green herbaceous matter, especially downtown, is worrisome!

112215IMG_9905

This is Toronto right about now. Nice sentiment on the sign, but the snakes and insects are about as evident right now as the greenery!

Anyway, we do have a dollar store right downstairs, and low and behold, they sell some fake plants. I figured, why not set these up on the wall where I can use them much like a real plant when I am out shooting with the Monster Macro Rig?

20151123-112315IMG_0179

2 bucks a pop is not too pricy!

20151123-112315IMG_0180

A couple nails in the wall to hang them, and there they are.

20151123-112315IMG_0181

For some extra colour and depth, why not put some green paper behind? $1!

Results:

20151120-112015IMG_9720

OK, I am getting good exposures, but that green looks way off to me. It is way too bluish for my taste, and does not look natural.

20151120-112015IMG_9735

Even with significant adjustments in Photoshop, the green still bothers me. Better to get it right in camera, so back to the Dollar store to find some gels.

20151123-112315IMG_0131

For $1.50, I got a pack of “gels” to colour the output of my background light. These are just plastic report covers. I am only using the yellow one, but will keep the rest as well for funky hard lighting somewhere down the line.

20151123-112315IMG_0127

With a bit of velcro, gels are ready to attach to the flash.

112315IMG_0182

Man, that YN-460 is looking old! Not bad for 30 bucks though! It has been a trooper!

Results: Yellow-gelled background light

112215IMG_0077

OK! This looks way better to me. And this Rabidosa is looking FINE! Orange spider goggles seem to be in this year.

112215IMG_0088

Here if it looks any cooler, it is because I brought it down in post, but still pretty credible rendition of what lit, out of focus vegetation might look like.

20151122-112215IMG_0027

This Kukulcania male on moss is about how I would expect it to look against some actual plants outdoors.

20151122-112215IMG_0043

If I pull out far enough, I have to open up a bit. This dock spider shot shows how the “vegetation” looks when a bit more in focus. Still good colour though!

20151122-112215IMG_0052

Getting in close shows that the background can still be soft with a big subject. Depth of field is a complicated business!

20151123-112315IMG_0140

This debris-covered assassin nymph might prefer to be in the guck of a spiders crevice, but the fake plants in the background have the look of the outdoors.

So there you have it! One way to achieve out of focus vegetation indoors in the studio! Another way to do this might be to print large photos of out of focus plants as backdrop, but I worry about how to light that consistently without getting big glaring reflections from my background light’s head. 

This setup is cheap, portable, and nice to have in my bag of tricks. One wonderful thing is that I will never have to worry about that one white stick or grass blade in the background that mucks up a shot before I even realize it. This way, there are no visual intrusions! It is good to know that I have some “outdoor” shooting ability as the icy winter looms!

112215IMG_9912


Cheapskate Tuesday 27: the Yongnuo 35 mm F2

IMG_0236

So my soujourn in Guyana was not entirely without casualties. Although I avoided getting eaten by the jaguar, my Canon 50 mm 1.8 II died. I have no idea what happened, but the whole front assembly became detached from the rest of the lens. Everything still works, aperture, focus motor, but I cannot figure out how to snap it back together.

IMG_0230

The carnage: maybe the jaguar attacked it!

Anyway, I needed a new fast prime, and it just so happened that when  got back from the jungle, the YN 35 mm f2 was announced. It was retailing for 110 bucks, the same for the 50, and since i have a crop-frame camera, a 35 sounded like a nice focal length for a fast lens. After all, the legacy of the fast 50 mm prime is a holdover from film days, where it would be a “normal” lens on a 35 mm frame. With my 1.6X crop frame Canon, 35 mm is just about a normal focal length, so what I am really getting is not a wide lens, but a fast normal lens. I ordered one!

The waiting for shipment took way longer than expected, as it was on the slow boat from China, but when it arrived last week, I immediately tried it out. The first few images I took with it were OK, but not stellar. Then I remembered to take the protective plastic off the rear element!!!

OK, this lens is pretty cool, it is nice, fast focusing and decently well built (seems on par with the el cheapo Canon 50 anyhow, and is quite reminiscent). It does have a metal mount, and the autofocus switch feels way nicer than that of the Canon. So far so good. What about the images?

I intend to use this for a number of things I used to use my 50 for: documenting social events, fieldwork, and sometime putting it on tubes for macro. Here are my results so far:

Social documentation

IMG_9603

Nice and sharp details, and the real advantage of this lens for me is that I do not have to run backwards to frame up a shot. It sees what I see!

IMG_9633

I like the way colours are rendered (although a better body would help with the greens!)

IMG_9597

The lens is decently fast in focus response, and hence feels fun to use.

IMG_9612

The lens is not so wide as to significantly distort faces in close-up shots.

IMG_9661

Most importantly, it captures the expressions of huskies well, especially that moment they discover there is a bag of chicken skewers nearby.

IMG_9726

Because the lens is bright, getting focus right in the dark is way easier than using a slow zoom.

Field Documentation

IMG_0189

Again, I like the focal length. If I want a snapshot of a GPS and a pitfall trap, it works great.

IMG_8820

For documentation of habitat, it is wide enough to show the scene.

IMG_9080

It can even work for a bit wider view of larger insect phenomena!

Macro

IMG_0032

It does focus pretty close for a wide lens, but the magnification sort of sucks for macro.

IMG_0044

With a Raynox DCR 250, it can be used for closeups, even in natural light. It gets to about 1:2. With 31 mm of extension tubes, it gets a bit better than 1:1. With more extension, the working distance gets pretty darn short. i will experiment with this kind of thing, but for anything approaching 2:1, I would be better off with the 100 mm as a starting point.

IMG_0247

“Native” magnification. Not too impressive.

IMG_0243

With 31 mm of tubes. A usable macro setup, though subject distance is small.

IMG_0096

The seven bladed aperture definitely renders out of focus highlights better than the Canon 50 mm 1.8 II.


Verdict

Well, this is certainly a usable and enjoyable replacement for my 50 1.8. In fact, with its focal length, it will likely be way more useful to me. I am impressed with the decently close focus, the fact that it is fast and light, and that it fits my budget! One thing to keep in mind about this versus the Canon 50 is that the front element is much less recessed, and hence ghosts and flare may be more common. I did not notice anything other than small blue ghosts when the sun was right in the frame.
I would say if you can afford to, one of the Canon versions of this lens would undoubtedly hold value way better, and perhaps offer an edge in build quality or some aspect of performance. But this is definitely a usable lens, and is quite sharp even wide open (I will post some samples soon!). I will certainly be making a lot more use of this lens than my 50 got, as this is a more valuable focal length for documentation and snapshooting. Look forward to seeing more from this lens in the future!


Cheapskate Tuesday 25: Einige Kleine NachtSpinnen

IMG_7625

A few weeks ago, I suggested a Rat Safari, as a budget-minded wildlife photo expedition that is easy to do in most cities. Today, I bring you a budget spider safari, which Catherine and I conducted in the tiny  park across the street. For this to work, I needed some constant illumination in the subject area, so I simply taped my Fenix E-05 flashlight to the lens hood of my 100 mm, which illuminated the spiders for easy focusing. The lighting for the shots was simply accomplished with a single diffused speedlight on the Monster Macro Rig. I hope you enjoy the photos, and are inspired to go find some little night spiders yourself!

IMG_0139

IMG_7618

Realm of the Amaurobiids: These Hacklemesh Weavers are the most abundant of the spiders we found. Their disordered web flanking their retreat is laid as a trap for unwary passing insects.

IMG_7623

Some webs are more sparse than others!

IMG_7660

Here is a freshly-moulted Amaurobiid.

IMG_7646

We guess that this is a male Steatoda hespera (Therediidae).

IMG_7665

These small orb weavers (Araneidae) were out in small numbers.

IMG_7678

A nice big sac spider (Clubionidae)! This is a female.

IMG_7686

Could this male sac spider be the same species as the previous? It is difficult to tell. There are hundreds of species of Clubionidae in Canada.

IMG_7697

Here a male Amaurobiid tackles an introduced Drumming Katydid (Meconema thalassinum)

IMG_7713

IMG_7726

Cheapskate Tuesday precluded due to owls!

IMG_6534

Sorry, no Cheapskate Tuesday today, as I just got back from another Barn Owl trapping adventure. I need to get to sleep!

IMG_6584

Perching on the truck to investigate before capture, this big girl left a souvenir for us.

IMG_6533

Owl banded, “transmittered”, and ready for release.

IMG_6535

An hour and half after release, we tracked her to a property about 1.5 km away.


Cheapskate Tuesday 24: On white, in situ

IMG_4179

A few weeks ago, I delved into what a white card could do paired with two flashes. I found it was a bit tricky to use it to add fill except in a few situations, but the way that it could be used to blow out a background was intriguing, so I wondered if it was practical to use for “Meet Your Neighbours” style lighting in the field. The difference between MYN style and mine is that the MYN people are really good…But enough of that, the other difference is that the MYN style often involves larger setups and “field studio” type conditions, using tripods and lightstands and the lot. With bounced flash from a white card, I can blow out the background, so what is to stop me from just holding it behind the subject and using the Monster Macro Rig to light both the subject and the background? I gave it a try, and here are my results and some thoughts.

IMG_3985

For relatively slow moving insects on stable backgrounds, this is a great technique. The only issues are to get an angle that allows a blown background, and to balance the light hitting the subject and the flash. I was working at f13, with 1/8 power on a YN560 for the subject, and 1/8 to 1/4 with a YN460 (a smaller light) for the background. ISO around 160-250.

IMG_4128-2

For subjects on more mobile backgrounds, it is better to have no wind! The more flighty subjects may tolerate a close approach with the macro rig, but putting the card behind is a whole other level of disturbance to manage! I found that flies and bees and such were tough to approach.

IMG_4150

This Grass Veneer was flighty and was also on some ridiculously mobile grass, so this is the only shot I got. Luckily it was mostly in focus. Again, working in calm conditions would be best.

IMG_3993

Getting the subject isolated in natural (unselected) vegetation is difficult, especially when they are timid. This shot could be better isolated.

IMG_4117-2

A tiny subject on a larger leaf is a tough one to compose. Wherever you cut the leaf, it will look odd. It may have been better with this lace bug to cut it in the corner…That being said, this technique can make for some nice textural contrasts with a subject such as this.

IMG_4002-2

Small fine features coming out into the white background can be easily swamped, so it is important to keep fine features parallel to the plane of the rest of the subject…This would be great, but the way the antennae fade is not so nice.

IMG_4026

The nicest thing about this approach is that the subject is actually in the position and situation it was found in, so the setting is appropriate and not contrived. A field studio approach may not achieve this.

So that’s it for this week’s Cheapskate Tuesday!  I think that it is something I will continue to work on, as it seems to have promise. Keep watching this blog for more results using this technique, preferably of lovelier subjects on calmer days!

Cheapskate Tuesday 23: Rat Safari!

More Rats!_5959739615_l

They say that if you want to take better pictures, you need to stand in front of more interesting stuff. This certainly has some truth to it, and is one of the reasons why investment in a photo expedition can be so much more useful than allocating tons of money on new cameras and lenses. But a trip to an exotic far-flung locale does not really fit in with the Cheapskate Tuesday philosophy, so how about a photo safari closer to home?

Shooting Norway Rats (Rattus norvegicus) provides an opportunity to shoot an interesting, seldom-photographed subject in the heart of a city. Because they are nocturnal, they pose some unique challenges, namely lighting them properly! For these shots, I used 2 radio-controlled manual speedlights,which were set up to light a small area baited with common dog food. One could also use TTL triggers, such as the new YongNuo 622‘s and set the metering to spot to meter the subject, but I did not have these available. Instead, after guesstimating lighting ratios, I just played with the ISO and f-stop to get decent exposures.

Starting shortly after nightfall on a summer night in July, I chose an area with lots of foot traffic adjacent to a rail line. This ensured that the rats were used to human proximity and conditioned to search for littered food. An alleyway near some dumpsters would also work well. I shot these using a 70-300 zoom, and of course the faster the lens, the easier focusing will be, but choosing an area with some artificial light helps.

Because rats are neophobic (afraid of new things in their environment), I was worried that the speedlights would scare them off, but these rats that are habituated to a rapidly-changing litter landscape did not pay too much heed to some more crap lying around.

More Rats!_5959724887_l

Depending on the season (I recommend early summer), the majority of rats you will encounter will be young, as rats are short-lived highly fecund creatures, meaning that the cohort of young individuals will greatly exceed the number of large, reproductively mature animals. These younger rats often have bright eyes and nice fur, which makes them rather cute.

More Rats!_5960278204_l

Urban litter is often in the frames, adding some context to the shots.

More Rats!_5960291608_l

Many of the rats I encountered had scars such as missing eyes, which indicates crowding in shelter areas and conspecific aggression.

Rats at Commercial Drive_6095205769_l

The elegant form of the rat at a gallop is one of the most astounding sights in the natural world.

Rats at Commercial Drive_5956413839_l Rats at Commercial Drive_5956981674_l

There is much more I would like to do with rats, such as triggering a camera with a wide angle remotely, and providing more natural foods, like pizza. Just imagine, a rat in front of a graffiti covered wall, dragging a massive slice of pizza! This is my art, this is my dream.

Anyway, I urge anyone to go try a rat safari, and wonder at the most urban of urban wildlife.

Cheapskate Tuesday 21: Sitting on black

IMG_1033

Seeing as how last week’s Sitting on White was fun to do, and inspired by this great post by Alex Wild, I decided to shoot some jumpers sitting on black.

To do this, I simply spray painted a sheet of window glass black, and used the unsprayed side as a stage. The lighting was much more simple than Alex’s, just  single diffused speedlight overhead. All shots required a good deal of “healing” to remove dust, but in general they came out OK. The better method would be to get a thick piece of glass as Alex described, but I do not have any such on hand, and if I had tried this with the glass suspended, i would get ugly double reflections. Anyway, I hope you enjoy the pics, and get inspired to try it yourself!

IMG_0847

IMG_0879

I think this guy could see his reflection!

IMG_0877 IMG_1013-2 IMG_1056

IMG_1019

IMG_1057

IMG_9524

By the way, when I tried to bring in a snooted rim-light, this is what happened. Messy, but kind of cool!

IMG_0862