*NOTE! The instructions here are great for cutting out a pattern to fit your flash, but check out the Cheapskate Diffuser MKIII instructions for a better method of general construction
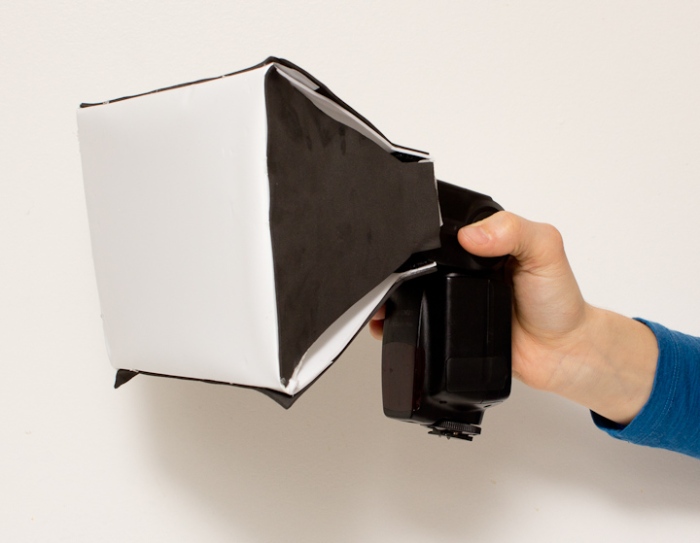
Adrian Thysse has just announced a macro tools workshop for you Albertans, and Alex Wild has just put up a post about diffusing an MT-24 EX, so the time is ripe for macro flash diffusion discussion. This week’s Cheapskate Tuesday is an overhaul of the Cheapskate Flash Diffuser, essentially transforming it into a small softbox. This update uses the same plastic diffuser material as well as craft “foamie” material. A glue gun or other adhesive option is also required.
The two chief advantages to this updated device are: 1. the diffusion material stands off several more centimeters from the flash head, so the illumination of the diffuser is more even. 2. The new device is stiff and solid when mounted to your speedlight, so it won’t flop around. The disadvantages are the more complex build, larger folded size, and increased weight (48 vs. 12 g). Another disadvantage is that this is no longer universal, but must be made to fit the dimensions of a particular speedlight. Here I have illustrated a build that would work for a YongNuo 560, 565 or a Canon 580. The generalized schematics to adapt the design to any speedlight are found below. If possible, I will have some shots from the field taken with this soon.
Please follow along below for the essentials on how to construct the Cheapskate Diffuser Mark II. Just like an update to a Canon lens, this Mark II will run you three times the price. So budget around 3 dollars. Because being a PhD student wrecks my brain and hands, I had to rely on my local Master’s Student Catherine Scott to help me out with all the tough geometry, hand modelling and cutting! Pythagoras also helped immensely.

This “foamie” craft material is the basis for the modification. You will need two black sheets and two white sheets.

Using the same plastic diffusion material as in the Mk I, mark off 4 cm from each side.

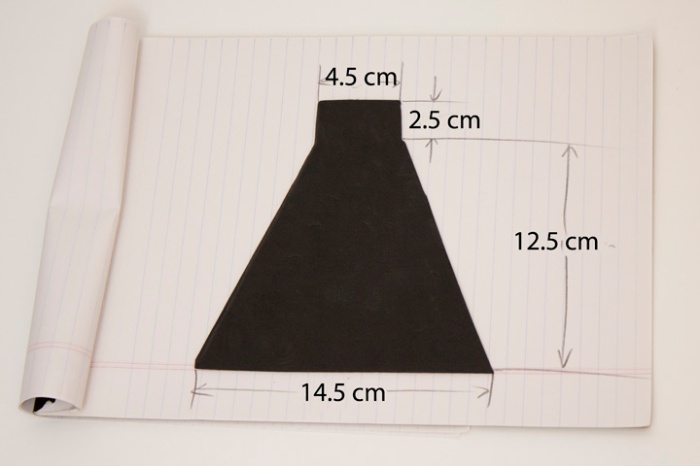
For the wide sides, cut out the pictured shapes in both the white and black foamie material.
Same with the narrow sides. Make two in black and two in white.
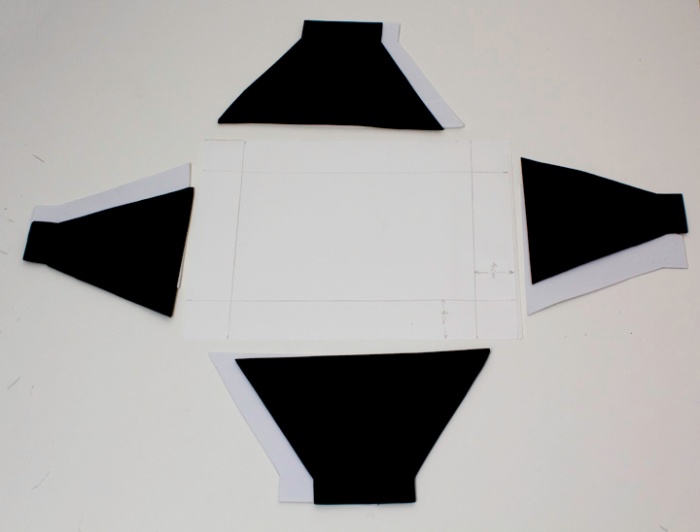
8 foamie pieces of four kinds and a marked plastic sheet.
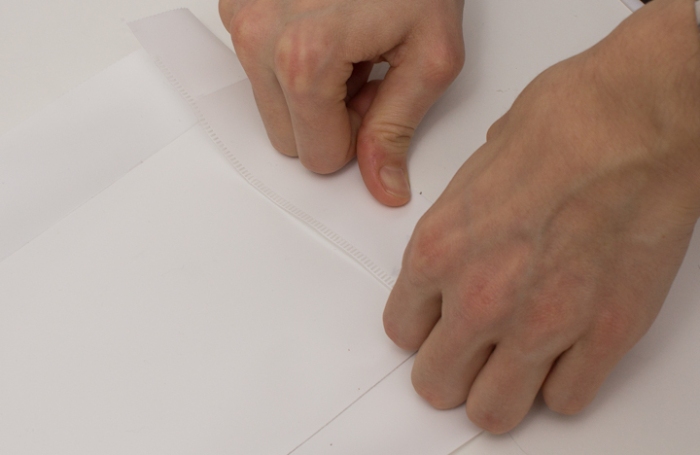
make creases along the lines previously drawn
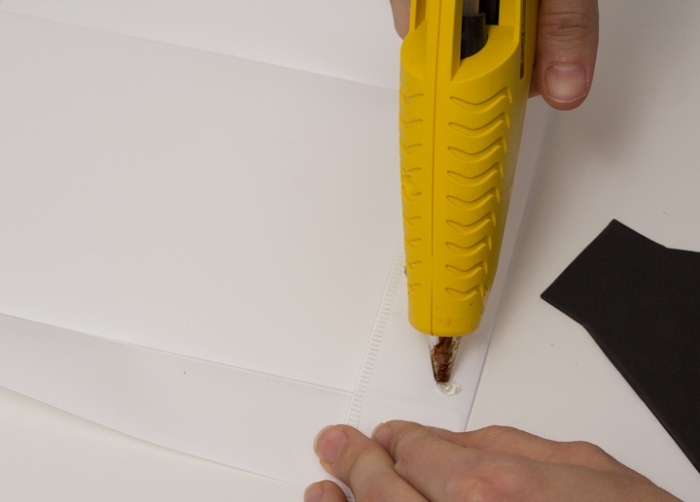
lay down a bead of hot glue along the creased 4 cm
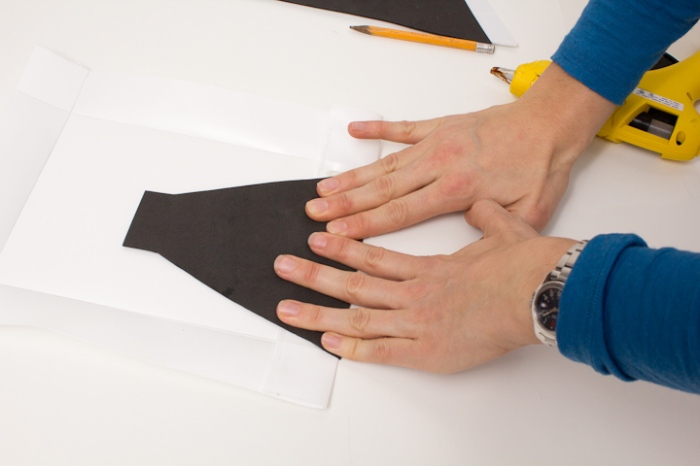
glue down the black pieces on the corresponding sides. Black goes on the “outside”. Then glue the white pieces on the inside, sandwiching the plastic in between.
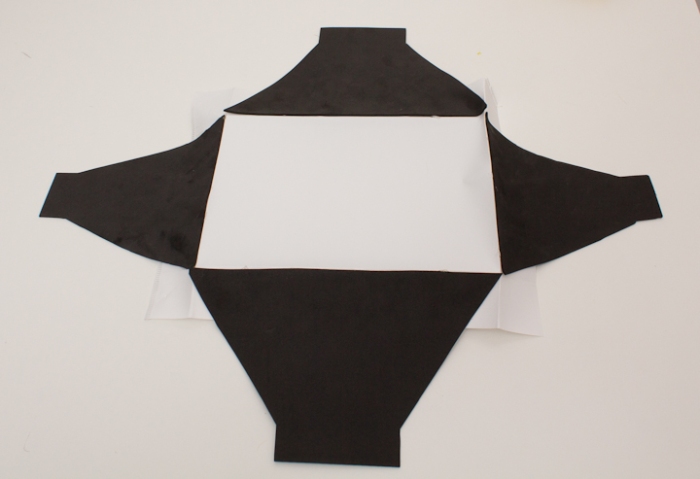
ready for cutting out
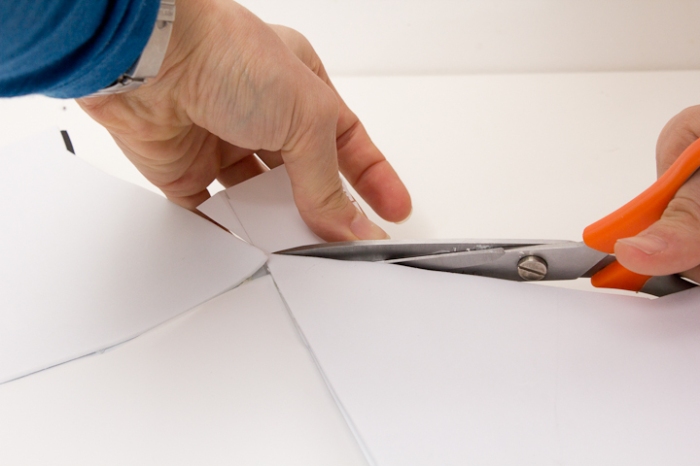
cut out the corners

cut out velcro to size

ready to rock
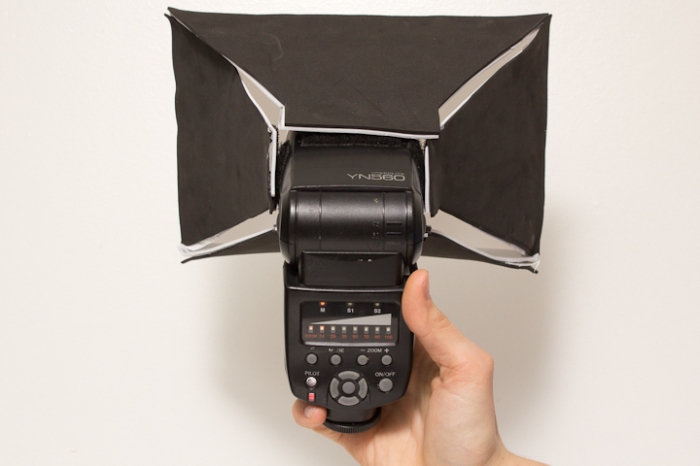
mounted to the YN 560.
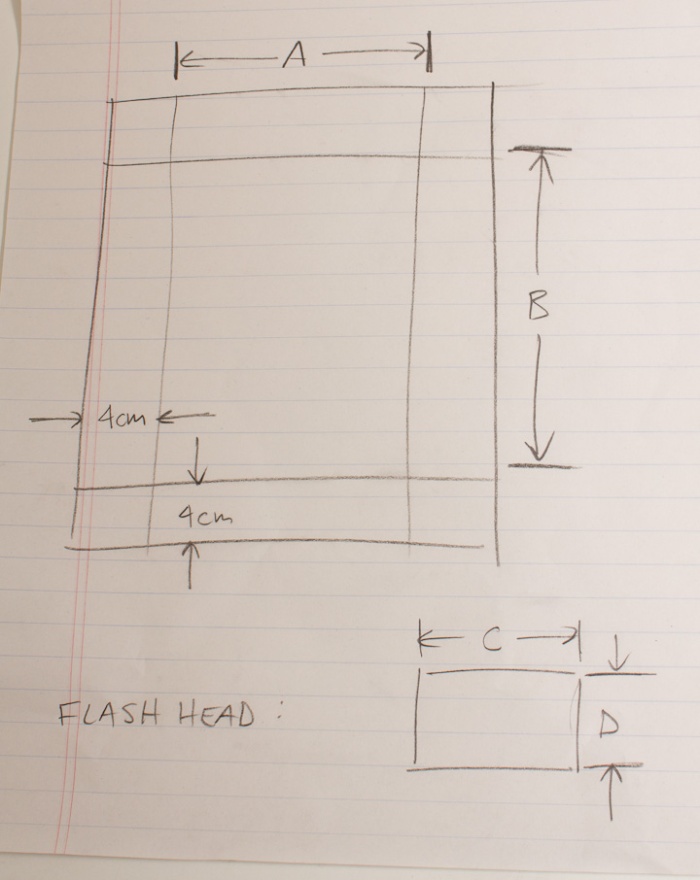
these schematics are for designing custom diffusers for differently sized diffusion material or a different speedlight. Here is how to measure a flash head and mark off the diffuser material.
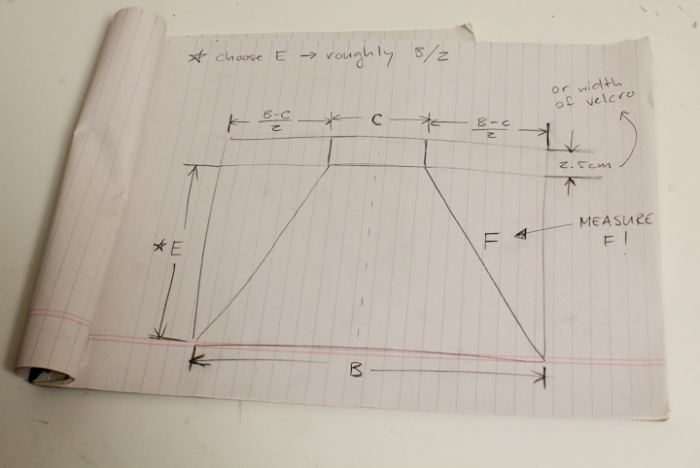
schematic for the larger pieces. Note that B and C are the dimensions from the previous diagram, and that F must be measured.
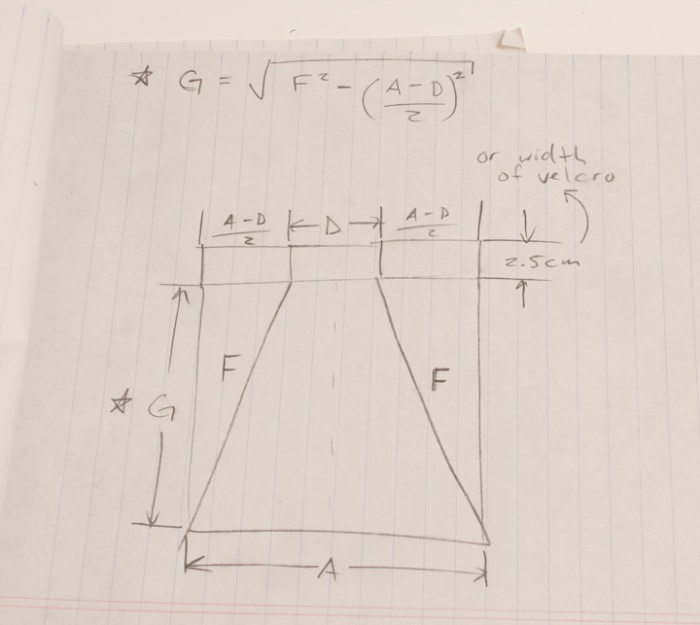
schematic for the smaller pieces. First calculate G, and make sure F is the same as measured in the previous diagram.
UPDATE!!!!!!!!!!!!!!!!!!!!!!!!!!
found a Camponotus alate in the hallway at school today, so I had an opportunity to test out the CFDMkII


Pingback: Cheapskate Tuesday 9: Black Foam flag/snoot | Ibycter
Pingback: Mystic Beach | Ibycter
Pingback: Cheapskate Tuesday 10: the Monster Macro Rig | Ibycter
Pingback: Cheapskate Tuesday 19: Speedlight(s) and a bounce card | Ibycter
Pingback: Cheapskate Tuesday 20: Sitting on white | Ibycter